Saturday, September 22, 2018

Meaningful Words Gift Ideas

Hi everybody! Kim here from My Kraft Kloset sharing a wonderful way to capture meaningful words that describe somebody special using these amazing antique silver pieces from Craft Fantastic.  With the holidays sneaking up on us, you maybe starting to think about special gifts you can make and these are very affordable. So, follow along as I show you a unique way to send a special message or express your feelings and capture them forever.


Let's get started...

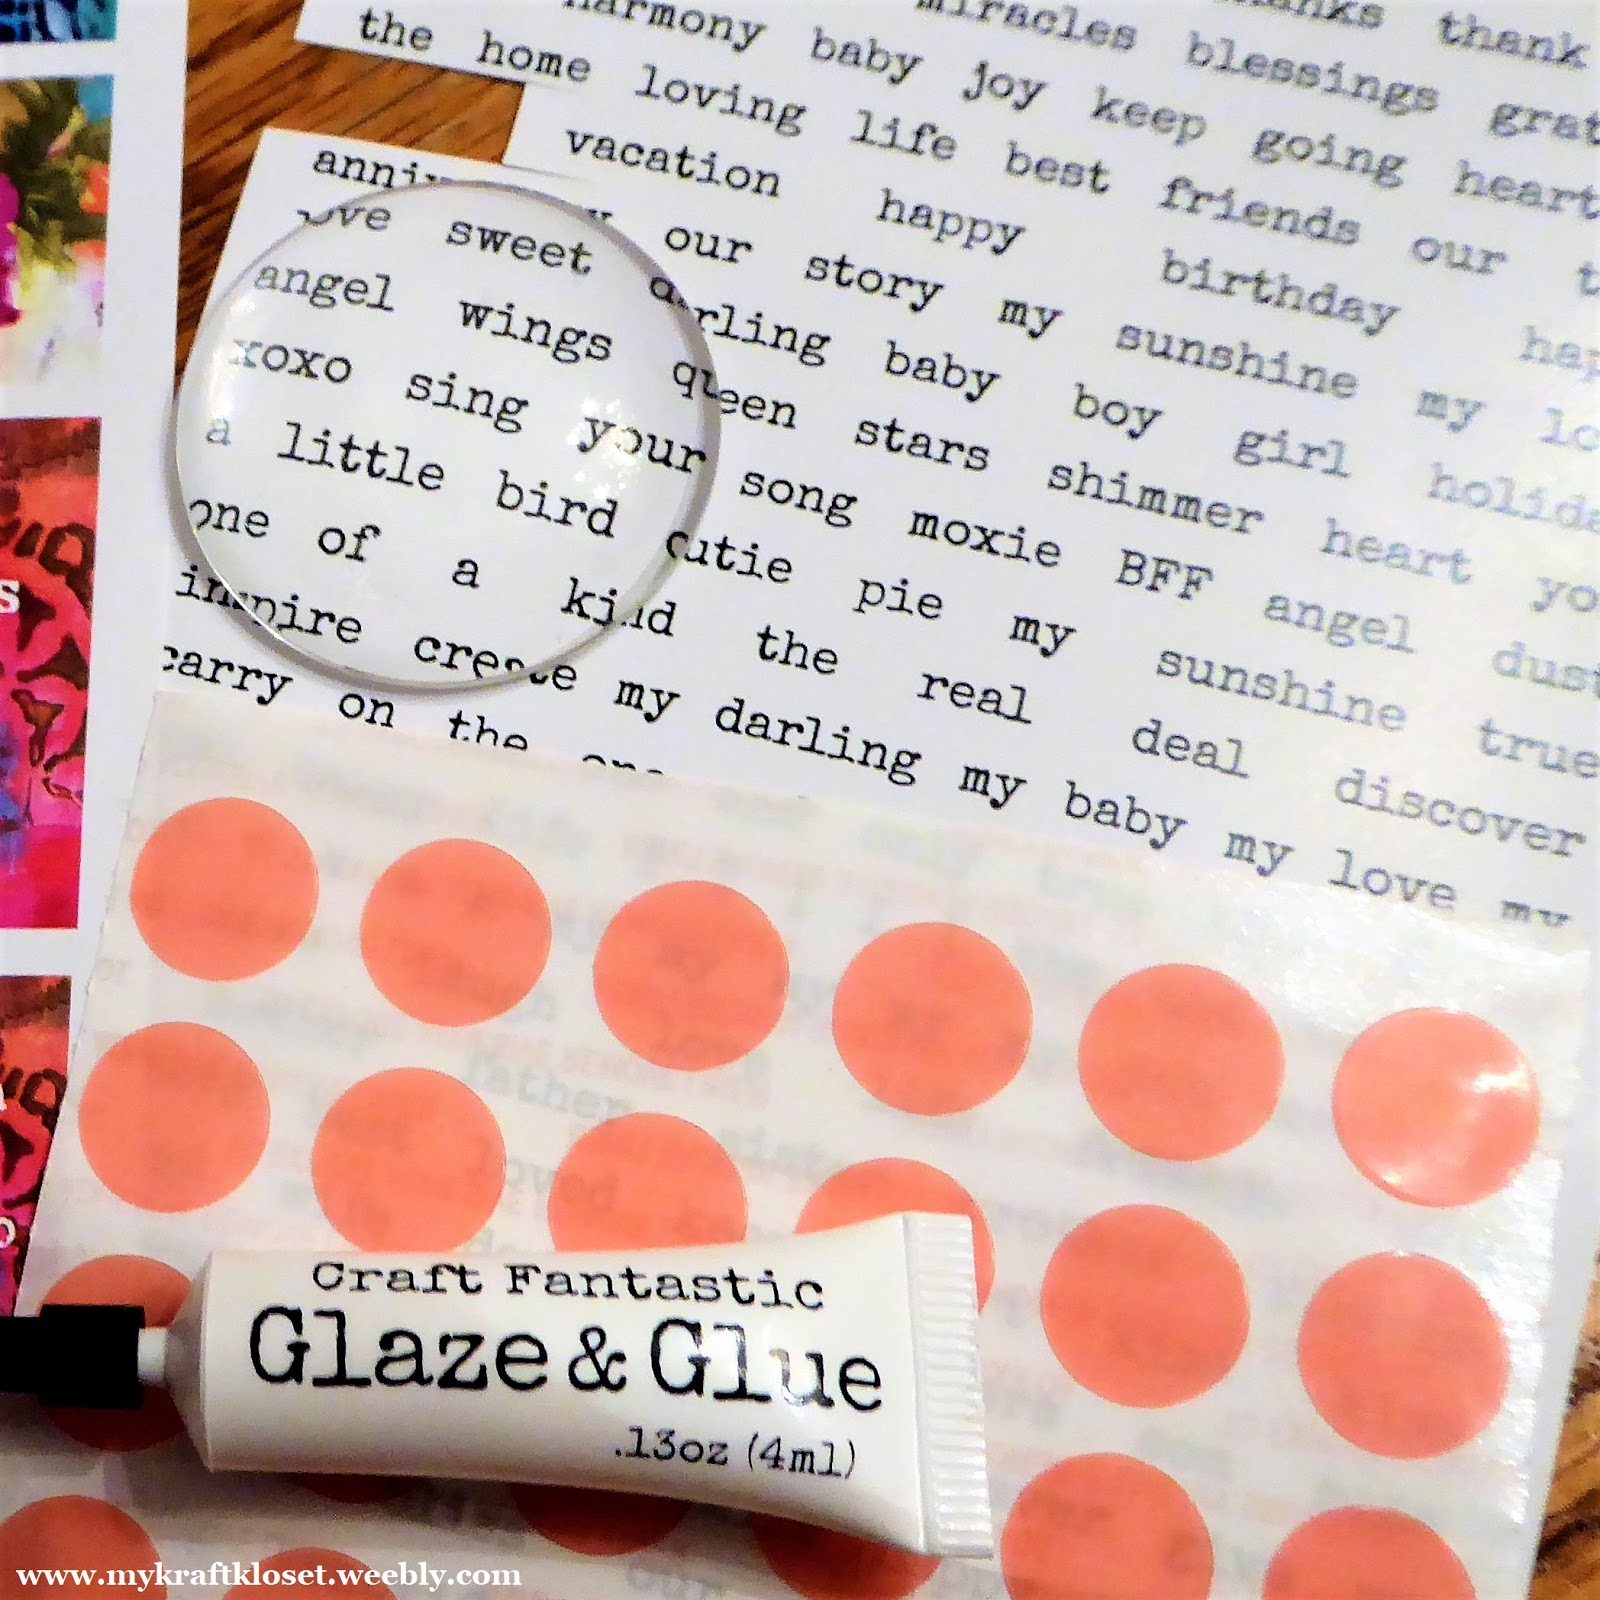
1. Choosing from hundreds of Craft Fantastic images is always the hardest part. And usually you see my collage projects where I cut out 1-2 words, but for this project I chose to use a section of words already on the word collage sheet.


I made this necklace for my Aunt and these words were all very personal to me and very descriptive of her. But don't fret if it doesn't easily work out that way, you can certainly cut the words apart, group together, and glue onto another sheet and make a collage of something similar. 


2. I added a few drops of iridescent glitter glue to give it some sparkle. Allow time to dry so the glitter doesn't stick to your glass and obstruct your view of the words. Can you see the sparkles?


3. Once dry, add several drops of Glaze & Glue onto an XL Glass Round and place over the word image, and press gently for a few minutes until set. Wipe off any excess glue around the edges with a Q-tip. Allow a few minutes to dry.


4. Once dry, cut around the glass and cut out the word image. Next I chose a stunning XL antique silver tray to give it a classy timeless look.

I was going to add this small square image tray to this project too, which is why it's pictured here, but I changed my mind. Better to make too many choices than not enough. And I'll use it for another gift.


5. Adhere several Fantastic Super Sticky Dots to the tray, because you'll want to use more dots on the larger trays. Remove red sticky dot backings and place the glass word image in the tray. And press gently to set.


6. Repeat steps 3-5 above to create the letter "g" in this project, which reminds me of an old vintage typewriter text. Cool, right? Once dry, place glass letter image in this small, but very classy looking tray. And press gently to set.

7. Attach the silver angel wing charm with a small jump ring and pliers. And add all three pieces to a beautiful silver chain to complete.

These angel wings are one of my favorite charms. Aren't they beautiful? You've probably seen me use them on several of my projects. I just can't help it, they remind me of guardian angels watching over that special person. I just love them!

Voila! There you have an incredibly meaningful gift idea for that somebody special on your holiday gift giving list. I hope I've inspired you to use your words and spread kindness this Holiday Season and all year long!


Be sure to check out our *NEW* Designer Kits-of-the Month and get started early on a few custom gifts for all your upcoming special occasions. The possibilities are truly endless with these amazing Craft Fantastic products that help you personalize any project! Leave us a comment and tell us what you think or what your making and share with us.
Thanks for stopping by!

Wednesday, September 19, 2018

ON THE ROAD WITH CRAFT FANTASTIC

I had the wonderful opportunity to work at the Craft Fantastic booth at the STAMP SCRAP ART SHOW (SSAT) this past August in Hamburg New York (just outside of Buffalo).  That is not me pictured below at the demo table that is my 18 year old daughter who did a fine job demonstrating as well!  It was a two day show and each day a different project was offered as a free make and take.  I was so happy to share all the different techniques and ideas that you can do with all the CRAFT FANTASTIC products.


Here are some photos I took of all the different samples that can be found at the CRAFT FANTASTIC booth at any given show/convention.


Pictured below is a fabulous necklace and earrings made with seed beads.  This was definitely one of the most asked about project at the show.


The amount of product offered at the booth was great and if there was anything you wanted to special order the shipping is free if done at the show booth.

Here is a list of  all the upcoming shows that CRAFT FANTASTIC will be participating in:

Shows/Workshops


VISIT US AT ONE OF THESE FABULOUS SHOWS IN 2018!
Nov 2 & 3
SCRAPBOOK EXPO ONTARIO, CANADA
Each day there was a specific show special that could be purchased at a discount.  A great way to get started with a multitude of projects!!
I had such a wonderful time working alongside Gloria who runs these road shows.  I hope you get to make it to one of these shows.  
Liz from Junque Drawer Designs


Saturday, September 15, 2018

Nothing Says Fall Like A Sunflower Charm Bracelet!

Hi Everyone! I hope you have all had a wonderful summer and are ready to get crafting! Today I am bringing you a fun and easy project using Craft Fantastic Round Charm Bracelet Kit in Silver. This kit actually has almost everything you will need for this project. The only other items will be your images and for this project I am using Sunflowers Image Sheet and jewelers super sticky dot and glaze and glue.
Ok so to begin with I did shorten the length of the charm bracelet itself. That is one of the great things about this kit. The bracelet itself can accommodate a lot of wrist sizes. Now with the bracelet shortened, I attached my jump rings fairly evenly over the length of the bracelet and attached the trays. Now you may be wondering why I attached the trays first before I attached the glass to the trays. Easy! For me personally I have a tendency to put things on upside down.
Ok next I put on the super sticky dots on the trays.

Next I took my Sunflowers Image Sheet and used Glaze and Glue to attach the jewelers glass onto the images I decided to use. Apply your glaze and glue to the jewelers glass as normal, hold the glass until it grips the paper and is dry.
Trim and using the super sticky dots already on the trays, adhere the glass onto the charm trays.
Pretty huh?
I would love to know what you think of this fun fall charm bracelet!
Hugs,

Judy

Thursday, September 13, 2018

Mixed Media Necklace

Hello everyone!!! Kymona here from Kreative Kymona, and I missed all of you. It's been awhile. I'm here to show you my new mixed media necklace.

Over the summer break, I decided to organized my craft space, which means that some things have to go. I was able to get rid of 2 big boxes of goodies. They all found a new home. A couple of days ago, I found a couple of my mixed media notebook. I didn't know what to do with them. Then a light bulb went off - create a necklace out of my art work!! Brilliant!

Let's take a look:


I love how my artwork looks behind this glass. So pretty and I can carry it wherever I go. 

Before you throw your artwork away, consider using it to create super cute jewelry.

What do you think?  

Will you use create a necklace out of your artwork? Let me know.

Where to find us:

Just in case you didn't know you can find Craft Fantastic on all of the social media platforms:


Follow so that you don't miss out on any of the creative ideas, deals and new goodies that appear in the store.

Thank you so much for stopping by!!


Friday, September 7, 2018

THIS ONE IS FOR THE BIRDS


Hi everyone this is Liz from Junquedrawerdesigns. Hope everyone had a great summer vacation!
I recently picked up the Birdcage brooch from Craft Fantastic a couple weekends ago at the Stamp and Scrap show in Hamburg NY.  I have always seen them on the website but seeing the brooch in person really made me want to make a couple.  They are just stunning.


The Birdcage Brooch comes in Antique silver (as shown).  I used images from the Vintage Birds mini and small Image Sheet.  Once I chose my images I applied the Craft Fantastic Glaze and Glue to the Small Square Jeweler's Glass and put the glass on the image. When dry I then used a Super Sticky Dot to adhere the glass square to the brooch.


I really love this Brooch.  It is such a quick and easy project and makes for a beautiful piece of jewelry.  A fabulous gift idea!!!!


Thursday, September 6, 2018

Magnetic Chore Signs

Hi everybody! Kim here from My Kraft Kloset and it’s back to school time around my house. Which means new schedules and back to chores. And recently nobody could remember if the dishes in the dishwasher were clean or dirty, so we had to wash them again. I immediately realized, we needed a sign system and that's what I'm sharing with you today using these amazing Craft Fantastic alphabet images in your kitchen. Yes, I said kitchen.


Let's get started...for today’s project I’m going to show you how to make clean and dirty magnetic signs to place on your dishwasher. But you can turn any of these images into a magnet.  

1.  Using a 1” square punch tool, punch out the letters from the alphabet image sheets or you can use scissors. Here I used black TYPEWRITER KEYS mini & small glass sizes and ALPHABET #1 mini & small glass sizes for the two different words. 


2.  From a craft store, get a magnetic sheet. Or do what I did, and reuse old flat magnets or free ones that come on the new phone books and just cover them up with these alphabet letters. Yep, they still deliver those. (lol) 


3.  Add a Fantastic Super Sticky Dot on the back of each letter and place them in a row along the edge of the magnetic sheet to spell out your word. 

4.  Cut the whole word out from the magnetic sheet with scissors.

5.  Then place a clear piece of packing tape over the whole word to seal it from wear and tear and water. Keeping the tape just on the front. Trim the clear tape to fit the new magnet. Repeat steps for second word. (or you can seal it with any clear sealer or spray from the craft store.) I just used what I had on hand. 


For this tutorial only,  I put both signs on the dishwasher to show you the final results. But when it’s time for chores, we only use one sign on the dishwasher and put the other sign on the refrigerator, as to not confuse anybody, anymore. And now there is no more guessing if the dishes are "clean" or "dirty" and it’s working out perfectly. Voila! Craft Fantastic products to the rescue.

I hope I’ve inspired you to use your crafts in and around your home and to think outside the box about other things you can label too! Let me know what you think, we love comments and new ideas. And be sure to check out our *NEW* Designer Kits-of-the Month and get started on some amazing projects of your own. The possibilities are endless with Craft Fantastic!
Thanks for stopping by! 

Kim Klinkovsky @mykraftkloset

Wednesday, September 5, 2018

SEPTEMBER 2018 DESIGNER KIT - Fall Nature Bracelet

Thank you for purchasing one of our EXCLUSIVE Designer Kits! 
We hope you enjoy wearing this one-of-a-kind piece of jewelry!

Here's a few links to help you complete the
followed by assembly instructions to finish your piece:


  1. Select images and add them to the glass cabochons using Fantastic Glaze & Glue. 
  2. Attach the Small Round Charm Trays and the charms to the Charm Bracelet using small jump rings. 
  3. Add a Fantastic Sticky Dot to each tray. Remove the red backing to expose the adhesive. 
  4. Firmly press the appropriate cabochon into each tray. 
We hope you have fun putting together the Exclusive Fall Nature Bracelet Designer Kit! Be sure to follow Craft Fantastic on FACEBOOK and INSTAGRAM! Also, sign up for the CRAFT FANTASTIC NEWSLETTER for the latest and greatest sales, giveaways and product peeks! 

SEPTEMBER 2018 DESIGNER KIT - Skull Flower Necklace

Thank you for purchasing one of our EXCLUSIVE Designer Kits! 
We hope you enjoy wearing this one-of-a-kind piece of jewelry!

Here's a few links to help you complete the
followed by assembly instructions to finish your piece:


  1. Select images and add them to the glass cabochons using Fantastic Glaze & Glue.
  2. Using pliers, remove the lobster clasp and jump rings from the ends of the 30" Rolo Chain.
  3. Using pliers, attach the Toggle bar to each end of the Rolo Chain with Small Jump Rings. Be sure the loop is pointed down.
  4. Using pliers bend back the loop on the very top and bottom of the Tiny Round Modular Tray.
  5. Attach the Classic Small Round Link Tray to the Tiny Round Modular Tray using a Small Jump Ring.
  6. Attach the Skull Flower Charm to the Classic Small Round Link Tray using a Small Jump Ring.
  7. Add a Fantastic Super Sticky Dot to each tray and remove the red backing to expose the adhesive. Cut one of the dots into quarters and place one of the quarters into the Tiny Round Modular Tray.
  8. Firmly press each glass piece into the corresponding tray.
We hope you have fun putting together the Exclusive Skull Flower Necklace Designer Kit! Be sure to follow Craft Fantastic on FACEBOOK and INSTAGRAM! Also, sign up for the CRAFT FANTASTIC NEWSLETTER for the latest and greatest sales, giveaways and product peeks!