Thursday, November 29, 2018

Holiday Bracelet Gift Idea

Hi everybody! Kim here from My Kraft Kloset and the season of giving has begun. I grabbed a few affordable jewelry kits and I'm making customized holiday gifts using these amazing Craft Fantastic products. I love how you can monogram, add a name, pick out special charms, or use beautiful images to personalize each handmade gift. Follow along and I'll show you just how easy it really is.


Let's get started...


I had a couple of monthly kits on hand and chose this Twist Bracelet Kit in antique brass, because I like the vintage look and you get a lot of pieces to get you started. It is beautiful as is, but I took it a few steps further to personalize it with some special pieces to make it unique for my mom. All supplies listed below.


Next choose your images. That's the hardest part, because they are all so beautifully designed.  I love these holiday image sheets with the poinsettias and sheet music, an angel, and the children seemed fitting for my mom.

The bracelet kit comes with 5 glass pieces and 5 trays. Take a small glass round, add a few drops of Glaze & Glue and place over the image. Press gently and hold for a couple minutes until set. Wipe away any excess glue around the edges with a q-tip. Allow to dry for a few minutes and cut out. Repeat for all 5 round holiday images. 


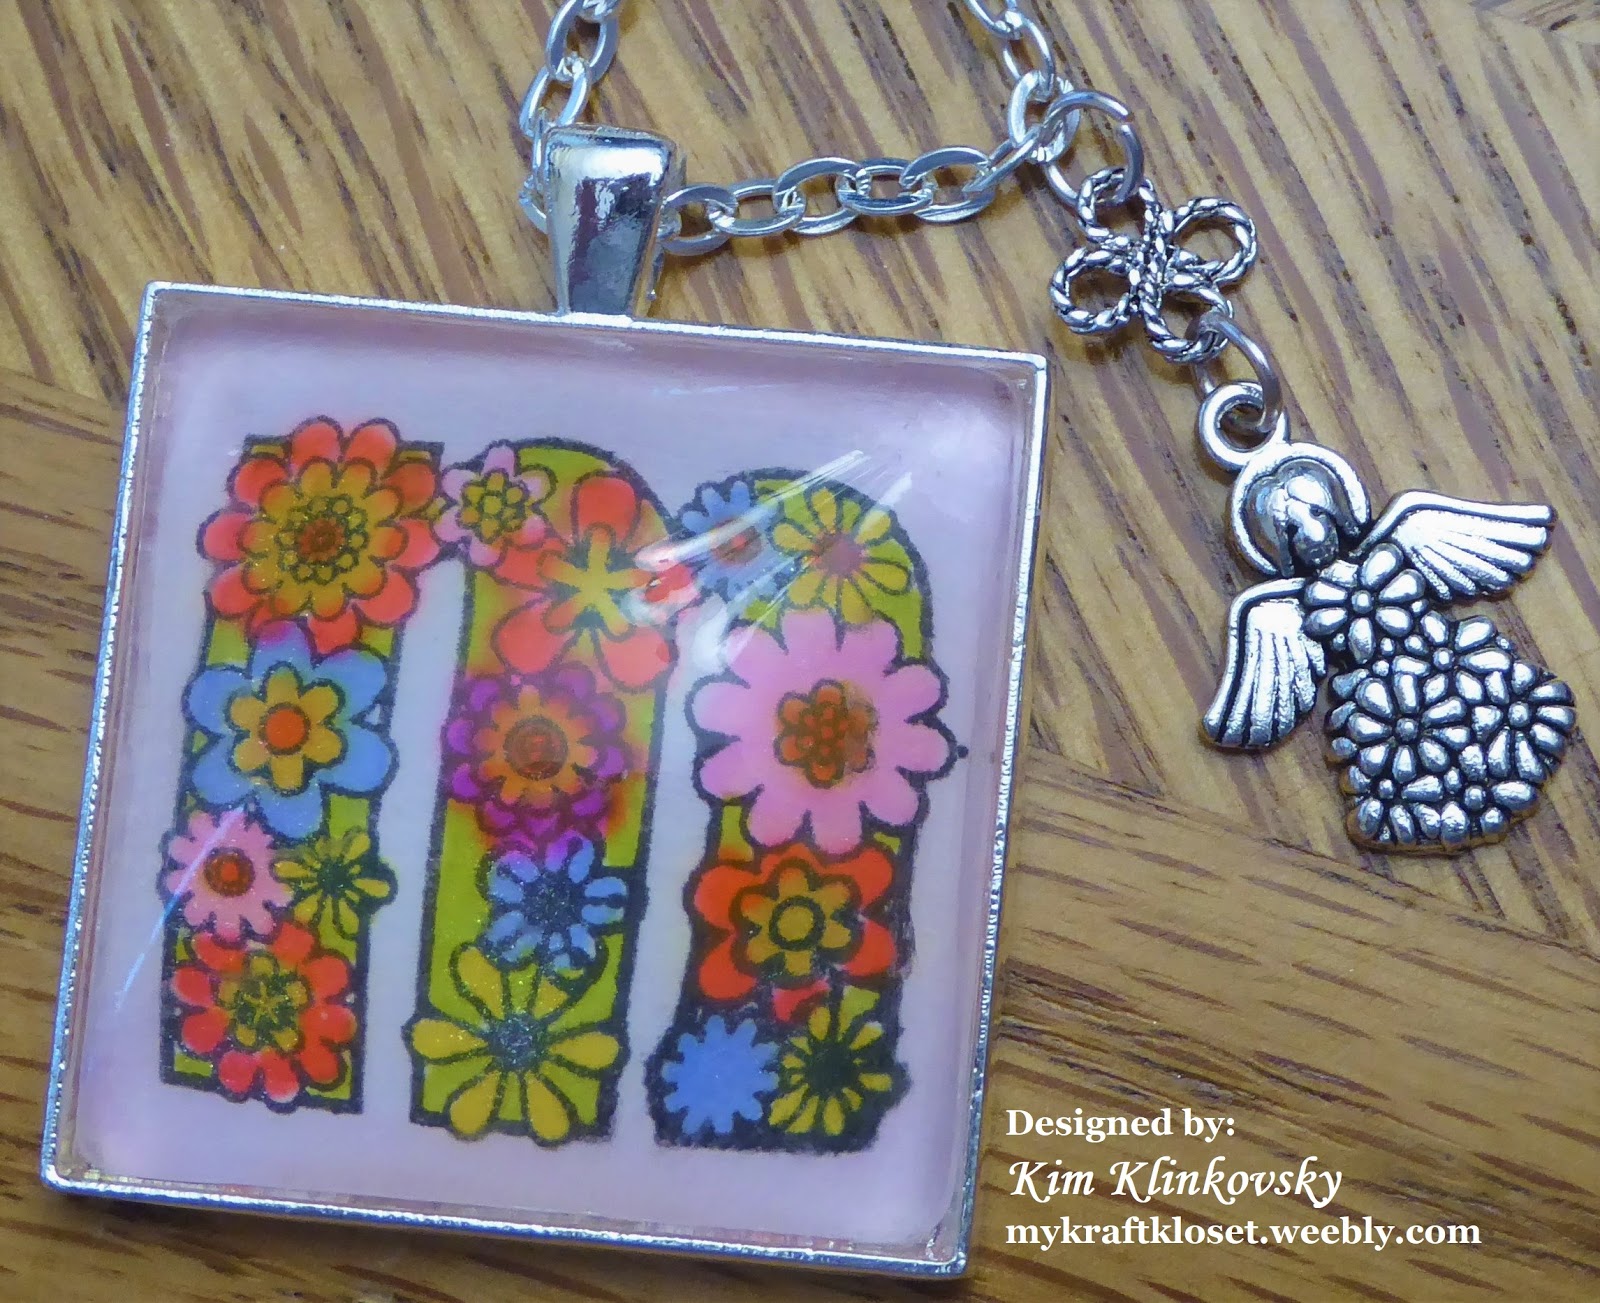
For the heart piece I chose my moms initial from the alphabet image sheet. I cut the word "mom" out from the collage word sheet and glued it onto the letter "H" image with a dab of Glaze & Glue. Wait a couple minutes to dry or it will distort your glass if wet. 

Then take a medium heart glass piece, add a few drops of Glaze & Glue and place over the whole image. Press gently and hold for a couple minutes until set. Wipe away any excess glue around the edges with a q-tip. Allow to dry for a few minutes and cut out.

Now all the assembling fun begins...


I lay everything out and keep it in piles to stay organized. 

For the blue bling shown above, I chose my moms birthstone, added a Super Sticky Dot to an antique butterfly tray, remove red backing, and place the bling into the tray and press gently to set. 


Next line up all your images, charms, and trays to see what configuration you want. 

Take all 5 antique round twist trays and an antique brass heart tray, add Super Sticky Dots to each tray, remove red backing, and place the images into the trays and press gently to set for a secure fit. (as shown above)

Using a pair of pliers, attach each tray to each other with small jump rings. 

Then I added a few of my favorite charms for a dash of holiday charm and special meaning, that I attached with small jump rings and a pair of pliers. Attached the lobster clasp and a couple of large jump rings from the kit to each end of the bracelet with pliers so it will close and this special holiday gift is ready to wrap. 


Voila! There you have a uniquely personalized holiday bracelet that is sure to please anyone on your list this holiday season. And I hope I've inspired you to grab a Kit-of-the-Month or two to give as gifts and create something fantastic! 


The possibilities are truly endless with these amazing Craft Fantastic products! Leave us a comment and tell us what you think of this project or what your making and share with us on social media. Thanks for stopping by! Happy Holidays!

~Kim Klinkovsky @mykraftkloset


Supplies Used:
TWIST BRACELET KIT antique brass 
MEDIUM GLASS HEARTS

Thursday, November 22, 2018

Holiday Packaging Ideas With Craft Fantastic

Happy Thanksgiving Everyone! As the turkey is finished, thoiughts may start to turn to Black Friday, holiday shopping, craft fairs, gift giving! So today I am sharing with you a quick and easy idea for packaging. I love to give handmade cards, and to package them up check this out!
You will need Silver Rectangle Pendant Tray, Glass Rectangles,  Holiday Mini and Small Glass Sizes Image Sheet,  Fantastic Glaze & Glue and Fantastic Super Sticky Dots

I picked an image from the image sheet and adhered my jewelers glass, let dry and trimmed around as always, used a super stick jewelers dot to adhere it to the tray.

Then I used some pretty holiday ribbon and added it to my ccards which were already in a clear cellophane bag, and there you have it!


And as always keep in mind, changing the image, the tray, the colors will change the whole look and take you through the holidays!
I hope you like this project and can't wait to see what you all are making!
Until next time!
Hugs,
Judy

Saturday, November 17, 2018

One of a Kind Holiday Cards

Hi everybody! Kim here from My Kraft Kloset and the holidays are soon upon us and as a card maker, I'm busy working on holiday cards to mail out soon. So today I thought I'd share a couple of ideas on how to use your Craft Fantastic products in your card making and create special one of a kind holiday cards your friends and family will swoon over!


Let's get started. Gather all your supplies together, like an assembly line to make several cards at once. And to make it easier I used these gorgeous Luxe-Line cards and envelopes set in off-white as the base of my cards. Which are found in the Craft Fantastic shop, but let me tell you, these cards are beautiful, elegant, and very sturdy quality.


Next I die cut blue panels from patterned paper with a scallop stitched die cut that is 1/4" larger than the luxe card base. Then I came across this free vintage holiday sheet music "here" online and printed them on regular copy paper. They already had a vintage ivory color to them, but I inked around the edges to give it a wintery blue look. Cut it out with a stitched die cut and trimmed to fit. Adhered to blue card panel with several super sticky dots.


Added this rustic twine to frame the sheet music panel and adhered with Glaze & Glue. It drys really quick and worked really well. Then I chose these precious Craft Fantastic holiday images, cut them out, and adhered in the corners with Glaze & Glue. 

Adhered blue panel to luxe card base with several super sticky dots. And attached a little floral holiday bundle in each corner with a super sticky dot to complete these special cards. 

Tip: Use a bubble mailer envelope or a small box to mail thick cards.


Voila! There you have special one of a kind holiday cards made with Craft Fantastic products and a few of your card making supplies. I hope I've inspired you to play with your supplies, mix and match, and check out other images to see what else you can make! But these are so precious, I just might frame them and give as gifts or hang them on my wall for all to see!


Also take a peak at the new Kit-of-the-Month to get a lot of projects made for the holidays or any upcoming special occasions at a reasonable price. The possibilities are truly endless with these amazing Craft Fantastic products! Leave us a comment and tell us what your making and share with us. Thanks for stopping by! Happy Holidays!

~Kim Klinkovsky @mykraftkloset


Supplies:
HOLIDAY all jeweler's glass sizes (Christmas images sheet)
FANTASTIC GLAZE & GLUE 2 oz.
FANTASTIC SUPER STICKY DOTS
Free printable holiday sheet music
Gina Marie Designs Stitched and Scallop Die Cuts
Bo Bunny Vintage Double Dot 6x6 patterned paper
twine
Petaloo floral holiday bundle
Ranger Distress Ink-Stormy Sky

Tuesday, November 13, 2018

Thanksgiving Wine Charms

Thanksgiving is almost here!  For those who are hosting a grand feast here's some fantastic wine charms to add to your table décor or as a great hostess gift if you are not hosting.  I found these to be a quick and easy project and they look great!


All you need to do to create these fun wine charms is to pick your images and I chose images from the THANKSGIVING mini and small glass sizes IMAGE SHEET, use the FANTASTIC GLAZE AND GLUE to adhere the MINI ROUND JEWELER'S GLASS to the image, once dry cut the image out and place it into a MINI ROUND PENDANT TRAY using a SUPER STICKY DOT.  I used hoop earrings as the round piece that goes around the stem of the glass.  These were bought at a local craft store for a very low price, you can find them in the findings section of your local craft store.  I plan on making more WINE GLASS CHARMS with other images as the possibilities are endless.  Hope you like them,
Liz from JUNQUEDRAWERDESIGNS

Sunday, November 11, 2018

So Let's Talk Stocking Stuffers

Like many of you, I am sure, I am starting to think about the holidays. And one of those things that we start to think about is stocking stuffers. Well here is a super easy idea for you. Craft Fantastic has beautiful image sheets for the holidays. And earrings make great stocking stuffers. So if you take a look under the Kit Collection Tab on the Craft Fantastic Page you will find Round and Square Earring Kits, available in both Silver and in Antique Brass.
I am using the Silver Kit today with Holiday Mini and Small Glass Sizes Image Sheet to make this adorable set of earrings. The kit contains materials for four pairs of earrings and you can certainly do multiple sets from one image sheet. The only other items you will need is Fantastic Glaze & Glue and Fantastic Super Sticky Dots.

I picked a pair of  images from the image sheet and adhered my jewelers glass, let dry and trimmed around as always, used a super stick jewelers dot to adhere it to the tray. Then simply add the ear wires and you are done! Super fast, easy, and fun stocking stuffers!

And keep in mind, changing the image, the tray, the colors, and expanding to the basic earrings will change the whole look and take you through the holidays!
I hope you like this project and can't wait to see what you all are making!
Until next time!
Hugs,
Judy

Thursday, November 1, 2018

Personalized Holiday Gift Ideas

Hi everybody! Kim here from My Kraft Kloset sharing a special monogrammed pendant I created using a clear alphabet stamp set and Craft Fantastic products for a personalized touch. See how easy it is to make a bunch of these in a flash for everyone on your list this holiday season. 


Let's get started...

Using an alcohol marker friendly ink, stamp your alphabet letter on thin white cardstock made for alcohol markers, so it won't bleed or peel apart. Color away using your favorite alcohol markers. And I allowed it to dry thoroughly overnight, so the color wouldn't bleed out of the edges. 

Tip: Using alcohol markers instead of water color markers, allows the color to set permanently, so the image won't bleed when you add the liquid Glaze & Glue over the top. 

Take an XL glass square, add several drops of Glaze & Glue and place over the stamped alphabet letter. Press gently and hold for a couple minutes until set. Wipe away any excess glue around the edges with a q-tip. Allow to dry for a few minutes. 

I chose this stunning XL antique silver tray for this project, but it does require several Super Sticky Dots for a secure hold with larger pieces. Remove red backing and place the alphabet glass image into the tray and press gently all over to set the corners and center for a secure fit. 

Added a couple of my favorite charms for a dash of good luck and a sparkle of holiday charm, that I attached with small jump rings and a pair of pliers. And added a stunning silver chain to complete this wonderful holiday gift. 

Voila! There you have a uniquely personalized holiday pendant that is sure to please anyone on your holiday gift giving list this season. I hope I've inspired you to play with your stamps and use them in your jewelry projects too! And be sure to check out our other charms and images to see what else you can make! 

Also take a peak at the new Kit-of-the-Month and other Kits to get a lot of projects made for the holidays or any upcoming special occasions at a reasonable price. The possibilities are truly endless with these amazing Craft Fantastic products! Leave us a comment and tell us what you think or what your making and share with us. Thanks for stopping by!

~Kim Klinkovsky @mykraftkloset


Supplies Used:
X LARGE GLASS SQUARES