Hi everybody! Kim here sharing my first post for the Craft
Fantastic All Stars Design Team!
I am overjoyed
to be here creating with these truly fantastic products. I’m mostly a card
maker, but when I tried these products a few years ago at a craft show, I was
hooked and you will be too! They are fun, easy, and oh so pretty.
For my first project I wanted to show you the versatility of
these amazing products and how you can incorporate them into many facets of your crafty
life. As a special gift, I designed this beautiful handmade necklace, a charming card, and a
matching gift bag tag.
The Necklace:
I started with a super unique necklace that could be for a special
Birthday, Anniversary, Wedding, Valentines gifts, or any special occasion. To
help you better understand the lingo, Craft Fantastic calls their pendant
pieces trays, and you use these as your vehicles to creativity.
1. I chose this bright red heart image with a funky black and
white button type background.
2. Next I chose a silver medium fancy heart tray and medium
glass heart. The silver pieces are lead and nickel free and oh so gorgeous, I
really hated to alter them, but I wanted to do something that hadn’t been done
or shown on the blog before. So, I
colored the silver heart trays with a red Copic alcohol marker. I know—gasp!
(lol) But it turned out stunning, with or without the heart image too, don’t you
think?
3. Add several drops of Craft Fantastic Glaze & Glue
onto the flat part of the glass heart and place over the image. Too much glue
can be cleaned up, but too little won't seal properly to the image. Press a
finger over the glass to help distribute the glue, hold in place for about a
minute, and then wait 2-3 minutes for it to set. Give the glass a nudge, if it
doesn’t move its set.
4. Use a Q-tip to remove any excess glue around the edges of
the glass. Trim around the edges of the glass and cut out your image.
5. Place a Fantastic Jewelers Dot in the center of the heart
tray, remove the red backing, and place glass heart image into the tray and
press down.
It’s a jeweler’s quality dot
and super duper strong. For larger trays you’ll want to use more than one dot. For
more details, check out the Craft Fantastic tutorial
HERE.
6. Add a pinch bail and a small jump ring to the heart tray pendant.
Then add a heart charm to the small jump ring, clamp with pliers, and string a necklace
chain through the pendant.
The colored pendent will dry very quickly, but go over it a
few times to get desired coverage, and if it is still tacky to the touch, you
may want to spray it with a clear epoxy sealer.
Craft Fantastic Supplies:
Fantastic Glaze & Glue, 2 pairs-
Multi purpose Jewelry Pliers,
Fantastic Jewelers Dots,
Fantastic Art Images Sheet-Valentines,
MediumFancy Heart Tray,
Medium GlassHearts,
Day/DeadCharm Collection, 1-
Silver Pinch Bail, 1-
Small Jump Rings,
24" ROLO CHAIN silver, Red Cadmium Copic Marker, and Q-tips.
The Card:
As an avid card maker I believe every gift should have a
handmade card to go with it too! So, I added these gorgeous heart charms and a
red ribbon to give it some extra love and sparkle too!
See step by step card tutorial at:
My Kraft Kloset
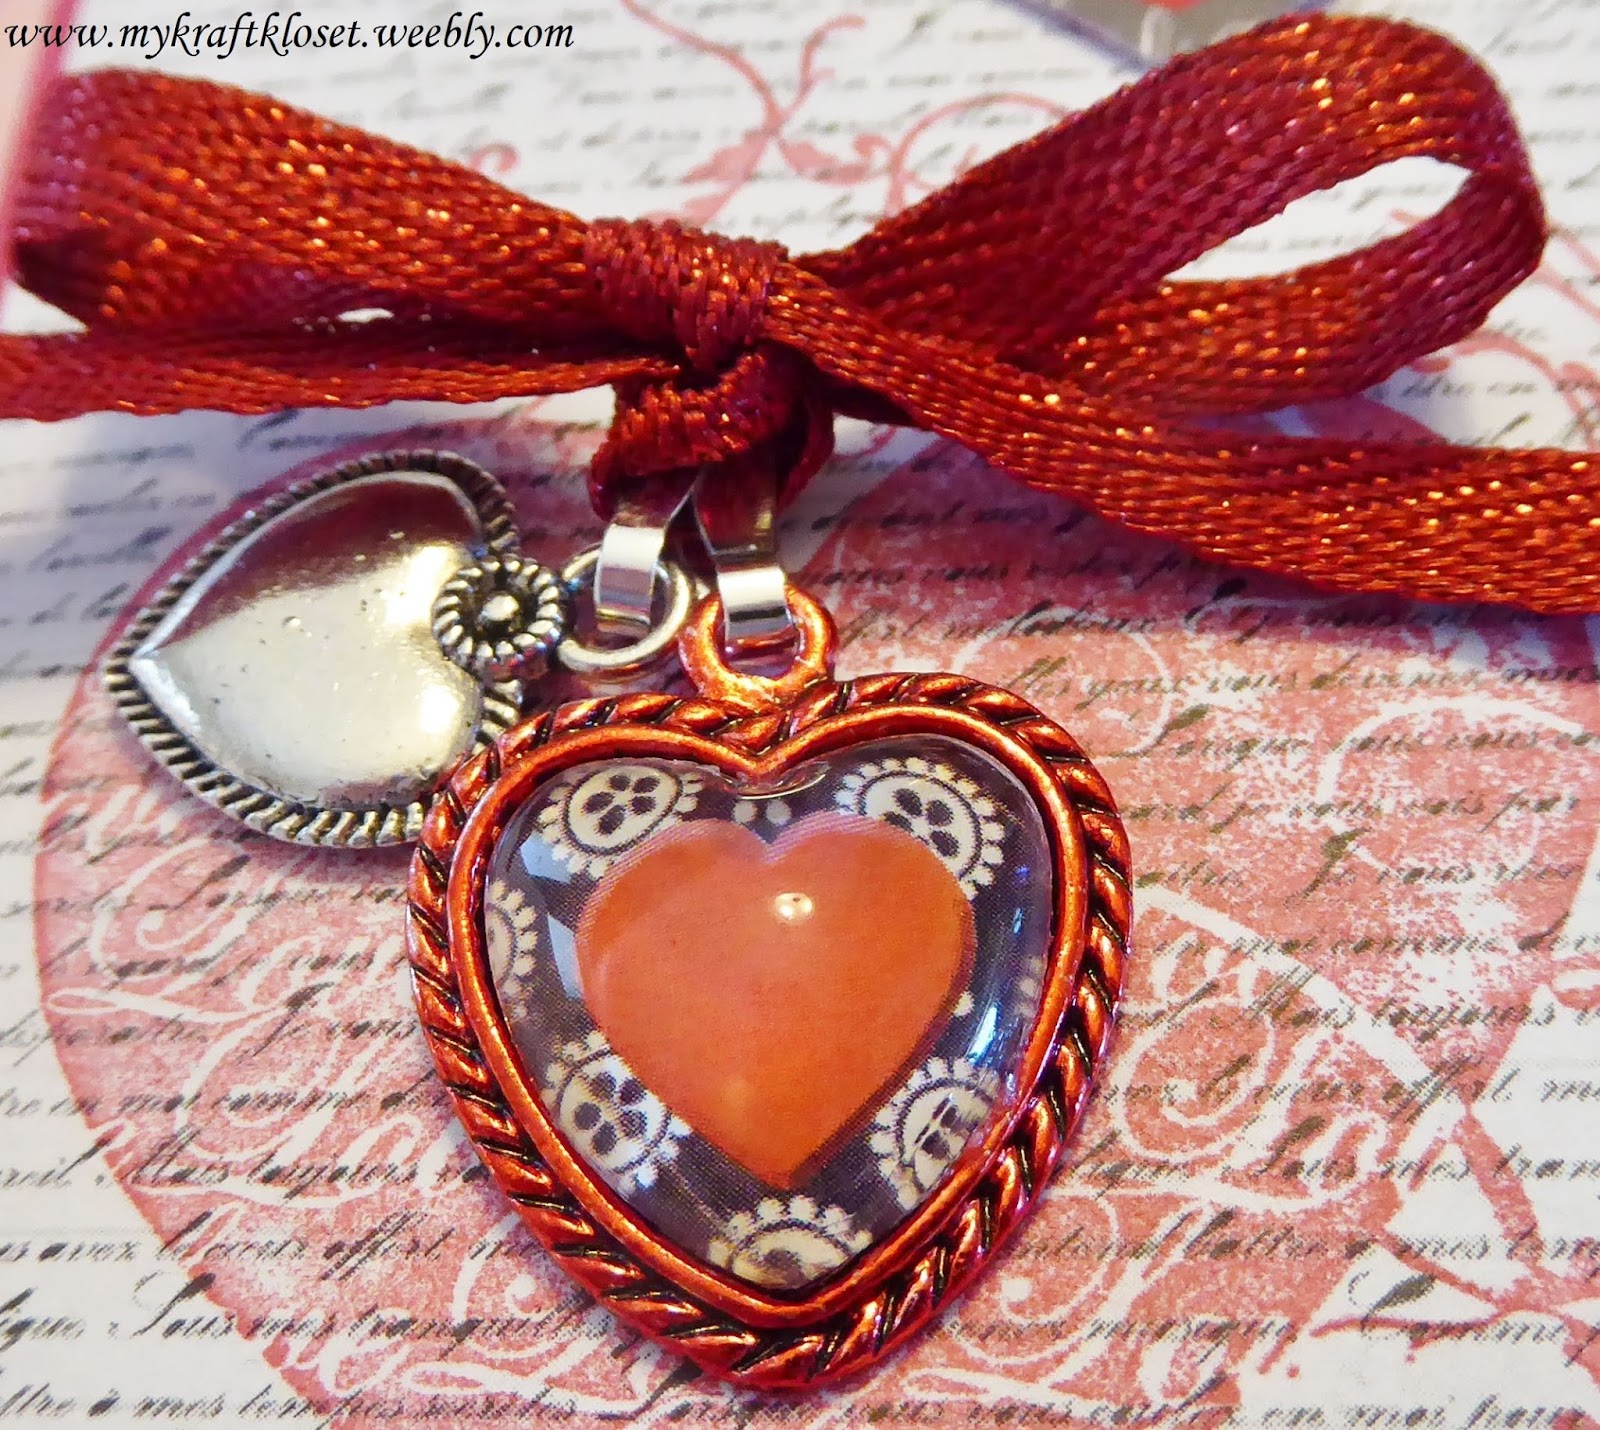
For the charms, repeat
Steps 1-5 as above to create this heart pendant
6. Add two pinch bails to the heart pendant and the silver
heart charm. Then string a glittery red ribbon through the pendant and charm,
and tie in a bow.
7. Place a Fantastic Jewelers Dot on the back of the ribbon,
the heart tray pendant, and the silver heart charm. Remove the red backing,
place them on the card, and press down. The dots are super strong and sticky
and will hold these in place really well. If any parts of the dots are visible
and causing other things to stick to your card, just add a touch of talc powder
to those edges to un-stick it.
Craft Fantastic
Supplies: Fantastic Glaze & Glue, 2 pairs-
Multi purpose Jewelry Pliers,
Fantastic Jewelers Dots,
Fantastic Art Images Sheet-Valentines,
Medium Fancy Heart Tray,
Medium Glass Hearts,
Cute Heart Charm, 2-
Silver Pinch Bails, Q-tips, Red Cadmium Copic Marker, Cardstock, Pattern Paper, Die Cuts, Ink/Stamps, Stickers,
and Creative Impressions Red Glitter Ribbon.
The Gift Bag Tag:
No present is complete without a gift bag and a matching
tag. So, I added a set of heart charms and a sparkly red ribbon here too!
For the charms, repeat
Steps 1-6 as above to create this heart pendant
7. Then add a large silver jump ring through the red
glittery ribbon and string it through the braided tag ribbon that came with the
bag, and clamp with pliers. Add tissue paper. Voila!
Craft Fantastic
Supplies: Fantastic Glaze & Glue, 2 pairs-
Multi purpose Jewelry Pliers,
Fantastic Jewelers Dots,
Fantastic Art Images Sheet-Valentines,
Medium Fancy Heart Tray,
Medium Glass Hearts,
Cute Heart Charm, 2-
Silver Pinch Bails,
Large Jump Rings, Q-tips, Red Cadmium Copic Marker, Creative Impressions Red Glitter Ribbon, a Gift bag and
tissue paper.
And there you have a very unique and special gift made from
the heart with a few products, a whole lot of imagination, and at very little
cost. And maybe include a little note explaining to your recipient that they
could remove the pendants from the card and the gift bag to wear for a total of
three pendant gifts. WOW! I’d love that, wouldn’t you?
I hope I’ve inspired you to think outside the box. Lets see
what you can create with these fantastic jewelry products and your paper crafting
supplies. Because the possibilities are truly endless!
Please let us know what
you think, we’d love to hear from you.