Showing posts with label My Kraft Kloset. Show all posts

Saturday, December 15, 2018

Fantastic Holiday Gift Ideas

Hi everybody! Kim here from My Kraft Kloset and December is half over and the holidays are just around the corner. Are you ready?  If not, don't panic, Craft Fantastic has you covered. Get out all your Craft Fantastic kits you've been collecting all year and make something homemade. We make it simple, yet fun or elegant, you choose and you'll have holiday gifts done in no time at all.

Poinsettia Earring and Pendant Set


Gather up all your supplies, choose from hundreds of images, charms, jump rings, earwire earrings bangles, chains, glass pieces, trays, Glaze & Glue, Super Sticky Dots, scissors and Qtips.

Then click "here" to get all the basic details on how to make these masterpieces and all the supplies I used are listed in links below. Grab a friend or maybe your kids to make Grandma, Mom, or Auntie gifts. Ready...Set...Go...Craft!!!

Vintage Birds Pendant


Candy Cane Pendant


Bangle Charm Bracelet, duo tray side 1


Bangle Charm Bracelet, duo tray side 2

Click "here" to see how to collage the "s and daughter" together

Voila! There you have several uniquely made or personalized holiday gifts sure to please anyone on your holiday gift giving list and that only took an hour or two.  I hope I've inspired you to grab a Kit-of-the-Month or two, mix them up, and create something fantastic!

The possibilities are truly endless with these amazing Craft Fantastic products! Leave us a comment and tell us what you think of these projects or what your making for the holidays and share with us on social media. Thanks for stopping by! Happy Holidays!


~Kim Klinkovsky @mykraftkloset


Supplies Used:
MINI GLASS SQUARES (poinsettia earrings)
HOLIDAY mini & small glass sizes images (poinsettia earrings)
LONG EARWIRES antique brass (poinsettia earrings)

HOLIDAY all jeweler's glass sizes-large images (poinsettia pendant)
X LARGE GLASS SQUARES (poinsettia pendant)

VINTAGE BIRDS mini & small glass sizes images (vintage birds pendant)
SMALL GLASS ROUNDS (vintage birds pendant)
SMALL JUMP RINGS silver (vintage birds to attach charm)
BUTTERFLY KISS CHARM antique silver (vintage birds charm)


HOLIDAY all jeweler's glass sizes-large images (candy cane pendant)
EXTRA LARGE ROUND PENDANT TRAY silver (candy cane pendant)
X LARGE GLASS ROUNDS (candy cane pendant)

SLIDE BANGLE silver (charm bracelet)

SMALL JUMP RINGS silver (to attach charms) 
NATURE CHARM (tree of life) silver (Tree of Life charm) (bangle bracelet)
TINY ROUND GLASS BLING-Aqua (bangle bracelet)
INSPIRATION mini & small glass sizes (bangle bracelet heart image)
WING CHARM antique silver (bangle bracelet)
MEDIUM ROUND DUO SIDE CHARM TRAY silver (bangle bracelet, double sided for two images)
MEDIUM GLASS ROUNDS (bangle bracelet for duo tray)
HOLIDAY mini & small glass sizes Images (bangle bracelet, images for duo tray)
Silver Angel Charm (out of stock, but she is found in many past kits, so check your stash) 
Day of the Dead Silver heart/flower Charm (out of stock, but maybe in past kits)
SMALL ROUND CHARM TRAY silver (bangle bracelet-letter "s")
SMALL GLASS ROUNDS (bangle bracelet - letter "s")

Thursday, November 29, 2018

Holiday Bracelet Gift Idea

Hi everybody! Kim here from My Kraft Kloset and the season of giving has begun. I grabbed a few affordable jewelry kits and I'm making customized holiday gifts using these amazing Craft Fantastic products. I love how you can monogram, add a name, pick out special charms, or use beautiful images to personalize each handmade gift. Follow along and I'll show you just how easy it really is.


Let's get started...


I had a couple of monthly kits on hand and chose this Twist Bracelet Kit in antique brass, because I like the vintage look and you get a lot of pieces to get you started. It is beautiful as is, but I took it a few steps further to personalize it with some special pieces to make it unique for my mom. All supplies listed below.


Next choose your images. That's the hardest part, because they are all so beautifully designed.  I love these holiday image sheets with the poinsettias and sheet music, an angel, and the children seemed fitting for my mom.

The bracelet kit comes with 5 glass pieces and 5 trays. Take a small glass round, add a few drops of Glaze & Glue and place over the image. Press gently and hold for a couple minutes until set. Wipe away any excess glue around the edges with a q-tip. Allow to dry for a few minutes and cut out. Repeat for all 5 round holiday images. 


For the heart piece I chose my moms initial from the alphabet image sheet. I cut the word "mom" out from the collage word sheet and glued it onto the letter "H" image with a dab of Glaze & Glue. Wait a couple minutes to dry or it will distort your glass if wet. 

Then take a medium heart glass piece, add a few drops of Glaze & Glue and place over the whole image. Press gently and hold for a couple minutes until set. Wipe away any excess glue around the edges with a q-tip. Allow to dry for a few minutes and cut out.

Now all the assembling fun begins...


I lay everything out and keep it in piles to stay organized. 

For the blue bling shown above, I chose my moms birthstone, added a Super Sticky Dot to an antique butterfly tray, remove red backing, and place the bling into the tray and press gently to set. 


Next line up all your images, charms, and trays to see what configuration you want. 

Take all 5 antique round twist trays and an antique brass heart tray, add Super Sticky Dots to each tray, remove red backing, and place the images into the trays and press gently to set for a secure fit. (as shown above)

Using a pair of pliers, attach each tray to each other with small jump rings. 

Then I added a few of my favorite charms for a dash of holiday charm and special meaning, that I attached with small jump rings and a pair of pliers. Attached the lobster clasp and a couple of large jump rings from the kit to each end of the bracelet with pliers so it will close and this special holiday gift is ready to wrap. 


Voila! There you have a uniquely personalized holiday bracelet that is sure to please anyone on your list this holiday season. And I hope I've inspired you to grab a Kit-of-the-Month or two to give as gifts and create something fantastic! 


The possibilities are truly endless with these amazing Craft Fantastic products! Leave us a comment and tell us what you think of this project or what your making and share with us on social media. Thanks for stopping by! Happy Holidays!

~Kim Klinkovsky @mykraftkloset


Supplies Used:
TWIST BRACELET KIT antique brass 
MEDIUM GLASS HEARTS

Saturday, November 17, 2018

One of a Kind Holiday Cards

Hi everybody! Kim here from My Kraft Kloset and the holidays are soon upon us and as a card maker, I'm busy working on holiday cards to mail out soon. So today I thought I'd share a couple of ideas on how to use your Craft Fantastic products in your card making and create special one of a kind holiday cards your friends and family will swoon over!


Let's get started. Gather all your supplies together, like an assembly line to make several cards at once. And to make it easier I used these gorgeous Luxe-Line cards and envelopes set in off-white as the base of my cards. Which are found in the Craft Fantastic shop, but let me tell you, these cards are beautiful, elegant, and very sturdy quality.


Next I die cut blue panels from patterned paper with a scallop stitched die cut that is 1/4" larger than the luxe card base. Then I came across this free vintage holiday sheet music "here" online and printed them on regular copy paper. They already had a vintage ivory color to them, but I inked around the edges to give it a wintery blue look. Cut it out with a stitched die cut and trimmed to fit. Adhered to blue card panel with several super sticky dots.


Added this rustic twine to frame the sheet music panel and adhered with Glaze & Glue. It drys really quick and worked really well. Then I chose these precious Craft Fantastic holiday images, cut them out, and adhered in the corners with Glaze & Glue. 

Adhered blue panel to luxe card base with several super sticky dots. And attached a little floral holiday bundle in each corner with a super sticky dot to complete these special cards. 

Tip: Use a bubble mailer envelope or a small box to mail thick cards.


Voila! There you have special one of a kind holiday cards made with Craft Fantastic products and a few of your card making supplies. I hope I've inspired you to play with your supplies, mix and match, and check out other images to see what else you can make! But these are so precious, I just might frame them and give as gifts or hang them on my wall for all to see!


Also take a peak at the new Kit-of-the-Month to get a lot of projects made for the holidays or any upcoming special occasions at a reasonable price. The possibilities are truly endless with these amazing Craft Fantastic products! Leave us a comment and tell us what your making and share with us. Thanks for stopping by! Happy Holidays!

~Kim Klinkovsky @mykraftkloset


Supplies:
HOLIDAY all jeweler's glass sizes (Christmas images sheet)
FANTASTIC GLAZE & GLUE 2 oz.
FANTASTIC SUPER STICKY DOTS
Free printable holiday sheet music
Gina Marie Designs Stitched and Scallop Die Cuts
Bo Bunny Vintage Double Dot 6x6 patterned paper
twine
Petaloo floral holiday bundle
Ranger Distress Ink-Stormy Sky

Thursday, November 1, 2018

Personalized Holiday Gift Ideas

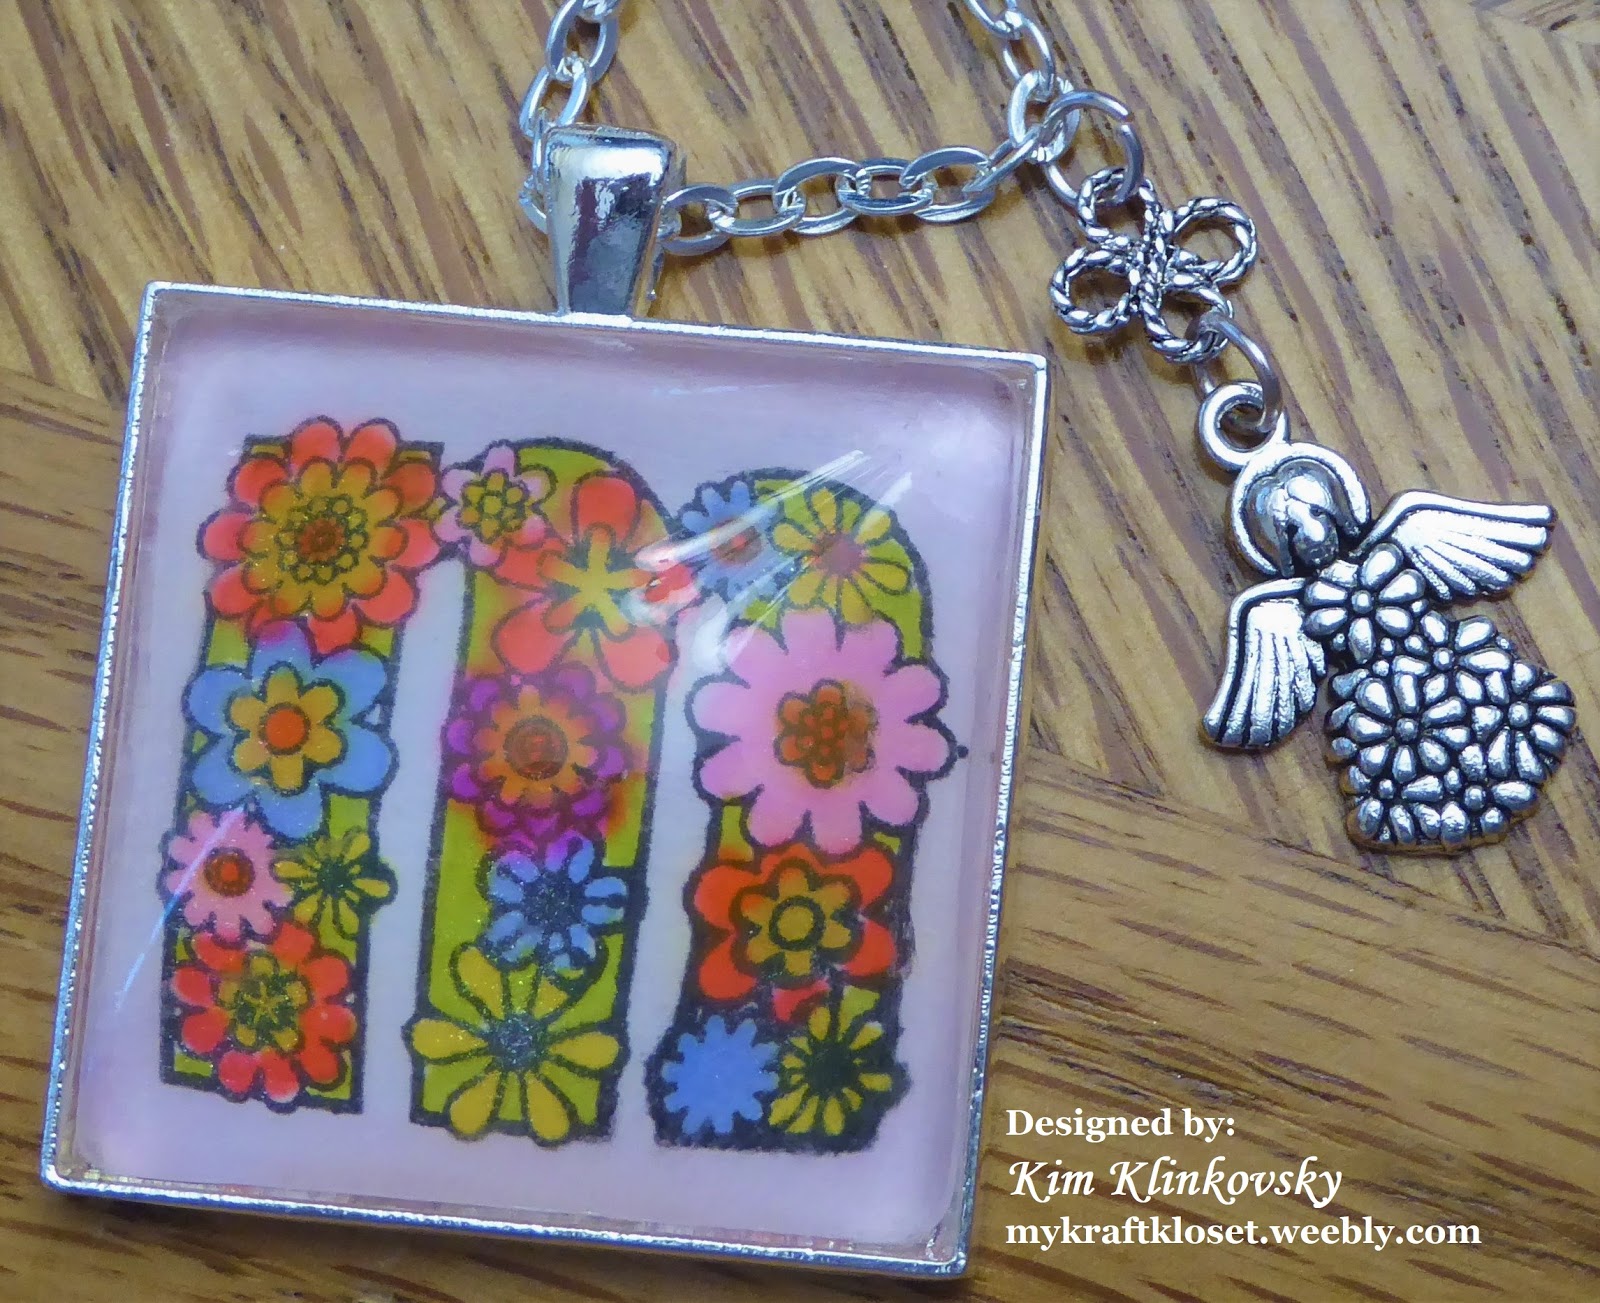
Hi everybody! Kim here from My Kraft Kloset sharing a special monogrammed pendant I created using a clear alphabet stamp set and Craft Fantastic products for a personalized touch. See how easy it is to make a bunch of these in a flash for everyone on your list this holiday season. 


Let's get started...

Using an alcohol marker friendly ink, stamp your alphabet letter on thin white cardstock made for alcohol markers, so it won't bleed or peel apart. Color away using your favorite alcohol markers. And I allowed it to dry thoroughly overnight, so the color wouldn't bleed out of the edges. 

Tip: Using alcohol markers instead of water color markers, allows the color to set permanently, so the image won't bleed when you add the liquid Glaze & Glue over the top. 

Take an XL glass square, add several drops of Glaze & Glue and place over the stamped alphabet letter. Press gently and hold for a couple minutes until set. Wipe away any excess glue around the edges with a q-tip. Allow to dry for a few minutes. 

I chose this stunning XL antique silver tray for this project, but it does require several Super Sticky Dots for a secure hold with larger pieces. Remove red backing and place the alphabet glass image into the tray and press gently all over to set the corners and center for a secure fit. 

Added a couple of my favorite charms for a dash of good luck and a sparkle of holiday charm, that I attached with small jump rings and a pair of pliers. And added a stunning silver chain to complete this wonderful holiday gift. 

Voila! There you have a uniquely personalized holiday pendant that is sure to please anyone on your holiday gift giving list this season. I hope I've inspired you to play with your stamps and use them in your jewelry projects too! And be sure to check out our other charms and images to see what else you can make! 

Also take a peak at the new Kit-of-the-Month and other Kits to get a lot of projects made for the holidays or any upcoming special occasions at a reasonable price. The possibilities are truly endless with these amazing Craft Fantastic products! Leave us a comment and tell us what you think or what your making and share with us. Thanks for stopping by!

~Kim Klinkovsky @mykraftkloset


Supplies Used:
X LARGE GLASS SQUARES

Saturday, October 20, 2018

Breast Cancer Awareness Pendant 2

Hi everybody! Kim here from My Kraft Kloset reminding you that October is National Breast Cancer Awareness Month and I wanted to create something special to show my support and to remember my younger sister, who lost her battle with breast cancer one year ago at the age of 46. I wanted to do something to raise awareness and spread the word to all the women in our lives, because early detection can save lives! I've designed this beautiful pendant in antique silver with a few accent pieces that are very personal to me from Craft Fantastic to wear proudly.


Click "here" to get all the basic details on how to get started and all the supplies I used are listed below.

Facts About Breast Cancer:
in the USA from the National Breast Cancer Foundation, INC:
  • One in eight women in the USA will be diagnosed with breast cancer in her lifetime.
  • Breast cancer is the most commonly diagnosed cancer in women.
  • Breast cancer is the second leading cause of cancer death among women.
  • Each year it is estimated that over 252,710 women in the United States will be diagnosed with breast cancer and more than 40,500 will die.
  • Although breast cancer in men is rare, an estimated 2,470 men will be diagnosed with breast cancer and approximately 460 will die each year.
  • On average, every 2 minutes a woman is diagnosed with breast cancer and 1 woman will die of breast cancer every 13 minutes.
  • Over 3.3 million breast cancer survivors are alive in the USA today. 
  • GET TESTED EARLY!! Early detection can save lives. 

Breast Cancer Screenings:
Here are some screening guidelines according to the American Cancer Society:

These guidelines are for women at average risk for breast cancer who don't have a personal history of breast cancer, don't have a strong family history of breast cancer, or don't have the genetic mutation known to increase risk of breast cancer (such as BRCA), and has not had chest radiation therapy before the age of 30.
  • Women between 40 and 44 have the option to start screening with a mammogram every year. (I would start at 30-35 to create a base line)
  • Women 45 to 54 should get mammograms every year.
  • Women 55 and older can switch to a mammogram every other year, or they can choose to continue yearly mammograms. Screening should continue as long as a woman is in good health and is expected to live 10 more years or longer.
  • All women should understand what to expect when getting a mammogram for breast cancer screening – what the test can and cannot do. For those who are of higher than average risk please click here.
I am not a medical doctor, so consult with yours, but from my families experience the earlier you can have a mammogram the better you are to start a baseline of your medical history. Or earlier if you have a family history of breast cancer or the BRCA gene. Insist on a mammogram, regardless of your age. Or change doctors if you don't agree with them.  If your ever told you have dense breast tissue, it makes tumors harder to detect, and you should insist on an MRI or ultrasound for further testing. Only YOU can be your own health care advocate and only YOU can save your life or the women in your lives with EARLY DETECTION!!! 

I hope I've inspired you to become aware of your breast health, get educated, talk to your daughters, mothers, sisters, family, friends and share awareness with others. Thanks for stopping by!

Thursday, October 11, 2018

Spooktacular Halloween Accessories

Hi everybody! Kim here from My Kraft Kloset sharing some spooktacular jewelry that you can make yourself to accessorize for Halloween or any day with these amazing antique brass pieces from Craft Fantastic. I LOVE this time of year! So, follow along as I show you a couple of fun pieces you can make for yourself or grab an affordable kit and make some for your friends and family too!


Let's get started...

For this project I chose this darling black cat from this Halloween image sheet.


Add a few drops of Glaze & Glue onto a mini glass square, place over the image, and press gently for a few minutes until set. Wipe off any excess glue around the edges with a Q-tip. Allow a few minutes to dry.

Once dry, cut around the glass and cut out the image. Next I chose this mini antique brass square tray to fit nicely on the bangle and to give it a vintage look.


Adhere a Fantastic Super Sticky Dot to the tray, remove red sticky dot backing and place the glass image in the tray. And press gently to set.

Next I chose a tiny clear round glass bling, but I wanted it orange for Halloween or Fall. So, I colored it with an orange alcohol marker. Set a side to dry.

I picked out this tiny antique brass round tray, because it has two loops on each end. One to attach a jump ring and the other to attach a charm to dangle. 


Once the orange glass bling is dry, adhere a Fantastic Super Sticky Dot to the tray, remove red backing, and place in the tray. Press gently to set.

Pick out some of your favorite charms and attach small jump rings to all of them and the trays with pliers. 


And now the fun...Assembling!!!


Just screw off the ball on the end of this antique brass bangle bracelet and slip on all the pieces and screw the ball back on to complete for Halloween or maybe Day of the Dead (Día De Los Muertos).  Pretty, right???

Change and personalize your bangle anytime with the season, holiday, occasion,  or your mood with a switch of a new charms or maybe make new trays!

Or add this spooky tray to a faux leather necklace and be stylish for Howloween!


Voila! There you have some spooktacular jewelry pieces to accessorize for the season or any day! I hope I've inspired you to check out our images and charms and see what you can make! 

Be sure to check out the new and improved October Kit-of-the-Month that are back this month and get started early on a few custom gifts for the holidays or upcoming special occasions. The possibilities are truly endless with these amazing Craft Fantastic products! Leave us a comment and tell us what you think or what your making and share with us. Thanks for stopping by!


Kim Klinkovsky @mykraftkloset


Supplies Used:
SLIDE BANGLE antique brass
Orange Copic Marker (alcohol marker)

Saturday, September 22, 2018

Meaningful Words Gift Ideas

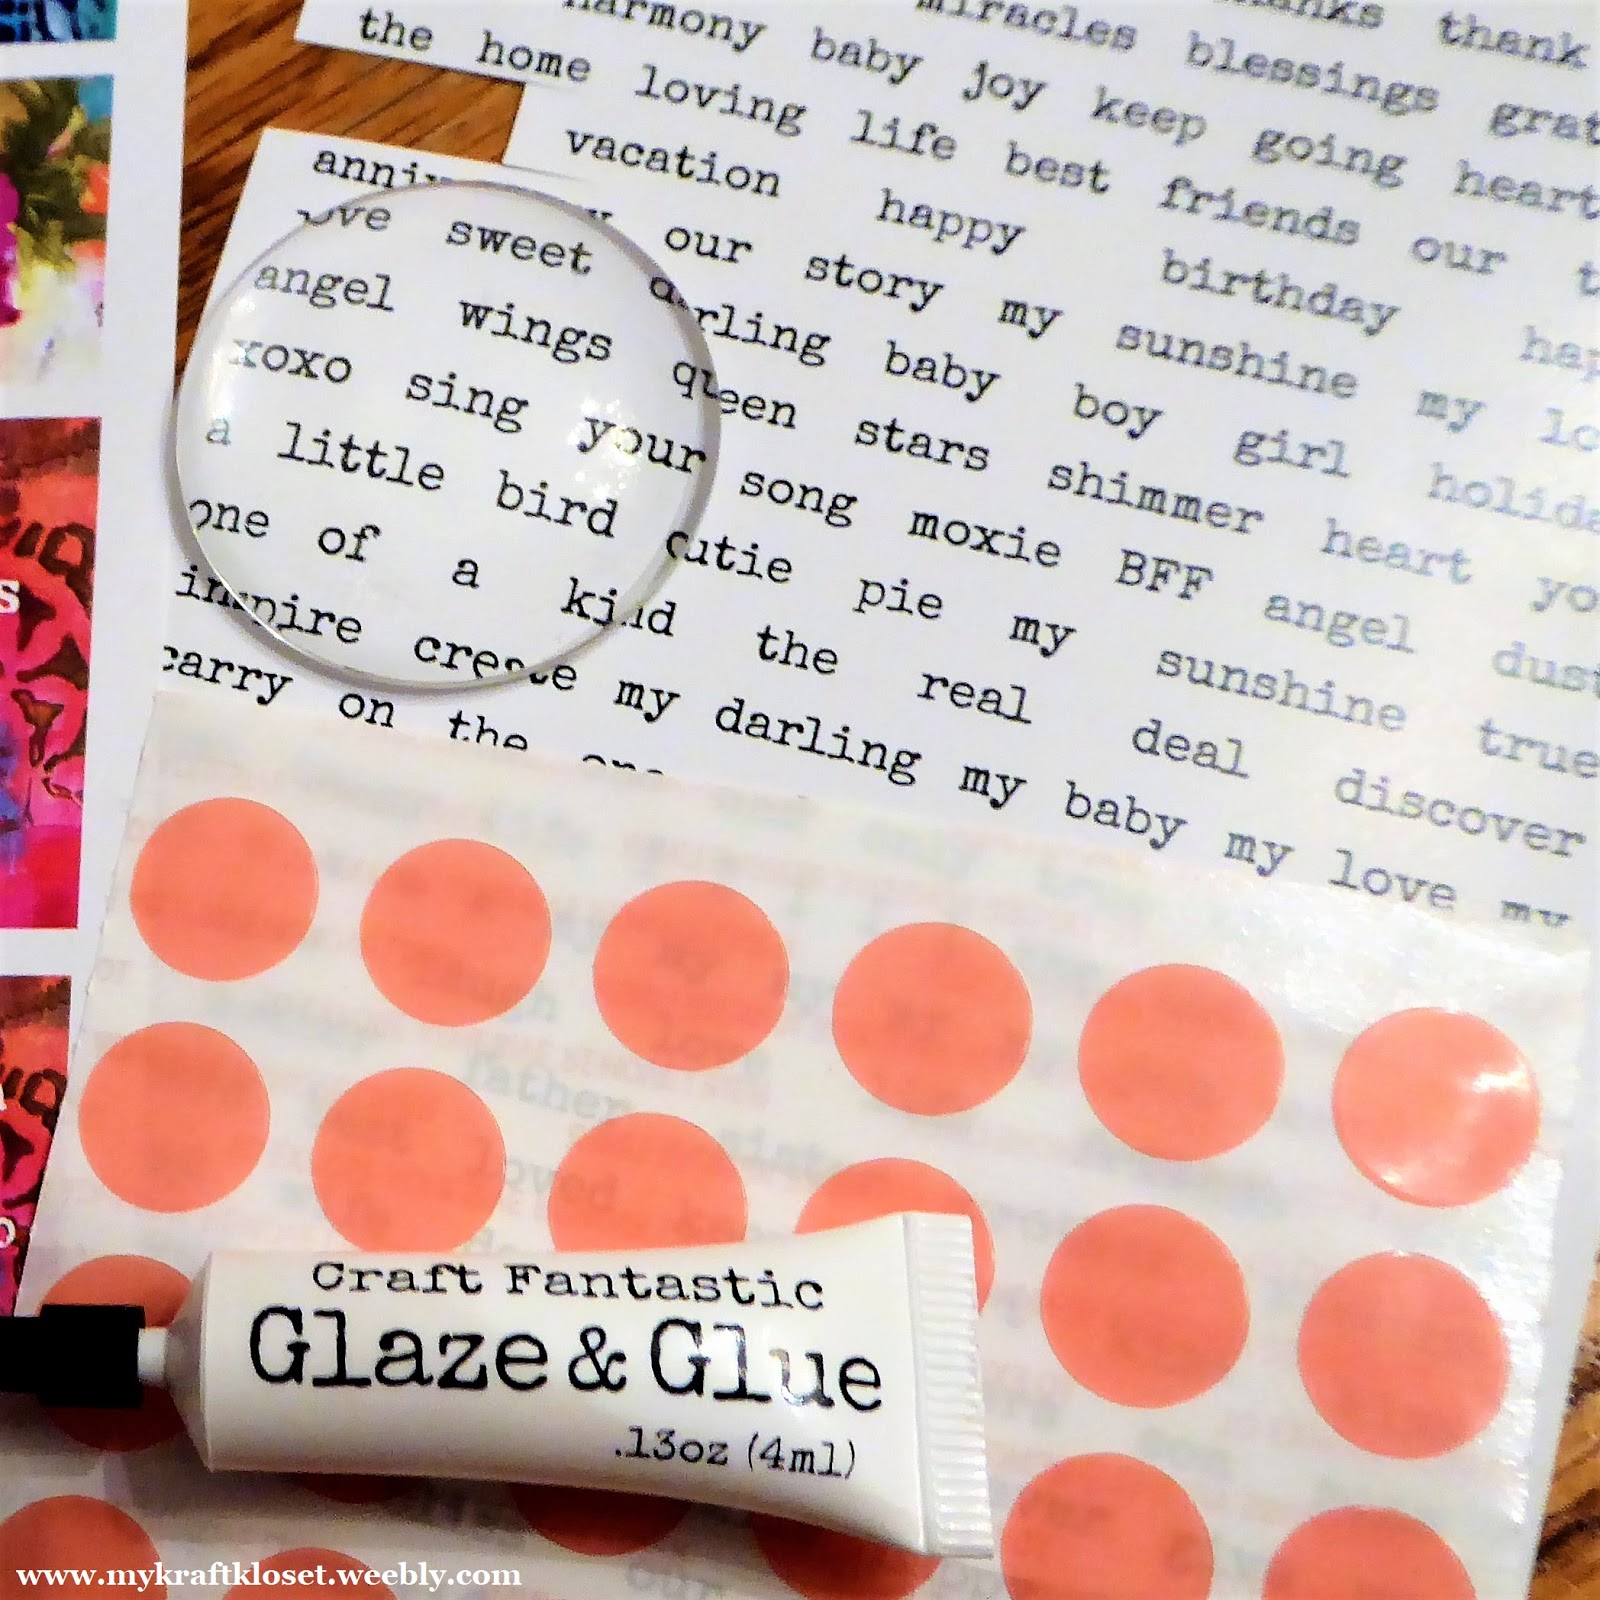
Hi everybody! Kim here from My Kraft Kloset sharing a wonderful way to capture meaningful words that describe somebody special using these amazing antique silver pieces from Craft Fantastic.  With the holidays sneaking up on us, you maybe starting to think about special gifts you can make and these are very affordable. So, follow along as I show you a unique way to send a special message or express your feelings and capture them forever.


Let's get started...

1. Choosing from hundreds of Craft Fantastic images is always the hardest part. And usually you see my collage projects where I cut out 1-2 words, but for this project I chose to use a section of words already on the word collage sheet.


I made this necklace for my Aunt and these words were all very personal to me and very descriptive of her. But don't fret if it doesn't easily work out that way, you can certainly cut the words apart, group together, and glue onto another sheet and make a collage of something similar. 


2. I added a few drops of iridescent glitter glue to give it some sparkle. Allow time to dry so the glitter doesn't stick to your glass and obstruct your view of the words. Can you see the sparkles?


3. Once dry, add several drops of Glaze & Glue onto an XL Glass Round and place over the word image, and press gently for a few minutes until set. Wipe off any excess glue around the edges with a Q-tip. Allow a few minutes to dry.


4. Once dry, cut around the glass and cut out the word image. Next I chose a stunning XL antique silver tray to give it a classy timeless look.

I was going to add this small square image tray to this project too, which is why it's pictured here, but I changed my mind. Better to make too many choices than not enough. And I'll use it for another gift.


5. Adhere several Fantastic Super Sticky Dots to the tray, because you'll want to use more dots on the larger trays. Remove red sticky dot backings and place the glass word image in the tray. And press gently to set.


6. Repeat steps 3-5 above to create the letter "g" in this project, which reminds me of an old vintage typewriter text. Cool, right? Once dry, place glass letter image in this small, but very classy looking tray. And press gently to set.

7. Attach the silver angel wing charm with a small jump ring and pliers. And add all three pieces to a beautiful silver chain to complete.

These angel wings are one of my favorite charms. Aren't they beautiful? You've probably seen me use them on several of my projects. I just can't help it, they remind me of guardian angels watching over that special person. I just love them!

Voila! There you have an incredibly meaningful gift idea for that somebody special on your holiday gift giving list. I hope I've inspired you to use your words and spread kindness this Holiday Season and all year long!


Be sure to check out our *NEW* Designer Kits-of-the Month and get started early on a few custom gifts for all your upcoming special occasions. The possibilities are truly endless with these amazing Craft Fantastic products that help you personalize any project! Leave us a comment and tell us what you think or what your making and share with us.
Thanks for stopping by!

Thursday, September 6, 2018

Magnetic Chore Signs

Hi everybody! Kim here from My Kraft Kloset and it’s back to school time around my house. Which means new schedules and back to chores. And recently nobody could remember if the dishes in the dishwasher were clean or dirty, so we had to wash them again. I immediately realized, we needed a sign system and that's what I'm sharing with you today using these amazing Craft Fantastic alphabet images in your kitchen. Yes, I said kitchen.


Let's get started...for today’s project I’m going to show you how to make clean and dirty magnetic signs to place on your dishwasher. But you can turn any of these images into a magnet.  

1.  Using a 1” square punch tool, punch out the letters from the alphabet image sheets or you can use scissors. Here I used black TYPEWRITER KEYS mini & small glass sizes and ALPHABET #1 mini & small glass sizes for the two different words. 


2.  From a craft store, get a magnetic sheet. Or do what I did, and reuse old flat magnets or free ones that come on the new phone books and just cover them up with these alphabet letters. Yep, they still deliver those. (lol) 


3.  Add a Fantastic Super Sticky Dot on the back of each letter and place them in a row along the edge of the magnetic sheet to spell out your word. 

4.  Cut the whole word out from the magnetic sheet with scissors.

5.  Then place a clear piece of packing tape over the whole word to seal it from wear and tear and water. Keeping the tape just on the front. Trim the clear tape to fit the new magnet. Repeat steps for second word. (or you can seal it with any clear sealer or spray from the craft store.) I just used what I had on hand. 


For this tutorial only,  I put both signs on the dishwasher to show you the final results. But when it’s time for chores, we only use one sign on the dishwasher and put the other sign on the refrigerator, as to not confuse anybody, anymore. And now there is no more guessing if the dishes are "clean" or "dirty" and it’s working out perfectly. Voila! Craft Fantastic products to the rescue.

I hope I’ve inspired you to use your crafts in and around your home and to think outside the box about other things you can label too! Let me know what you think, we love comments and new ideas. And be sure to check out our *NEW* Designer Kits-of-the Month and get started on some amazing projects of your own. The possibilities are endless with Craft Fantastic!
Thanks for stopping by! 

Kim Klinkovsky @mykraftkloset

Saturday, June 23, 2018

Cherished Travel Pendant

Hi everybody! Kim here from My Kraft Kloset sharing a fun way to capture your special travels using these amazing antique silver pieces from Craft Fantastic. With Summer upon us, you maybe taking memorable trips or enjoying special activities that you may want to document. So, follow along as I show you a unique way to capture those memories and treasure forever.


Let's get started:

1.  Chose your image or memento. Could be a map, brochure, flyer, postcard, or picture from your travels. Just make sure it is one layer thick or see if you can peel it apart to make it one layer or your project may fall apart. You can also print your own maps on regular copy paper, see "here" for more details.


For this project I chose a one layer, real folding map of Tennessee I got free at the visitors center, because my hubby surprised me on a recent family vacation with a detour to Memphis to visit Graceland. I know it sounds corny, but I have LOVED Elvis ever since I was a little girl. And I always want to "stop by" for a visit whenever I am near there, which I'll admit, has been a few times over the years. If you ever have a chance to go...GO! It's amazing to see, touch, and tour! 

And I wanted to capture these visits with a special pendant to cherish my many memories of Graceland with a map of Memphis and special pieces that to me represent love, good luck/safe travels with a clover knot, angels, or maybe a guardian angel with the wing charms. 


2.  Now that I've chosen my location on the map. Add a couple drops of Glaze & Glue to a large glass round and place over the area you want and press gently for a few minutes until set. Wipe off any excess glue around the edges with a Q-tip. 

3.  Once dry, cut around the glass and cut out the image.

4.  Next I chose this stunning antique silver dangle tray that I could add several special charms to. Adhere a couple of Fantastic Super Sticky Dots to the tray. Use more dots if your tray is larger. Remove red sticky dot backing and place glass image in the tray.


5.  Attach charms to the bottom of the tray with small jump rings and pliers. 

6.  To complete this design I cut my chain in half with scissors and made them equal lengths on both sides. Using small jump rings and pliers, attach a V connector to each side of the chain. Attach a clover type knot connector to the bottom of the V connector and attach to the top of the tray using a small jump ring too. As shown with arrows in the picture below. 


Voila! There you have an amazing travel memento pendant, that you too can treasure Memphis in June, Walking in Memphis, or maybe you Left Your Heart in Memphis this summer. (lol-all song titles)  So, wherever your travels take you, now you can cherish your memories forever in this unique pendant or even a great key chain too. What can you design with your travel treasures? Show us on Facebook, we'd love to see them!


Be sure to check out our *NEW* Designer Kits-of-the Month and get started on your travel mementos or design custom gifts for your special occasions. The possibilities are endless with these amazing Craft Fantastic products! Leave us a comment and tell us what you think. Thanks for stopping by!

Kim Klinkovsky @mykraftkloset


Supplies Used:
DANGLE TRAY antique silver
LARGE GLASS ROUNDS
HEART CHARM silver
WING CHARM antique silver
V CONNECTOR antique silver
KNOT CONNECTOR antique silver
SMALL JUMP RINGS silver
24" CLASSIC CHAIN silver
FANTASTIC GLAZE & GLUE 2 oz.
FANTASTIC SUPER STICKY DOTS
MULTI PURPOSE JEWELRY PLIERS

Qtips
Real State Map

Thursday, June 7, 2018

Family Heirloom Necklace

Hi everybody! Kim here from My Kraft Kloset sharing with you a beautiful heirloom necklace that was created using these amazing vintage antique brass pieces from Craft Fantastic that can be passed down through the generations to treasure for a lifetime. 


Let's get started:


1.  Choosing from hundreds of Craft Fantastic images is always the hardest part. So for this project I chose a couple of my families favorite flowers, the word "family" and the letter "K" for our name.


2.  To collage with the word "family," cut it out, add a couple drops of Fantastic Glaze & Glue to the back of the word, and place where you want it on your flower image and press down to make smooth. Allow to dry for a few minutes. If you don't, the glue could smear your image under the glass and could appear cloudy. 

3.  Add a couple drops of Glaze & Glue to a MEDIUM GLASS ROUNDS and place over the newly collage image, and press gently for a few minutes until set. Wipe off any excess glue around the edges with a Q-tip. 

(Do this step for the duo side daffodil flower image and the alphabet image too)


4.  Once dry, cut around the glass and cut out the images.

5.  Next choose a tray for your beautiful images. I chose a double sided "duo" tray so I could use two flower images and this lovely twist link tray in antique brass to give it a vintage quality. Adhere a Fantastic Super Sticky Dot to each tray. Use more dots if your tray is larger. Remove red sticky dot backing and place glass images in the trays.


6.  Attach trays and tree charm to each other with small jump rings and pliers. 


7.  To complete this design I cut my chain in half with scissors and made them equal lengths on both sides. Using small jump rings and pliers, attach a flourish connector to each piece of the chain. Attach a celtic type knot connector on each end and attach to the top of a V connector. Then attach the bottom of the V connector to the top of the duo side charm tray. 
(as shown with arrows in the picture above)


Voila! There you have a stunningly vintage heirloom piece, complete with the tree of life and a family monogram to pass down through the generations to treasure forever. I'd love to get this from my mom or grandmother. Wouldn't you?


Be sure to check out our *NEW* Designer Kits-of-the Month and get started on a few custom gifts for all your upcoming special occasions. And keep a few for yourself too, because the possibilities are truly endless with these amazing Craft Fantastic  products! Leave us a comment and tell us what you think. Thanks for stopping by!


Kim Klinkovsky @mykraftkloset


Supplies Used:
(2)MEDIUM GLASS ROUNDS

MINI GLASS ROUNDS (for alphabet images)

NATURE CHARM COLLECTION antique brass (family tree charm)

Seed Packets all jeweler's glass sizes (blue/white daisies image)