Showing posts with label faux leather necklace. Show all posts

Thursday, October 11, 2018

Spooktacular Halloween Accessories

Hi everybody! Kim here from My Kraft Kloset sharing some spooktacular jewelry that you can make yourself to accessorize for Halloween or any day with these amazing antique brass pieces from Craft Fantastic. I LOVE this time of year! So, follow along as I show you a couple of fun pieces you can make for yourself or grab an affordable kit and make some for your friends and family too!


Let's get started...

For this project I chose this darling black cat from this Halloween image sheet.


Add a few drops of Glaze & Glue onto a mini glass square, place over the image, and press gently for a few minutes until set. Wipe off any excess glue around the edges with a Q-tip. Allow a few minutes to dry.

Once dry, cut around the glass and cut out the image. Next I chose this mini antique brass square tray to fit nicely on the bangle and to give it a vintage look.


Adhere a Fantastic Super Sticky Dot to the tray, remove red sticky dot backing and place the glass image in the tray. And press gently to set.

Next I chose a tiny clear round glass bling, but I wanted it orange for Halloween or Fall. So, I colored it with an orange alcohol marker. Set a side to dry.

I picked out this tiny antique brass round tray, because it has two loops on each end. One to attach a jump ring and the other to attach a charm to dangle. 


Once the orange glass bling is dry, adhere a Fantastic Super Sticky Dot to the tray, remove red backing, and place in the tray. Press gently to set.

Pick out some of your favorite charms and attach small jump rings to all of them and the trays with pliers. 


And now the fun...Assembling!!!


Just screw off the ball on the end of this antique brass bangle bracelet and slip on all the pieces and screw the ball back on to complete for Halloween or maybe Day of the Dead (Día De Los Muertos).  Pretty, right???

Change and personalize your bangle anytime with the season, holiday, occasion,  or your mood with a switch of a new charms or maybe make new trays!

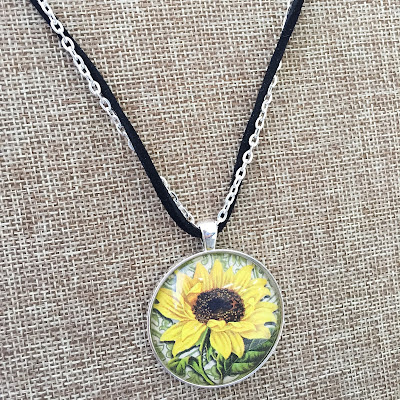
Or add this spooky tray to a faux leather necklace and be stylish for Howloween!


Voila! There you have some spooktacular jewelry pieces to accessorize for the season or any day! I hope I've inspired you to check out our images and charms and see what you can make! 

Be sure to check out the new and improved October Kit-of-the-Month that are back this month and get started early on a few custom gifts for the holidays or upcoming special occasions. The possibilities are truly endless with these amazing Craft Fantastic products! Leave us a comment and tell us what you think or what your making and share with us. Thanks for stopping by!


Kim Klinkovsky @mykraftkloset


Supplies Used:
SLIDE BANGLE antique brass
Orange Copic Marker (alcohol marker)

Saturday, March 3, 2018

Rock Paper Scissors Projects

Hi everybody! Kim here from My Kraft Kloset sharing these beautiful silver scissor charm projects that are sure to please any crafter with these stunning products from Craft Fantastic. They are a wonderful mix of vintage and modern that would make great gifts for any special occasion you wanted to personalize with monograms from paper images, charms, faux leather and more. 


If you were lucky enough to get February's Kit-of-the-Month, congratulations, because that kit included a few of the pieces I used for these projects.  But don't fret if you didn't, click on these links to get all the supplies you need to make the projects above and several more: Silver Scissors Charms, V Connector, Small Jump Rings, Pinch Bails, Glaze & Glue, Faux Leather Necklaces, Key Ring, Large Jump Rings, and a Swirl Toggle.

To create the "rock" part of our project, I added just 1-2 drops of Glaze & Glue into the center of the scissors where there is a small open circle and placed a small sparkly blue gemstone (purchased at a local craft store), into the glue to secure it in place. Attach the scissors to a special key ring or add it to a 3-ring or spiral planner and personalize it with monograms for a lovely planner chain or bookmark. As shown above.


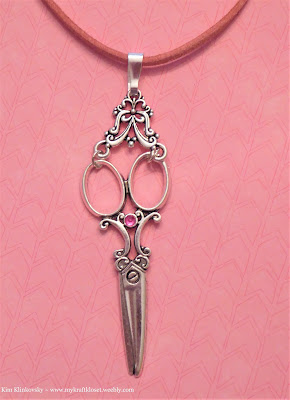
For my next project (shown above) I created a vintage necklace with a pink gemstone adhered with Glaze & Glue, attached a V Connector with small jump rings, added a pinch bail and slipped the pendant through a black faux necklace. And it's so simple, yet stunning. Don't you think? It's one of my favorite pieces, but I say that about all of them. (lol)

Here is another look at our stunning "scissors" on black faux leather for a vintage look and pink faux leather for a more modern look to mix and match your outfits. 


Voila! There you have several unique necklaces, planner chains, or key chains for special gifts or keep a few for yourself with just a few supplies.  The possibilities are truly endless! Thanks for stopping by!

Kim Klinkovsky @mykraftkloset

Wednesday, June 15, 2016

Faux Leather Necklace 5 Ways!


I love the versatility of the Craft Fantastic components! I can dismantle one piece intended to be worn a certain way and completely transform it into something spectacular by reconfiguring and adding other products from the line. My designs can be as simple or complex as I want to make them. This creative freedom gives me LOTS of design options.  

Today I'm working with the Faux Leather Necklace. Yesterday, in a flash of inspiration, I was hit with ideas for 5 different ways to wear this fabulous piece! Some are easy and some are a little more involved, but each results in something fun and unexpected!


I'll start with the simplest project. I've noticed online that many stylish folks are sporting necklaces that utilize more than one type and texture of neckwear, frequently pairing a leather cord with a metal chain and sometimes even adding a sheer ribbon. Here I've cut a 24" Rolo Chain to the size of the Faux Leather Necklace and rearranged my jump rings to finish it as one piece. Very easy to do, but that added metal detail really elevates this simple pendant into a fashionable accessory.  


This next piece requires no additional components. Instead, I've opted to attach it to my tray using the same technique we use with the Faux Leather Bracelets. I pinch the Faux Leather necklace in half and push it through the top loop of the tray. Then I string the loose ends of my necklace through the loop of the leather cord to create a knot. A simply change in how the tray is attached creates a modern, youthful piece. Find my Faux Leather Bracelet tutorial with step by step photos and instructions HERE


Here is a variation of the previous necklace. This time I've attached two Faux Leather Necklaces creating a double cord on each side of the necklace. This gives the necklace a more substantial feel and balances the three link trays pictured.  


Here, I've removed all of the hardware from a Faux Leather Necklace and added two Charm Bracelets to create a long, dramatic necklace. This piece is perfect to wear on it's own, or layer with shorter pieces for a casual, carefree style. 


I'll end with the piece de resistance of my Faux Leather Necklace projects. Here I braided 3 Faux Leather Necklaces and a Rolo Chain together, again mixing my textures and materials. I attached two Charm Bracelets to create another long, dramatic piece and added some of our newest trays for whimsical interest. I LOVE this look! 


I know I say this every time, but these were truly fun to make! The finished pieces look completely different from the original Faux Leather Necklaces and the projects are thoughtful and unique. I'm sure there are many more ways to transform these simple necklaces. Please share your design ideas with me at DearCrafty@CraftFantastic.com. I would LOVE to see what you're working on!

Don't miss a post! Subscribe to this blog by clicking the link in the sidebar and I'll keep you up to date on all of my latest projects and tutorials! Sign up for our NEWSLETTER for specials, freebies and secret sales! Follow Craft Fantastic on FACEBOOK to see LOTS of new product peeks, behind the scenes pics and design ideas!

See you soon with something NEW and CRAFTY!

Wednesday, March 23, 2016

Braided Double Wrap Bracelet!


I am flipping out over these new Faux Leather Necklaces! So much so that I can't wait to share my latest project with you. I've simply removed the hardware, braided three cords together added new hardware and created a ridiculously fun Double Wrap Bracelet! 

What You'll Need

Craft Fantastic Faux Leather Necklaces - You'll need 3 in whatever color combo your heart desires. Or use 3 cords in one color for a cleaner look.


It's crazy to think that just a few simple supplies will yield a beautiful bracelet in about 15 minutes.


Using pliers remove the jump rings and hardware from each end of the Faux Leather Necklaces.


String a small jump ring through the loops on one end of the necklaces. Add a lobster clasp before closing the jump ring.


I used the lobster clasps that we carry in the online store. They are a little larger than the clasps I removed, but I think the large size makes them easier to open and close on a bracelet.


Now I'm ready to braid. 


Securely holding the end sporting the lobster clasp between my index finger and middle finger, I lay the black cord over the purple cord so that it sits in the middle of the three cords.


Next, I lay the aqua cord over the black cord so that it sits in the middle of the three cords.


Next, I lay the purple cord over the aqua cord and continue in this manner.


After only a few minutes, my bracelet is really beginning to take shape.


I've reached the end of my braid.


I'll loop all of these ends together with another small jump ring.


I added another small jump ring and affixed one of the shortened extender chains that I originally removed from one of the cords at the beginning of the project. 


Fast, easy, fun!


I've added a mini round charm tray to give my piece even more personality.


WOW! That was fast! A fabulous braided bracelet in about 15 minutes! I think I'll make several of these and hold on to them for upcoming birthday, graduation and hostess gifts. Plus I'll need a few just for me, too :)

Sign up in the sidebar to have new blog posts delivered right to your In Box and never miss a post! Also, follow us on Facebook and/or subscribe to our newsletter to stay up to date on Craft Fantastic happenings, deals, and giveaways! 

See you next week with something new!