Showing posts with label project. Show all posts

Wednesday, June 15, 2016

Faux Leather Necklace 5 Ways!


I love the versatility of the Craft Fantastic components! I can dismantle one piece intended to be worn a certain way and completely transform it into something spectacular by reconfiguring and adding other products from the line. My designs can be as simple or complex as I want to make them. This creative freedom gives me LOTS of design options.  

Today I'm working with the Faux Leather Necklace. Yesterday, in a flash of inspiration, I was hit with ideas for 5 different ways to wear this fabulous piece! Some are easy and some are a little more involved, but each results in something fun and unexpected!


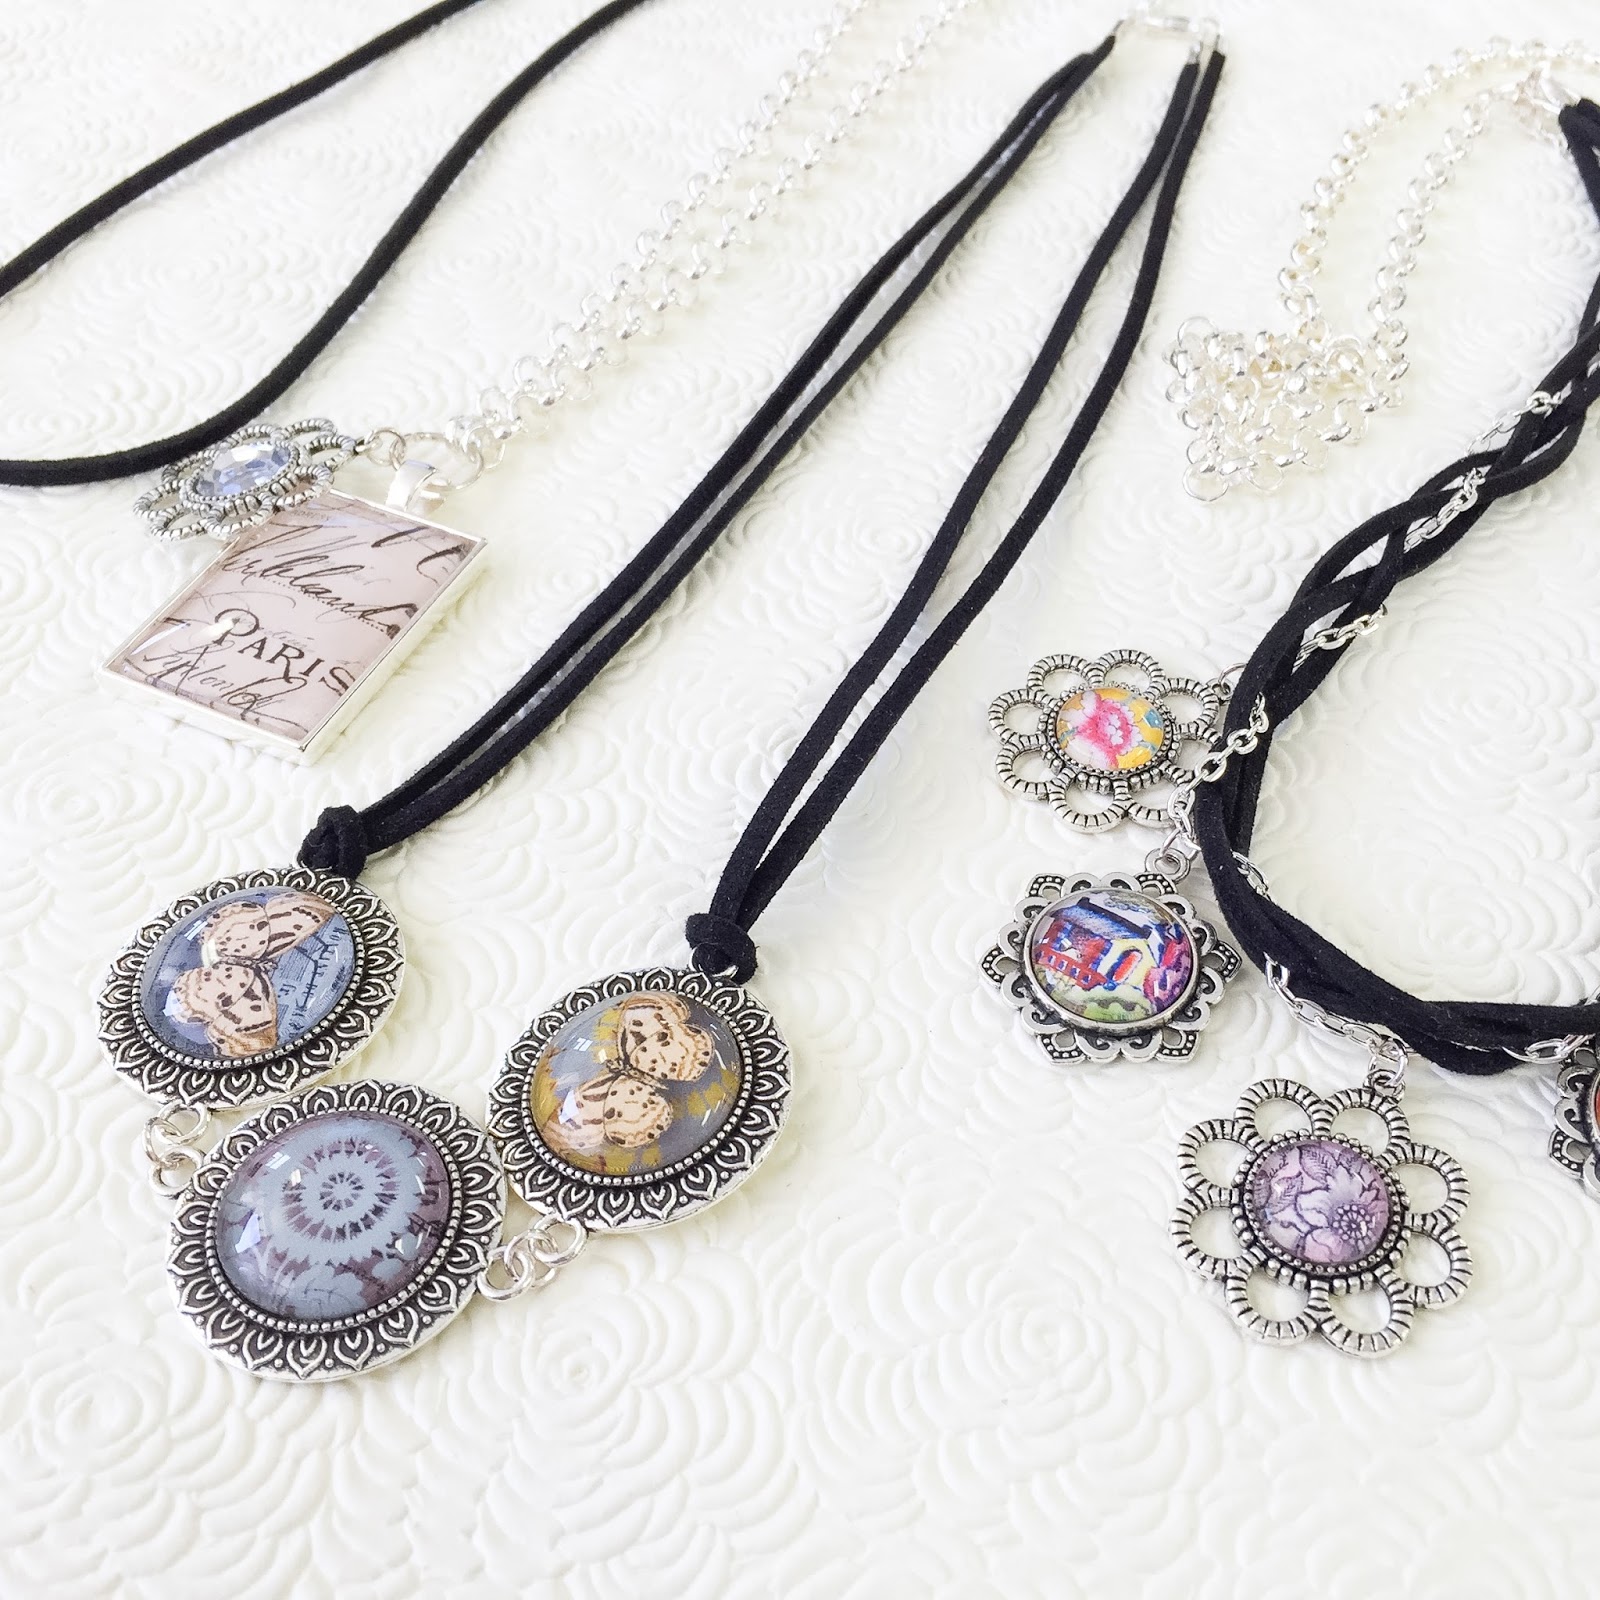
I'll start with the simplest project. I've noticed online that many stylish folks are sporting necklaces that utilize more than one type and texture of neckwear, frequently pairing a leather cord with a metal chain and sometimes even adding a sheer ribbon. Here I've cut a 24" Rolo Chain to the size of the Faux Leather Necklace and rearranged my jump rings to finish it as one piece. Very easy to do, but that added metal detail really elevates this simple pendant into a fashionable accessory.  


This next piece requires no additional components. Instead, I've opted to attach it to my tray using the same technique we use with the Faux Leather Bracelets. I pinch the Faux Leather necklace in half and push it through the top loop of the tray. Then I string the loose ends of my necklace through the loop of the leather cord to create a knot. A simply change in how the tray is attached creates a modern, youthful piece. Find my Faux Leather Bracelet tutorial with step by step photos and instructions HERE. 


Here is a variation of the previous necklace. This time I've attached two Faux Leather Necklaces creating a double cord on each side of the necklace. This gives the necklace a more substantial feel and balances the three link trays pictured.  


Here, I've removed all of the hardware from a Faux Leather Necklace and added two Charm Bracelets to create a long, dramatic necklace. This piece is perfect to wear on it's own, or layer with shorter pieces for a casual, carefree style. 


I'll end with the piece de resistance of my Faux Leather Necklace projects. Here I braided 3 Faux Leather Necklaces and a Rolo Chain together, again mixing my textures and materials. I attached two Charm Bracelets to create another long, dramatic piece and added some of our newest trays for whimsical interest. I LOVE this look! 


I know I say this every time, but these were truly fun to make! The finished pieces look completely different from the original Faux Leather Necklaces and the projects are thoughtful and unique. I'm sure there are many more ways to transform these simple necklaces. Please share your design ideas with me at DearCrafty@CraftFantastic.com. I would LOVE to see what you're working on!

Don't miss a post! Subscribe to this blog by clicking the link in the sidebar and I'll keep you up to date on all of my latest projects and tutorials! Sign up for our NEWSLETTER for specials, freebies and secret sales! Follow Craft Fantastic on FACEBOOK to see LOTS of new product peeks, behind the scenes pics and design ideas!

See you soon with something NEW and CRAFTY!

Wednesday, April 20, 2016

Working with Modular Trays!


Have you been poking around the Craft Fantastic online shop lately? Well, you should because there are LOTS of new items waiting for some crafty attention from talented crafters like you! 

One of my favorites from the new additions are the Modular Trays. They are the most flexible jewelry findings I've ever worked with. The trays are lightweight and low-profile, not adding any bulk to the glass as you're creating your piece. The edge consists of tiny loops that are easily bent to accommodate jump rings and pinch bails, allowing you to link them together or hang small charms and beads from them. My head is swarming with ideas!

Today I'm featuring a fairly simple project using these new trays. I will walk you through the basics, but at the end of the process we'll have a pretty fabby completed piece.

Let's get started...

What You'll Need


Scissors 


Looks pretty similar to the supplies used in other projects, but wait until you see the end results!


The magic is in the loops! This tiny lacy detail allows you to turn them into bracelets, earrings, extravagant necklaces, the list goes on and on. 


I start by adding a jeweler's dot or two to each of my trays. The tiny trays are very petite so a dot cut into quarters does the trick.


I made up my glass pieces earlier using images from the Porcelain Art Image Sheet. I actually used images from two of these sheets so that I could create a symmetrical pattern. Here I've laid out my trays in the configuration of my necklace. I find that it's easier to string the trays together before I add the glass. This allows me to have complete control over which loops I use for the jump rings instead of letting my images dictate the loops used.


I use a pair of pliers to gently bend back one of the loops that will accommodate a small jump ring.


Here I've selected my loops on my large round modular tray and bent them out.


After selected and bending back the loops on each tray, I string them together using small jump rings. 


Next, I add my glass pieces. My necklace is really starting to take shape now.


I remove the clasps and jump rings from each end of my three rolo chains. These jump rings are slightly smaller than the jump rings that I will be using in the rest of my project. It's a small detail, but I like the consistency, so I replace them all. 


I add new small jump rings to the end of each chain.


Then I string one end of each of the three rolo chains onto a large jump ring. I do the same with the other ends of the chains.


Next I attach the large jump ring to one end of my linked modular trays using a small jump ring and do the same on the other end.


I split the center of the backs of the chains using a pair of scissors. This is the point farthest from the modular trays.


I measure out 7" and carefully trim off the excess from the end of each chain. If you want to be more precise, you can count the number of links on each of the chains to ensure they are of equal length. I would normally do this, but today I opted for quickly measuring, cutting, and praying that I got them right. PHEW! Today it worked out, sometimes it doesn't. 


I've trimmed my chains.  I'm almost done! WOO HOO! 


The final step is to add small jump rings to the end of each chain and string them onto a large jump ring. On one end I attach one of the lobster clasps that I removed earlier, with a small jump ring. Now I'm all done and ready to show off the finished piece!  


Pretty swanky! This would make for a lovely Mother's Day gift!


I left the remaining loops standing straight up on each tray and I have to say that I prefer it this way.


If you like a tighter finish, gently bend each loop over the glass, as I've done for this photo. It's really just a matter of preference. 


Did you like today's project? I hope it inspires you to take these fabulous trays for a spin and see where your inner creative tour guide leads you. They're very easy to work with, yet they allow you the freedom to have fun and think outside the (jewelry) box. Share pictures of your designs with me on the Craft Fantastic Facebook page. I love to see what you're working on!

Like this post? Sign up in the side bar to receive blog updates right to your IN BOX and you'll never miss out on the projects and techniques I share each week.

Need even MORE Craft Fantastic news? Sign up for our MONTHLY NEWSLETTER and you'll be part of the VIP crowd. Receive special offers and freebies only available to our newsletter subscribers!

See you next time with something NEW!

Thursday, November 19, 2015

Tiered Butterfly Necklace!

Not so much a tutorial today as a project idea and recipe. Are you needing something a little different for someone special this holiday season? I have just the gift idea for you! A tiered butterfly necklace featuring some of the latest and greatest Craft Fantastic items added to our product line.

This 3-tiered necklace showcases a simple medium oval tray on the first strand, offset by a string of sweet petite flower connectors on the second strand, with a series of beautiful delicate butterfly charms rounding out the trio on the third strand.

This project took me about an hour to complete and there was lots of adjusting lengths and so forth, but I am really please with the results and would be happy (and proud) to give this as a gift.

Let's get started...

What You'll Need 

Craft Fantastic 30" Rolo Chains (3)

Craft Fantastic Medium Oval Tray

Craft Fantastic Medium Oval Glass

Craft Fantastic Flower Connectors (7)

Craft Fantastic Butterfly Charms (5)

Craft Fantastic Large Jump Rings (2)

Craft Fantastic Small Jump Rings - You'll need LOTS of these.

Craft Fantastic Lobster Clasp

Fantastic Glaze & Glue

Fantastic Jeweler's Dot

Pliers

Scissors

Cotton Swabs


Here's a look at my 3-tiered butterfly necklace. It's graceful and elegant; a lovely accessory the recipient would be proud to wear.


Here's a closer look. Lots of details on this one! I am head over heels in love with those Flower Connectors!


This project requires more supplies and time than some of my past blog projects, but if you need something special, this one fits the bill.


I started by selecting an image to correspond with my butterfly charms. 


Then I removed all of the lobster clasps and jump rings from the three rolo necklaces. I cut the first rolo down to 17" to allow for the addition of the 2 large and 2 small jump rings. I used the large jump rings to have adequate room to attach smaller jump rings for each of the 3 strands. I made sure to string my pendant tray on the strand before adding the larger jump rings. Here's my recipe for the first strand...

Lobster Clasp
Small Jump Ring
Large Jump Ring
Small Jump Ring
17" piece of Rolo Chain (with tray strung)
Small Jump Ring
Large Jump Ring 


Next, I cut my second rolo into pieces carefully measuring them out with a ruler. To be more accurate, I recommend counting the links. I had to fiddle with this strand to get the length I wanted and to make it clear the Medium Oval Tray from the first strand. I might do this piece again with a smaller tray. Here's my recipe for the second strand... 

Small Jump Ring 
4 3/4" piece of Rolo Chain
Small Jump Ring
Flower Connector
Small Jump Ring
1 1/8" piece of Rolo Chain
Small Jump Ring
Flower Connector
Small Jump Ring
1 1/8" piece of Rolo Chain
Small Jump Ring
Flower Connector
Small Jump Ring
1 1/8" piece of Rolo Chain
Small Jump Ring
Flower Connector 
Small Jump Ring
1 1/8"piece of Rolo Chain
Small Jump Ring
Flower Connector 
Small Jump Ring
1 1/8"piece of Rolo Chain
Small Jump Ring
Flower Connector
Small Jump Ring
1 1/8"piece of Rolo Chain
Small Jump Ring
Flower Connector 
Small Jump Ring
4 3/4" piece of Rolo Chain
Small Jump Ring 


Remember that the small jump rings from each strand will need to be attached to the two main jump rings for the closure and clasp.


To make the third and final strand, I cut a 24" length of rolo chain, attached small jump rings to each end and then affixed each of my butterfly charms along the bottom also using small jump rings.  Here's the recipe for the third strand...

Small Jump Ring
24" piece of rolo chain
Small Jump Ring
Add Butterfly Charms with Small Jump Rings


The finished piece! Imagine how many tiered necklaces you can create using Craft Fantastic elements. The possibilities are endless! I'm already thinking about my next piece. How about you?

Give this project a try and be sure to share pics on our Craft Fantastic Facebook Page! Also, be sure to follow this blog by email so you never miss a post! I share something new every week, so it's worth checking out. See you next week!