Showing posts with label Fantastic Super Sticky Dots. Show all posts

Saturday, November 17, 2018

One of a Kind Holiday Cards

Hi everybody! Kim here from My Kraft Kloset and the holidays are soon upon us and as a card maker, I'm busy working on holiday cards to mail out soon. So today I thought I'd share a couple of ideas on how to use your Craft Fantastic products in your card making and create special one of a kind holiday cards your friends and family will swoon over!


Let's get started. Gather all your supplies together, like an assembly line to make several cards at once. And to make it easier I used these gorgeous Luxe-Line cards and envelopes set in off-white as the base of my cards. Which are found in the Craft Fantastic shop, but let me tell you, these cards are beautiful, elegant, and very sturdy quality.


Next I die cut blue panels from patterned paper with a scallop stitched die cut that is 1/4" larger than the luxe card base. Then I came across this free vintage holiday sheet music "here" online and printed them on regular copy paper. They already had a vintage ivory color to them, but I inked around the edges to give it a wintery blue look. Cut it out with a stitched die cut and trimmed to fit. Adhered to blue card panel with several super sticky dots.


Added this rustic twine to frame the sheet music panel and adhered with Glaze & Glue. It drys really quick and worked really well. Then I chose these precious Craft Fantastic holiday images, cut them out, and adhered in the corners with Glaze & Glue. 

Adhered blue panel to luxe card base with several super sticky dots. And attached a little floral holiday bundle in each corner with a super sticky dot to complete these special cards. 

Tip: Use a bubble mailer envelope or a small box to mail thick cards.


Voila! There you have special one of a kind holiday cards made with Craft Fantastic products and a few of your card making supplies. I hope I've inspired you to play with your supplies, mix and match, and check out other images to see what else you can make! But these are so precious, I just might frame them and give as gifts or hang them on my wall for all to see!


Also take a peak at the new Kit-of-the-Month to get a lot of projects made for the holidays or any upcoming special occasions at a reasonable price. The possibilities are truly endless with these amazing Craft Fantastic products! Leave us a comment and tell us what your making and share with us. Thanks for stopping by! Happy Holidays!

~Kim Klinkovsky @mykraftkloset


Supplies:
HOLIDAY all jeweler's glass sizes (Christmas images sheet)
FANTASTIC GLAZE & GLUE 2 oz.
FANTASTIC SUPER STICKY DOTS
Free printable holiday sheet music
Gina Marie Designs Stitched and Scallop Die Cuts
Bo Bunny Vintage Double Dot 6x6 patterned paper
twine
Petaloo floral holiday bundle
Ranger Distress Ink-Stormy Sky

Thursday, September 6, 2018

Magnetic Chore Signs

Hi everybody! Kim here from My Kraft Kloset and it’s back to school time around my house. Which means new schedules and back to chores. And recently nobody could remember if the dishes in the dishwasher were clean or dirty, so we had to wash them again. I immediately realized, we needed a sign system and that's what I'm sharing with you today using these amazing Craft Fantastic alphabet images in your kitchen. Yes, I said kitchen.


Let's get started...for today’s project I’m going to show you how to make clean and dirty magnetic signs to place on your dishwasher. But you can turn any of these images into a magnet.  

1.  Using a 1” square punch tool, punch out the letters from the alphabet image sheets or you can use scissors. Here I used black TYPEWRITER KEYS mini & small glass sizes and ALPHABET #1 mini & small glass sizes for the two different words. 


2.  From a craft store, get a magnetic sheet. Or do what I did, and reuse old flat magnets or free ones that come on the new phone books and just cover them up with these alphabet letters. Yep, they still deliver those. (lol) 


3.  Add a Fantastic Super Sticky Dot on the back of each letter and place them in a row along the edge of the magnetic sheet to spell out your word. 

4.  Cut the whole word out from the magnetic sheet with scissors.

5.  Then place a clear piece of packing tape over the whole word to seal it from wear and tear and water. Keeping the tape just on the front. Trim the clear tape to fit the new magnet. Repeat steps for second word. (or you can seal it with any clear sealer or spray from the craft store.) I just used what I had on hand. 


For this tutorial only,  I put both signs on the dishwasher to show you the final results. But when it’s time for chores, we only use one sign on the dishwasher and put the other sign on the refrigerator, as to not confuse anybody, anymore. And now there is no more guessing if the dishes are "clean" or "dirty" and it’s working out perfectly. Voila! Craft Fantastic products to the rescue.

I hope I’ve inspired you to use your crafts in and around your home and to think outside the box about other things you can label too! Let me know what you think, we love comments and new ideas. And be sure to check out our *NEW* Designer Kits-of-the Month and get started on some amazing projects of your own. The possibilities are endless with Craft Fantastic!
Thanks for stopping by! 

Kim Klinkovsky @mykraftkloset

Thursday, June 14, 2018

How To Create a Pin Cushion Ring

Hello everyone and happy Friday eve! Kymona here from Kreative Kymona. I'm here to show you how to create a pin cushion ring using Craft Fantastic Mini Round Rope Rings.

Yesterday was National Sewing Machine Day. To honor the day I wanted to add super cute notions to my sewing stash. When I use pins, I pull them out and lay them down on the side of my machine.  That isn't safe because they can roll off and hide in my carpet. So I decided to create my own pin cushion ring that will sit right on top of my hand.

Let's take a look:


Aren't these rings the cutest?! They are super easy to create as well.

Here's how to create these rings:

1. Chose which ring you want to use. Either antique silver or antique brass.

2. Place one Fantastic Super Sticky Dots in the center of the tray of the ring.

3. Stick a felt ball on top of the sticky dot and press down to secure the ball to the ring.

4. Done!!


They are perfect for young people who sew as well, like my daughter and nieces.

Take another look:


Nice and easy.  You can make so many of them in no time. 

What do you think?  

Will you create your own pin cushion ring? Let me know.

Where to find us:

Just in case you didn't know you can find Craft Fantastic on all of the social media platforms:


Follow so that you don't miss out on any of the creative ideas, deals and new goodies that appear in the store.

Thank you so much for stopping by!!


Saturday, May 26, 2018

Bridal Party Wedding Gifts

Hi everybody! Kim here from My Kraft Kloset sharing with you a few beautiful projects just in time for bridal season for some very special people you've asked to be a part of your wedding party. Show your bridesmaids just how special they are to you with these amazing gifts they will treasure for a lifetime.

Craft Fantastic products allow you to personalize each gift for each bridesmaid using their initials, birthstone, favorite color, a family tree for a sister, cousin or special family member, hearts, a Celtic type knot, roses, butterflies, angel wings and so many Charms to chose from to customize each bangle bracelet.


Let's get started:

1.  Choose from hundreds of Craft Fantastic images, which is always the hardest part, because they are amazing. But for this project I wanted something vintage and traditional and selected the initials of each bridesmaid with these wonderful alphabets: TINY ALPHABET #1 all tiny jeweler's glass sizes and TINY ALPHABET #2 all tiny jeweler's glass sizes. 


2.  Add a few drops of Fantastic Glaze & Glue on the back of a mini glass round and press gently onto an alphabet image for a few minutes until set. Wipe off any excess glue around the edges with a Q-tip.


3.  Once dry, cut around the glass and cut out the alphabet image. 

4.  Adhere a Fantastic Super Sticky Dot to a chosen tray. Remove red sticky dot backing and place glass alphabet into a silver or antique brass tray, as shown below. If your using a tiny or mini bling, like these "birthstones" then there is no need for glue, just adhere the bling directly onto a tray with a super sticky dot. 


5.  As you can see above, some of the tiny trays have circles on each end. One to hang special Charms from with jump rings and the other to attach with another jump ring to slide onto a bangle. Add a tiny bling of color in the center to match their birthstone. 

Add a special note, like this one below, that I typed up on my computer and printed on cardstock to accompany each treasured gift. And don't forget the bride, make one for yourself with a little something old, new, borrowed or blue too!


Bangles are so pretty alone or stack a few of them together and have some fun.


See how lovely these are in antique brass with these Charms: Celtic type knot, tree of life from nature set, heart, dragonfly, butterfly, and a cute little button.


Voila! There you have several uniquely personalized gifts to say "thank you" to those special people who've decided to stand beside you and your groom on your special day. They will love these! I do! Don't you?

Be sure to check out our *NEW* Designer Kits-of-the Month and get started on a few custom gifts for all your upcoming special occasions. And keep a few for yourself too, because they are stunning! The possibilities are truly endless with these super fantastic products! Leave us a comment, we'd love to hear what you think. Thanks for stopping by!

Kim Klinkovsky @mykraftkloset


Supplies Used:
Qtips

Saturday, April 28, 2018

Mothers Day Gift Ideas

Hi everybody! Kim here from My Kraft Kloset sharing a very special bracelet I made using these wonderful products from Craft Fantastic. As Mother’s Day is approaching next month on Sunday, May 13th you still have plenty of time to order this amazing kit and make several handmade gifts for all the special ladies in your life.


Let's get started in 4 easy steps:

1.  I started with a Retro Square Bracelet Kit in antique brass which includes one bracelet and 8 Glass Squares.  


2.  Next choose from hundreds of Craft Fantastic images, which is always the hard part. I love them all! Or choose this *NEW* Sewing mini image sheet, like I used, because it reminded me of those sewing patterns from my childhood.


3.  Add a few drops of Fantastic Glaze & Glue on the back of each Glass Squares and press gently for a few minutes and hold until set. Repeat until you have eight amazing images. Wipe off any excess glue around the edges with a Q-tip.


4.  Once dry, cut around the glass and cut out the images. Adhere a Fantastic Super Sticky Dot to each square space on the bracelet and remove the red backing. I suggest laying out your images in a row to decide where to place each image first, before you add them to the bracelet and complete. 


Voila! There you have a uniquely designed gift for Mother's Day or any upcoming occasions like Graduation, Birthday, Wedding, Baby Mama gift or special gifts for a seamstress, crafter, fashionista or any special day.

Be sure to check out our *NEW* Designer Kits-of-the Month and get started designing special gifts and keep a few for yourself too, because they are stunning! The possibilities are truly endless with these super fantastic products! Thanks for stopping by!

Kim Klinkovsky @mykraftkloset

Thursday, February 15, 2018

Live Love Inspire

Hi everybody! Kim here from My Kraft Kloset sharing this inspiring silver necklace created with a special message that is sure to please anyone with these wonderfully creative products from Craft Fantastic.  A beautiful mix of spring colors that make great gifts for any upcoming occasions you can personalize with a mix of special words, hearts, symbols, monograms and more. 


To make Craft Fantastic glass pieces for projects, follow these 4 basic steps: 

1.  Choose from hundreds of images. Add a few drops of Fantastic Glaze & Glue on the back of the Small Glass you've chosen. Press on image until set. Wipe off any excess glue with a Q-tip.

2.  Cut around the glass and cut out the image.

3.  Adhere glass images and patterned paper with Fantastic Super Sticky Dots.

4. Remove red sticky dot backing and place glass image into the Small Silver Tray.


Look at these sheets of watercolor images and inspiration images. I just love them. So fun right? They are so colorful and inspiring for so many different combinations. Have fun making a whole bunch of these, share with friends, or change them up each day to reveal a new message.


Add a beautiful chain and here's a close up to live, love, and inspire.


Voila! And there you have an inspirational and unique special gift. Or make a bunch for yourself and share a new message each day. Try a Kit of the Month and get everything you need to get you started. The possibilities are truly endless! Thanks for stopping by! 

Kim Klinkovsky @mykraftkloset

Thursday, January 18, 2018

Key To My Heart Projects

Happy New Year everybody! Kim here from My Kraft Kloset sharing a few gift ideas using these wonderful products from Craft Fantastic. Whether you celebrate love all year long, Valentines Day, Galentines (Feb. 13th celebration for or with your gal pals, girlfriends, single friends, daughters, moms or grandma), or any upcoming occasion when you need a special gift, you can make it unique, special, and homemade with Craft Fantastic  products. 


Let's get started by gathering up your supplies. Click on the links to start your shopping list.


You can make any of these projects in a flash with these 4 basic steps: 

1.  Choose from hundreds of images. Add several drops of Fantastic Glaze & Glue on the back of an appropriate sized Glass you've chosen. Press on image until set. Wipe off any excess glue with a Q-tip. 

2.  Cut around the glass and cut out the image. 

3.  Choose from the many trays for the glass image to fit into. 

4.  Adhere glass images to the tray with a Fantastic Super Sticky Dot. 

And see what you can make: 

Glue layers, collage, or enhance images with glitter glue to make it sparkle. Like I did above with our Painting Inspiration "love" image and Collage Words "xoxo" image. But allow glitter glue to dry first or it will stick to the glass and distort your image.


Have you seen our charms??? They are so amazing in silver or brass!!! I LOVE this silver heart key tray and the back looks like a Celtic love symbol too. And the silver heart locket looks vintage, and opens up and has my loves initial "f" and a heart image inside that I cut out and adhered with a sticky dot. Great on a necklace, key chain, or a bangle.


Here is the "Key To My Heart" on a lovely chain:


My next project was created from the Painting Inspiration image sheet and is one of my sisters favorite sentiments and special to my family too. Set with a square glass and placed in this gorgeous silver square tray, a silver locket charm, on a silver chain. And remember, the locket opens for something special to place inside too. Could be a picture or initials and a heart like I did. So simple and yet so beautiful.


This next piece is a gorgeous floral from the Royal Hearts image sheet fit for a queen or a princess with a sparkly crown, set in a silver heart tray, and just a touch of glitter glue to make it sparkle, of course. And ready to place on a chain, key chain, bangle, etc...


For my last project I used our amazing tiny alphabets to create a special necklace with our initials and the medium size numbers/symbols image sheet for the ampersand. Then set images with tiny glass rounds, placed in silver mini round pendant trays on a silver chain. You could also use your kids initials and I just love how it turned out.


Here's another look at what you can make with these stunning products from Craft Fantastic for any occasion, anytime of year. The ideas are endless!


Voila! There you have several unique and special gift ideas for all the special people that hold the key to your heart. Or keep a few for yourself and try a Kit of the Month and get everything you need to get you started. The possibilities are truly endless! Thanks for stopping by!

Kim Klinkovsky @mykraftkloset

Saturday, December 23, 2017

Tag-tastic Packages

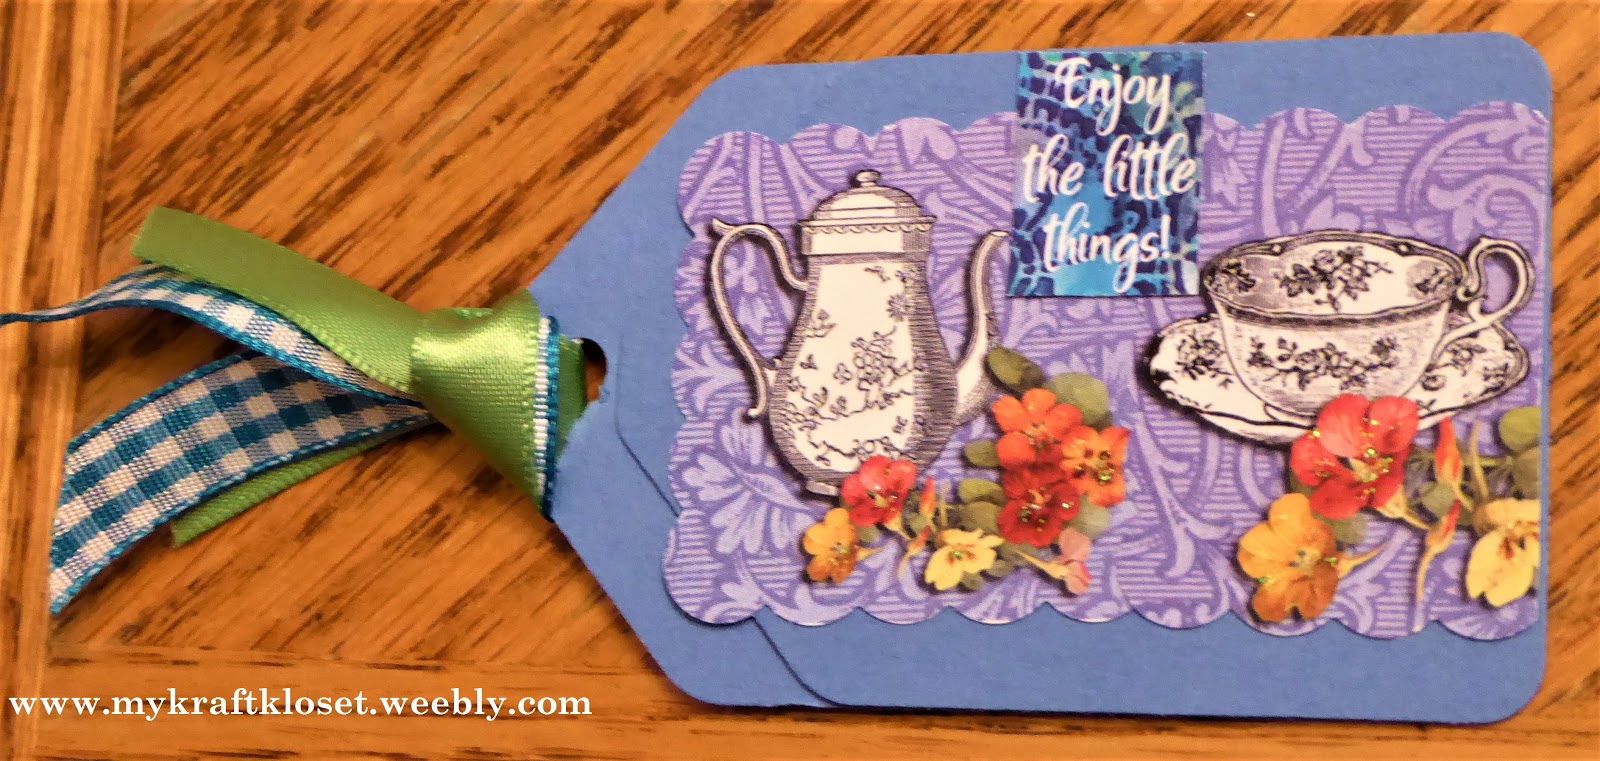
Hi everybody! Kim here from My Kraft Kloset sharing a few tag-tastic ideas to jazz up your holiday packages using your paper crafts and Craft Fantastic products. Still wrapping? No problem. See how easy these tags are to make in a flash.


I used this extra large tag punch to cut out a whole bunch of tags pretty quickly. But you can certainly use whatever you have, like die cuts or cutting machines, or pre-cut tags, or other shapes too! And look at these amazing images from Craft Fantastic...you can make over ten tags just from this one holiday sheet. Just think what you can make all year long for other occasions with their many other images too!


I punched several tags from solid cardstock and this fun holiday plaid patterned paper, layered them, and adhered together with Super Sticky Dots. Or this is a great way to use up your paper scraps too! 


Next I selected a few of my favorite holiday images, cut them out, and adhered to the tags with Super Sticky Dots. 


Then punch a hole in each tag at the top. Add a touch of glitter glue here and there for sparkle and a few snowflakes for some holiday flair. And finish them with some festive holiday ribbon. 


And you can customize your tags, like this one I combined a couple of our newest image sheets Painting Inspiration and Tea Time for somebody who loves tea. And cut each image out with a scallop square punch and adhered together with Super Sticky Dots.  All of these tags came together pretty quickly and you too can make a whole bunch in less than an hour with just a few supplies.


Voila! It's tag-tastic! And now you have several unique and special gift tags to decorate all of your holiday packages in a flash using your paper craft supplies and Craft Fantastic products. The possibilities are endless!


Try a Kit of the Month and get everything you need to get you started on making so many special projects. Thanks for stopping by! Happy Holidays & a Happy New Year!

Kim Klinkovsky
@mykraftkloset

other supplies: Stampin Up cardstock; My Favorite Things Plaid Patterned Paper; American Crafts Ribbon; Crop-a-Dile hole puncher; Marvy Uchida XL tag punch; EK Success Scallop Square Punch; Ranger Diamond Stickles glitter glue; and Creative Impressions Felt Snowflakes.

Saturday, December 9, 2017

Unique Holiday Gifts for Teens + Gamers

Hi everybody! Kim here from My Kraft Kloset sharing a few gift ideas for pre-teens, teenagers, or the gamers on your holiday shopping list. I have four kids and it gets harder and harder every year to find unique gifts for kids. Until I came across their Pokémon cards last week and it struck me, that I could make some really special holiday gifts using Craft Fantastic products.


I know...cutting up their Pokemon cards is blasphemy, (lol) but first I made sure they were duplicate cards, so they wouldn't get mad at me. Or you can print photo copies. See video "here" on that process.

Gather up all your supplies and let's get started...


1. Choose an image. Add several drops of Fantastic Glaze & Glue on the back of a Medium Glass Round. Press onto image until set. Wipe off any excess glue with a Q-tip.


2. Cut around the glass and cut out the image.


3. Next choose a tray. I decided on these fun Medium Round Duo Side Charm Trays in silver, so I could use more than one image. I think the kids will have fun flipping it back and forth to see the different images.

4. Lastly, adhere the glass images to the tray with a Fantastic Super Sticky Dot.


Voila! There you have several unique and special gift ideas or stocking stuffers for girls and boys or the gamers in your life. I had lots of fun making necklaces, key rings, bangles, earrings, and more. I can even see them on my kids backpacks as zipper pulls too! Even my husband hinted he wants a Pokemon key ring now too! So, I know, your kids or gamers will LOVE these!

Try a Kit of the Month and get everything you need to get you started on making so many special projects. The possibilities are truly endless! Thanks for stopping by! Happy Holidays!

Kim Klinkovsky @mykraftkloset