Showing posts with label Numbers. Show all posts

Thursday, January 18, 2018

Key To My Heart Projects

Happy New Year everybody! Kim here from My Kraft Kloset sharing a few gift ideas using these wonderful products from Craft Fantastic. Whether you celebrate love all year long, Valentines Day, Galentines (Feb. 13th celebration for or with your gal pals, girlfriends, single friends, daughters, moms or grandma), or any upcoming occasion when you need a special gift, you can make it unique, special, and homemade with Craft Fantastic  products. 


Let's get started by gathering up your supplies. Click on the links to start your shopping list.


You can make any of these projects in a flash with these 4 basic steps: 

1.  Choose from hundreds of images. Add several drops of Fantastic Glaze & Glue on the back of an appropriate sized Glass you've chosen. Press on image until set. Wipe off any excess glue with a Q-tip. 

2.  Cut around the glass and cut out the image. 

3.  Choose from the many trays for the glass image to fit into. 

4.  Adhere glass images to the tray with a Fantastic Super Sticky Dot. 

And see what you can make: 

Glue layers, collage, or enhance images with glitter glue to make it sparkle. Like I did above with our Painting Inspiration "love" image and Collage Words "xoxo" image. But allow glitter glue to dry first or it will stick to the glass and distort your image.


Have you seen our charms??? They are so amazing in silver or brass!!! I LOVE this silver heart key tray and the back looks like a Celtic love symbol too. And the silver heart locket looks vintage, and opens up and has my loves initial "f" and a heart image inside that I cut out and adhered with a sticky dot. Great on a necklace, key chain, or a bangle.


Here is the "Key To My Heart" on a lovely chain:


My next project was created from the Painting Inspiration image sheet and is one of my sisters favorite sentiments and special to my family too. Set with a square glass and placed in this gorgeous silver square tray, a silver locket charm, on a silver chain. And remember, the locket opens for something special to place inside too. Could be a picture or initials and a heart like I did. So simple and yet so beautiful.


This next piece is a gorgeous floral from the Royal Hearts image sheet fit for a queen or a princess with a sparkly crown, set in a silver heart tray, and just a touch of glitter glue to make it sparkle, of course. And ready to place on a chain, key chain, bangle, etc...


For my last project I used our amazing tiny alphabets to create a special necklace with our initials and the medium size numbers/symbols image sheet for the ampersand. Then set images with tiny glass rounds, placed in silver mini round pendant trays on a silver chain. You could also use your kids initials and I just love how it turned out.


Here's another look at what you can make with these stunning products from Craft Fantastic for any occasion, anytime of year. The ideas are endless!


Voila! There you have several unique and special gift ideas for all the special people that hold the key to your heart. Or keep a few for yourself and try a Kit of the Month and get everything you need to get you started. The possibilities are truly endless! Thanks for stopping by!

Kim Klinkovsky @mykraftkloset

Saturday, August 19, 2017

Masculine Gifts: Dog Tags + Key Rings


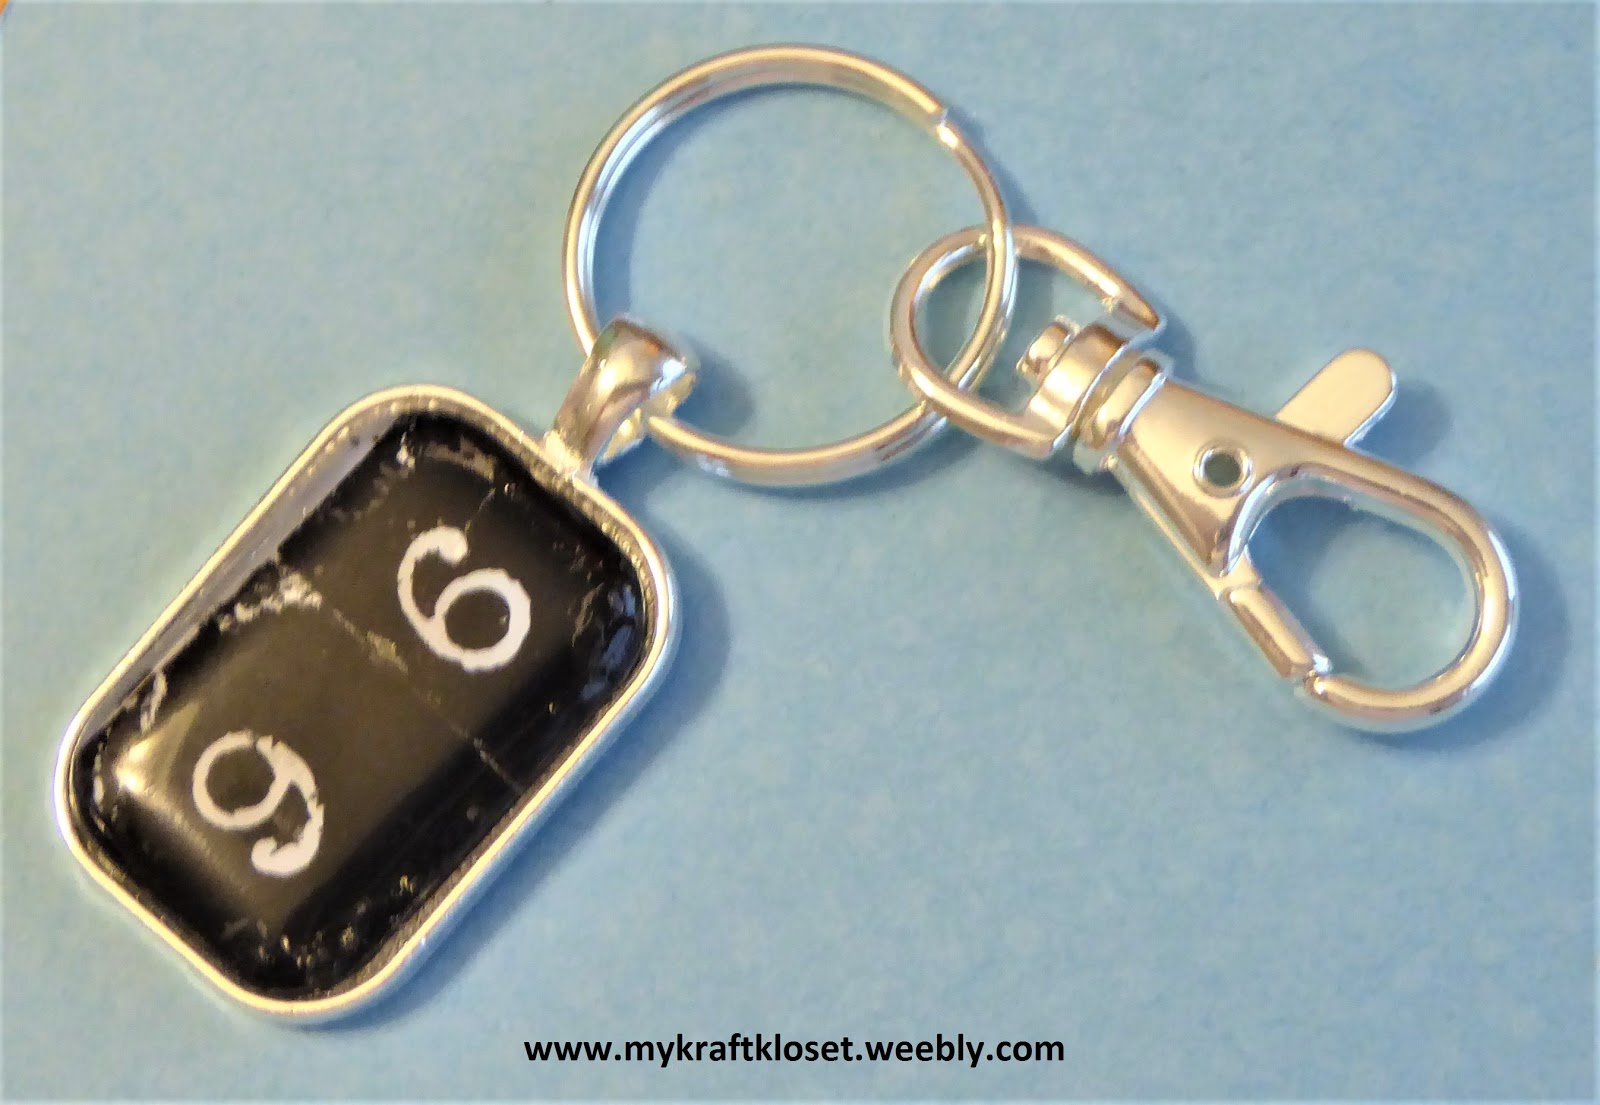
Hi everybody! Kim here from My Kraft Kloset sharing a special gift I made for my husband to commemorate our Wedding Anniversary using these vintage looking products from Craft Fantastic.


Usually it's really hard for me to make anything for my husband, besides just a handmade card and he gets those ALL the time. (lol) But when I came across this fabulous Key Ring Kit and those old time typewriter numbers, I just knew I could make something really cool and special for him.

Let’s get started:


1. Gather up all your supplies from these links: SMALL RECTANGLE PENDANT KIT silver, KEYRINGS W/ CLIPS silver, NUMBERS #2 mini & small glass sizes, Fantastic Glaze & Glue, Fantastic Super Sticky Dots, and Q-tips.


2. Choose your image. I'm using the old time typewriter Numbers. And I used a 1" square punch to punch them out and just trimmed a little bit off the insides to fit inside the tray. And laid them side by side on a scratch piece of white copy paper. (Because they weren't side by side on the image sheet)

3. Next I chose this funky Rectangle Pendant Kit because it reminded me of military dog tags and my husband being a US Army Veteran, I knew he'd love that connection. I added a few Fantastic Glaze & Glue droplets onto the back of a glass rectangle and placed over the images. Move your glass around to position your image, and add a little pressure to get any bubbles out.


4. Pull up around the glass quickly, so it won't stick to the copy paper, and when I did that it created these little tears across the top. Which my first thought was I ruined my project and I'd have to start over. But it turns out they were really cool and rustic. So, I pulled a little around each of the outer edges to create a distressed look. Hold in place for a couple minutes to set and let dry. This created a very unique, rugged, and masculine look.

5. Once set, use a Q-tip to remove any excess glue around the edges of the glass. Cut around the glass and cut out the image. If any of your image comes apart from the glass, just dab a little more glue around the inside edges with a toothpick, press, and hold until it dries.


6. Add a couple Fantastic Super Sticky Dots to the silver rectangle tray, peel off red backing, place glass image into the tray, and press down to secure in place.

7. Put the ring onto the clip (from the kit) and slide the finished "96" image piece onto the ring too. And now it's ready to add keys or even charms. Or take the dog tag off the key ring and add it to a chain and he can wear it as a necklace too! Extra Bonus!


Voila! A personalized handmade key ring that is super special for my husband and your special guy too!

I hope I’ve inspired you to try these wonderful Craft Fantastic products and try a kit or two, because the possibilities are truly endless! Please leave us a comment and let us know what you think, we’d love to hear from you.
Thanks for stopping by!

-Kim Klinkovsky @mykraftkloset

Saturday, May 27, 2017

Graduation Gift Card Holders + Craft Fantastic

Hi everybody! Kim here from My Kraft Kloset sharing a super easy gift card holder with personalized embellishments from Craft Fantastic number image sheets. Perfect for those upcoming Graduations.


Lets get started:


1. Gather up your supplies. Believe it or not, you will need an empty toilet roll holder to recycle for this project. Paper towel holders would work too, just cut in half. Or you can purchase new ones online. Really! lol. Press holder down to flatten, crease the sides with your hands or a bone folder.


2. Choose a patterned paper and cut a 4x6" strip.  Spread Craft Fantastic Glaze & Glue all over the holder, one side at a time, and wrap paper around holder. Repeat on other side. 
Trim any excess paper.


3. Add a brad or an eyelet to one end of the holder so the gift card doesn't fall through the bottom. You can also place a dollar bill or check, a tag, or even a message inside too!

4. Punch or cut out the numbers from the image sheet. Add a jewelers dot to the backs, peel off the red backing, and adhere to the holder.


And Viola! A fantastic gift card holder for all your special occasions, any time of the year, just change the patterned paper, and personalize the sentiment with Craft Fantastic letter and number image sheets. The possibilities are endless! 

Please leave us a comment and let us know what you think, we’d love to hear from you. Congratulations Graduates! Thanks for stopping by!

~Kim Klinkovsky @mykraftkloset

Craft Fantastic Supplies:
Other supplies: Reminiscence graduation paper; 1" square punch; toilet rolls