Showing posts with label Fantastic Jeweler's Dots. Show all posts

Saturday, May 27, 2017

Graduation Gift Card Holders + Craft Fantastic

Hi everybody! Kim here from My Kraft Kloset sharing a super easy gift card holder with personalized embellishments from Craft Fantastic number image sheets. Perfect for those upcoming Graduations.


Lets get started:


1. Gather up your supplies. Believe it or not, you will need an empty toilet roll holder to recycle for this project. Paper towel holders would work too, just cut in half. Or you can purchase new ones online. Really! lol. Press holder down to flatten, crease the sides with your hands or a bone folder.


2. Choose a patterned paper and cut a 4x6" strip.  Spread Craft Fantastic Glaze & Glue all over the holder, one side at a time, and wrap paper around holder. Repeat on other side. 
Trim any excess paper.


3. Add a brad or an eyelet to one end of the holder so the gift card doesn't fall through the bottom. You can also place a dollar bill or check, a tag, or even a message inside too!

4. Punch or cut out the numbers from the image sheet. Add a jewelers dot to the backs, peel off the red backing, and adhere to the holder.


And Viola! A fantastic gift card holder for all your special occasions, any time of the year, just change the patterned paper, and personalize the sentiment with Craft Fantastic letter and number image sheets. The possibilities are endless! 

Please leave us a comment and let us know what you think, we’d love to hear from you. Congratulations Graduates! Thanks for stopping by!

~Kim Klinkovsky @mykraftkloset

Craft Fantastic Supplies:
Other supplies: Reminiscence graduation paper; 1" square punch; toilet rolls

Saturday, April 15, 2017

Vintage By The Sea Necklace + Scraps


Hi everybody! Kim here from My Kraft Kloset  sharing a unique piece of jewelry I made using antique brass Craft Fantastic  products and some beachy vintage scrapbooking supplies. 

With warm weather approaching, who is ready to head to the beach? I know I am. So today I’ll show you how the beach inspired me to make this one-of-a-kind handmade necklace with just a few supplies and scraps. 

 Let’s get started: 

1.  Choose your image. I found a small sample picture from the cover page of this beachy paper collection    (as shown above with a white arrow).  I placed the square glass over the image and it appeared to be too small to fill the whole surface of the glass. So, I cut out the image to layer it with a coordinating piece of gingham patterned paper from the same collection. Surprise! Another art collage.  Look around, use what you have, be creative, and use your scraps too! One woman’s trash is another woman’s treasure.

2.  Add a few Craft Fantastic Glaze & Glue droplets onto the back of the tiny sample image and adhere to a piece of gingham patterned paper. Let dry for a minute.  

3.  Then add several Craft Fantastic Glaze & Glue droplets onto the back of a glass square and glue together. Move your glass around, add a little pressure to get any bubbles out, and make sure the surface is completely covered. Hold in place for a couple minutes to set. Let dry.
4.  Once dry, use a Q-tip to remove any excess glue around the edges of the glass. Cut around the edges of the glass and cut out the image. 
5.  Next I chose this antique brass square tray pendant because it has a vintage look for my image to sit in. Add a couple Fantastic Jewelers Dots to the tray pendant, peel off red backing, place your glass image into the tray, and press down. Add tray to neck chain.


6.  As you can see from my pictures I had a few fantastic charms to choose from, but in the end I selected this lovely antique heart charm. I slipped the charm onto a small jump ring and used my pliers to close and attached directly to a loop on the neck chain. And Voila! Another stunning piece of handmade jewelry that nobody but you and I know it was made from paper scraps.

I hope I’ve inspired you to try these wonderful Craft Fantastic products along with your paper crafting supplies. Because the possibilities are truly endless!  And don’t forget Mother’s Day is May 14th so think about giving this hobby a try and make a gift that is uniquely special and handmade. Please leave us a comment and let us know what you think, we’d love to hear from you. Thanks for stopping by!  

~Kim Klinkovsky @mykraftkloset
 

Craft Fantastic Supplies:
MEDIUM SQUARE PENDANT TRAY antique brass
other supplies: Q-tips; Graphic 45-By the Sea:cover page and gingham patterned paper

Saturday, April 1, 2017

My Garden 12x12 Scrapbook Layout

Happy Spring everybody! Kim here from My Kraft Kloset sharing a unique 12x12 scrapbook layout project I made with Craft Fantastic products and some scrapbooking supplies to show you how versatile these products are on layouts and cards too! And even though more snow is arriving in my area, I’m still thinking about Spring. Which is easy to do with these gorgeous *NEW* butterfly images and some of the flowers that have bloomed in my garden over the years. 

Let’s get started: 
1. I chose a 12x12” spring plaid patterned paper as my base. Cut a piece of green polka dot cardstock 12x6,” border punched the bottom, and adhered to the plaid paper. Then adhered and layered an 8.5x11” piece of turquoise cardstock to the layout.

2.  Next I printed my pictures in color on white cardstock, trimmed each picture leaving a white border around them, and adhered to the turquoise cardstock.

3. Added the title “My Garden” in green colored alpha stickers.


4. To make my own unique handmade embellishments to match my project I choose these new butterfly images. I could have used them flat as is, but I really wanted the magnified dimension you get with a glass round piece. 

 
5. Add some Craft Fantastic Glaze & Glue droplets onto the backs of the round glass and glue them onto the butterfly images. Move your glass around, add a little pressure to get any bubbles out, and make sure the surface is completely covered. Hold in place for a couple minutes. Let dry.


6. Once dry, use a Q-tip to remove any excess glue around the edges of the glass. Cut around the edges of the glass and cut out the butterfly images. 

7. Add a Fantastic Jewelers Dot to the back of each butterfly image and adhere to the layout.  And voila! You have a unique layout with handmade embellishments that will look great in a scrapbook. Or mount on canvas or in a frame for a one of a kind home decor piece. Or give as a special gift, as Mother’s Day is May 14th.


<<Bonus Card>> cut out butterfly image and adhere to card with a jewelers dot.

For more details check out the Craft Fantastic tutorials HERE.

I hope I’ve inspired you to try these fantastic products with your scrapbooking and card making supplies. Because the possibilities are truly endless! Please leave us a comment and let us know what you think, we’d love to hear from you.  Thanks for stopping by! 

~Kim Klinkovsky @mykraftkloset

Craft Fantastic Supplies: 
Q-tips and other supplies: Echo Park-Easter Collection; Gina K.-Blue Lagoon Cardstock; My Minds Eye-Beach Grass Cardstock; American Crafts-White Cardstock; EK Success Border Punch-Arch Scallop; Fancy Pants Designs Alpha Stickers-Baby Mine

Saturday, February 18, 2017

Gifts with Heart from Craft Fantastic

Hi everybody! Kim here sharing my first post for the Craft Fantastic All Stars Design Team!  I am overjoyed to be here creating with these truly fantastic products. I’m mostly a card maker, but when I tried these products a few years ago at a craft show, I was hooked and you will be too! They are fun, easy, and oh so pretty.

For my first project I wanted to show you the versatility of these amazing products and how you can incorporate them into many facets of your crafty life. As a special gift, I designed this beautiful handmade necklace, a charming card, and a matching gift bag tag.

The Necklace:
I started with a super unique necklace that could be for a special Birthday, Anniversary, Wedding, Valentines gifts, or any special occasion. To help you better understand the lingo, Craft Fantastic calls their pendant pieces trays, and you use these as your vehicles to creativity. 

 
1. I chose this bright red heart image with a funky black and white button type background.

2. Next I chose a silver medium fancy heart tray and medium glass heart. The silver pieces are lead and nickel free and oh so gorgeous, I really hated to alter them, but I wanted to do something that hadn’t been done or shown on the blog before.  So, I colored the silver heart trays with a red Copic alcohol marker. I know—gasp! (lol) But it turned out stunning, with or without the heart image too, don’t you think? 

3. Add several drops of Craft Fantastic Glaze & Glue onto the flat part of the glass heart and place over the image. Too much glue can be cleaned up, but too little won't seal properly to the image. Press a finger over the glass to help distribute the glue, hold in place for about a minute, and then wait 2-3 minutes for it to set. Give the glass a nudge, if it doesn’t move its set.

4. Use a Q-tip to remove any excess glue around the edges of the glass. Trim around the edges of the glass and cut out your image.

5. Place a Fantastic Jewelers Dot in the center of the heart tray, remove the red backing, and place glass heart image into the tray and press down.  It’s a jeweler’s quality dot and super duper strong. For larger trays you’ll want to use more than one dot. For more details, check out the Craft Fantastic tutorial HERE.

6. Add a pinch bail and a small jump ring to the heart tray pendant. Then add a heart charm to the small jump ring, clamp with pliers, and string a necklace chain through the pendant.

The colored pendent will dry very quickly, but go over it a few times to get desired coverage, and if it is still tacky to the touch, you may want to spray it with a clear epoxy sealer.


The Card:
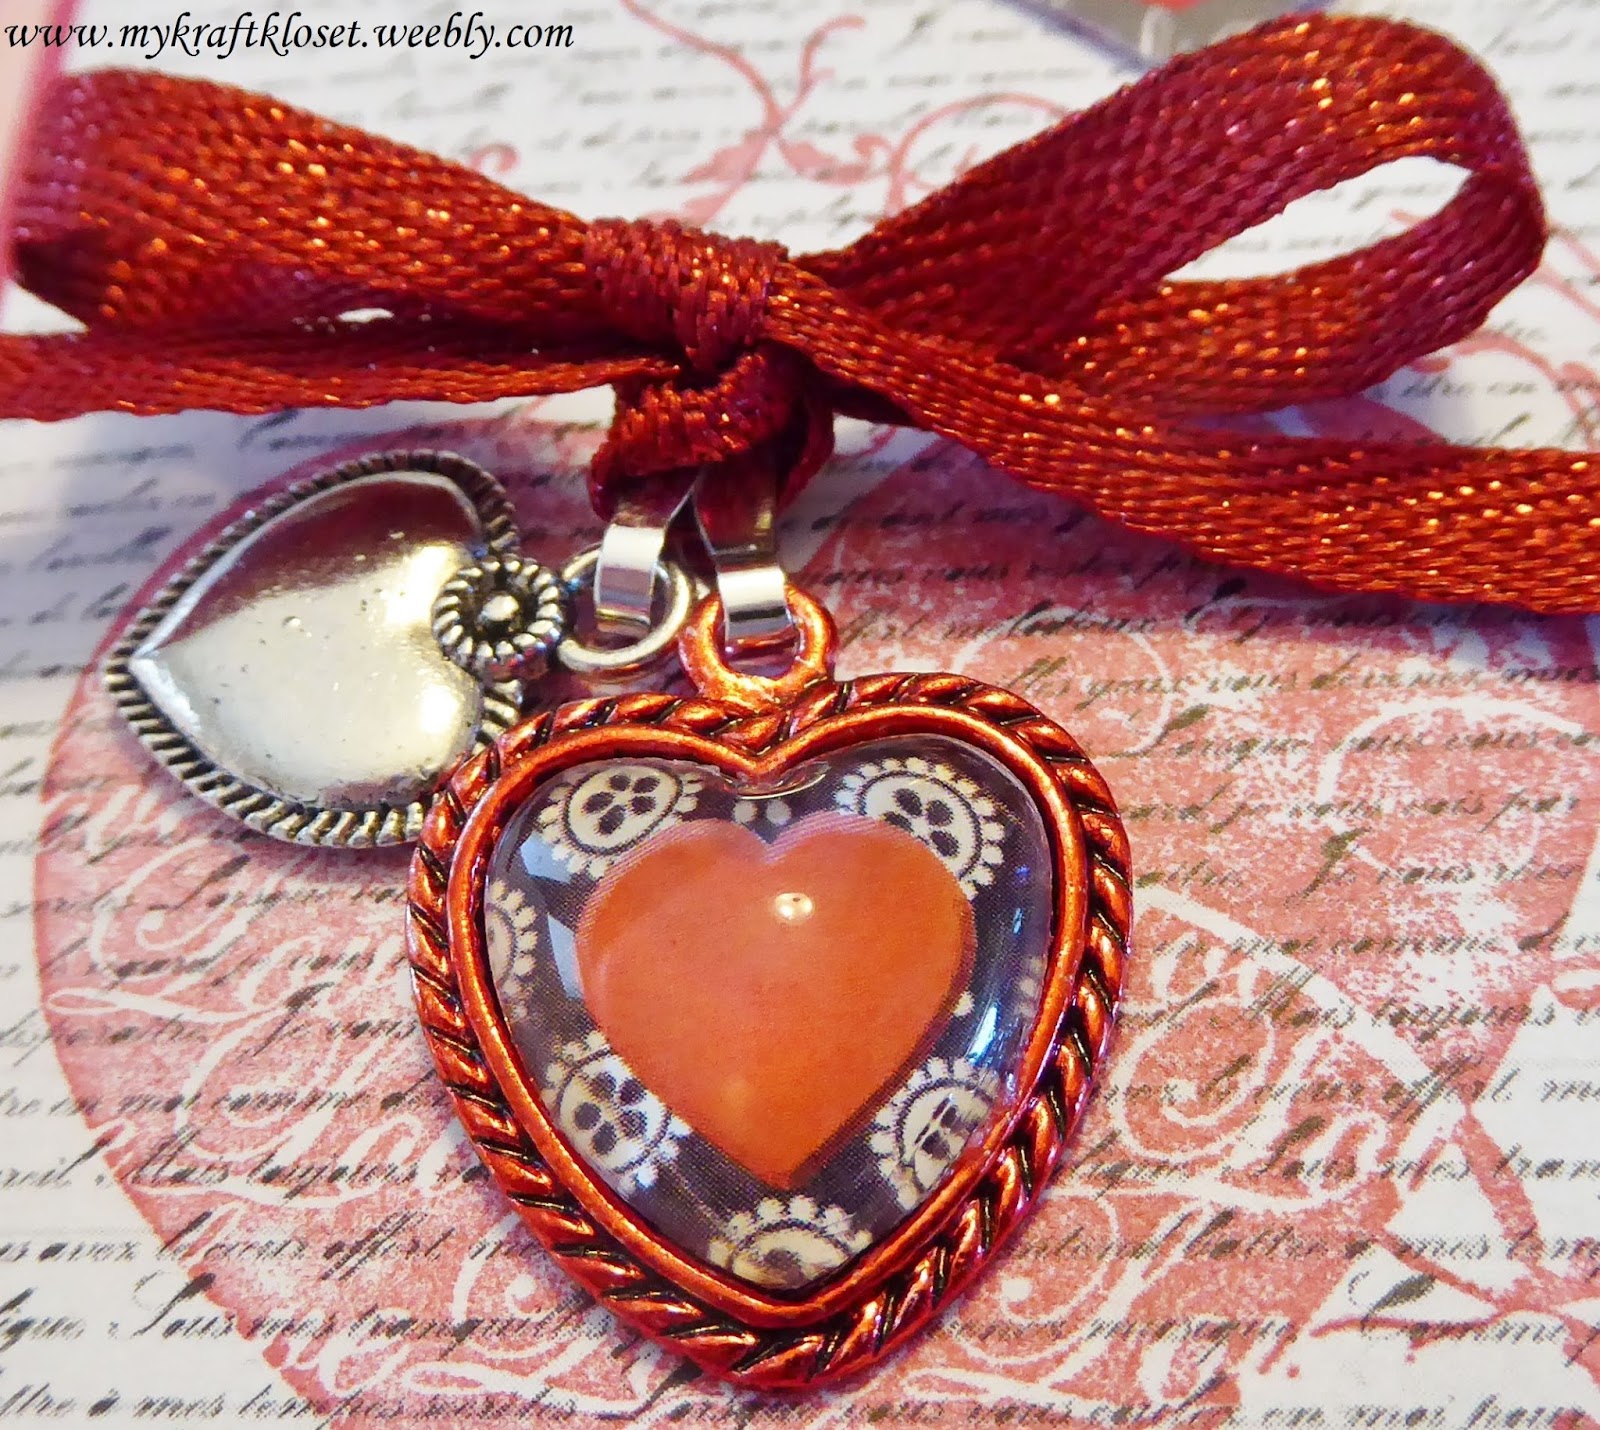
As an avid card maker I believe every gift should have a handmade card to go with it too! So, I added these gorgeous heart charms and a red ribbon to give it some extra love and sparkle too! See step by step card tutorial at: My Kraft Kloset

 For the charms, repeat Steps 1-5 as above to create this heart pendant

6. Add two pinch bails to the heart pendant and the silver heart charm. Then string a glittery red ribbon through the pendant and charm, and tie in a bow.

7. Place a Fantastic Jewelers Dot on the back of the ribbon, the heart tray pendant, and the silver heart charm. Remove the red backing, place them on the card, and press down. The dots are super strong and sticky and will hold these in place really well. If any parts of the dots are visible and causing other things to stick to your card, just add a touch of talc powder to those edges to un-stick it.

Craft Fantastic Supplies: Fantastic Glaze & Glue, 2 pairs-Multi purpose Jewelry Pliers, Fantastic Jewelers Dots, Fantastic Art Images Sheet-Valentines, Medium Fancy Heart Tray, Medium Glass Hearts, Cute Heart Charm, 2-Silver Pinch Bails, Q-tips, Red Cadmium Copic Marker, Cardstock, Pattern Paper, Die Cuts, Ink/Stamps, Stickers, and Creative Impressions Red Glitter Ribbon.

 The Gift Bag Tag:
No present is complete without a gift bag and a matching tag. So, I added a set of heart charms and a sparkly red ribbon here too!

 For the charms, repeat Steps 1-6 as above to create this heart pendant

7. Then add a large silver jump ring through the red glittery ribbon and string it through the braided tag ribbon that came with the bag, and clamp with pliers. Add tissue paper. Voila!

Craft Fantastic Supplies: Fantastic Glaze & Glue, 2 pairs-Multi purpose Jewelry Pliers, Fantastic Jewelers Dots, Fantastic Art Images Sheet-Valentines, Medium Fancy Heart Tray, Medium Glass Hearts, Cute Heart Charm, 2-Silver Pinch Bails, Large Jump Rings, Q-tips, Red Cadmium Copic Marker, Creative Impressions Red Glitter Ribbon, a Gift bag and tissue paper.

And there you have a very unique and special gift made from the heart with a few products, a whole lot of imagination, and at very little cost. And maybe include a little note explaining to your recipient that they could remove the pendants from the card and the gift bag to wear for a total of three pendant gifts. WOW! I’d love that, wouldn’t you?

I hope I’ve inspired you to think outside the box. Lets see what you can create with these fantastic jewelry products and your paper crafting supplies. Because the possibilities are truly endless!
Please let us know what you think, we’d love to hear from you. 
Thanks for stopping by!

~Kim Klinkovsky @mykraftkloset

Wednesday, September 14, 2016

Working with Fantastic Jeweler's Dots


I've received LOTS of questions regarding our Fantastic Jeweler's Dots lately. They're super easy to use, safe for all ages, and really hold up to the wear and tear of daily use. They're made of a high-tack adhesive, which means whatever you use them on will stay put for a VERY VERY VERY long time! BUT there are some steps to ensure that you get the most out of them. That prompted me to write this tutorial/FAQ post featuring our favorite little Craft Fantastic workhorses. They might be small, but they are mighty!  

First, let's look at how they work and the steps necessary to apply them to a  pendant tray. At the bottom of these instructions you'll also find answers to some commonly asked questions regarding the Fantastic Jeweler's Dots, so be sure to scroll all the way down to the bottom to get the most info out of this article.


I've chosen some different sized trays ranging from mini to extra large to demonstrate how best to position them in the trays. 


Trays sized medium and smaller will require only one Jeweler's Dot to get the job done. Tiny trays may only require a 1/2 dot. If that's the case, just cut the dot while the dot is still attached to the wax insert. If you pull the dot off the wax insert and try to cut it in half you will end up with a sticky blob attached to your scissors. Trust me on this one. 


Trays sized large and up will require 2 dots due to the larger surface area. Also, the glass pieces sized for these trays are heavier because they are larger. A second dot will ensure that they stay securely in place.


ALWAYS apply the Jeweler's Dot to the tray and burnish it down using your fingernail. This step ensures that the adhesive forms a bond with the tray. If you try to apply the dot to the paper side of the glass and then press the glass into the tray there will be less surface area that comes into contact with the tray and may even leave an air pocket between the glass and tray.  


Here I have applied all of my Jeweler's Dot to my trays taking note of size and being sure to burnish down each dot with my fingernail.


Next I remove just the thin red liner of the dot to expose the adhesive. It is easy to forget to remove this liner and then wonder why the glass fell out. Trust me on this one, too! LOL! 


Here I've removed the second red liner.


I've tried to angle the tray in this picture so that you can see the clear Jeweler's Dots are firmly attached to the tray, only the thin red liners have been removed. I have on occasion become so over zealous when creating a piece that I inadvertently pull the entire dot out of the tray, sticky and all. OOPS! When this happens, I discard the dot. Once it's been handled and exposed to the oils on your skin or to dust, the adhesive quality is compromised. Best to start with a new one. 


Next, I place my glass piece in my tray. This is particularly easy with a square or rectangle tray, but glass rounds can be a bit more challenging. If using a glass round make sure it is positioned in the manner you want. There's not much wiggle room for positioning the glass once it's in the tray. 


Press the glass piece firmly into the tray. It should feel secure right away. There's no need to let it cure or dry. It's ready to wear!  


Just another angle.


Here's my finished pieces. I create LOTS of samples for the online store, social media and to send to local shows. They get knocked around and handled pretty roughly, but I've never had a piece of glass fall out of a tray. Use these steps and I bet you'll have a similar success rate :)  

FREQUENTLY ASKED QUESTIONS...

What happens if the dots get wet?
A. The Fantastic Jeweler's Dots are pretty sturdy and will definitely hold up to perspiration and other mild forms of moisture, HOWEVER, paper in general, is not sturdy and will start to deteriorate when wet. If the paper gets wet it will dissolve and the bond between the dot and the glass will weaken possibly causing the glass piece to fall out.  

Can I stick the glass cab in the tray if the Fantastic Glaze & Glue is still wet or damp? 
A. No. The Glaze & Glue should be completely dry before affixing it to the tray with a Jeweler's Dot because of the same reasons as listed above. If the paper is wet it will start to dissolve and weaken the bond between the dot and the glass. 

Can I re-use the dots?
A. No. The dots are made from a very high-tack adhesive meaning they are very strong. However, if they are handled too much, exposed to dust or oils, they will lose their tackiness. Once a dot has been placed in a tray, it cannot be scraped out and used again. 

What if I absolutely hate the way my jewelry piece turned out? Do I have to throw everything away and start over?
A. NO! Never throw a Craft Fantastic project away. If you have already affixed the glass cab into the tray, gently pry the tray out with a craft knife. Continue to scrape the tray until you have completely removed the Jeweler's Dot. Soak the piece of glass for a few minutes in very hot/boiling water. When it's cooled enough to touch, use your thumbnail to scrape the softened glue and image away from the glass. Continue to scrape until the glass bead is completely clean and ready to use again. Then take that piece of glass and tray and create something wonderful! 

Thanks for tuning in today! Please feel free to email me at DearCrafty@CraftFantastic.com with questions. I'm happy to help! Also, subscribe to this blog in the sidebar and never miss a post. And feel free to follow us on FACEBOOK and subscribe to our monthly NEWSLETTER for giveaways, secret sales and new product peeks!