Saturday, June 10, 2017

Charming Butterfly Bliss + Gifts

Hi everybody! Kim here from My Kraft Kloset sharing a beautifully personalized bracelet I made for my daughter's birthday using these gorgeous *NEW* butterfly images from Craft Fantastic.


 Let’s get started:


1.  Gather up all your supplies from these links: Faux Leather Bracelet Kit,  Cute Heart Charm and Wing Charm, Bright Butterflies image sheet, Fantastic Glaze & Glue, Q-tips, Fantastic Super Sticky Dots, and Multi Purpose Jewelry Pliers.


 2.  Choose your image. That's the hardest part with these gorgeous *NEW* butterfly images. So many colorful and detailed butterflies to choose from. Then I added these tiny "20" number stickers from my sticker stash (for my daughters birth date) and placed directly onto the butterfly image.

3.  Next add several Fantastic Glaze & Glue droplets onto the back of a glass circle (from the kit) and place onto the butterfly image. Move your glass around to position your image, and add a little pressure to get any bubbles out. Hold in place for a couple minutes to set and let dry.


 4.  Once set, use a Q-tip to remove any excess glue around the edges of the glass. Cut around the glass and cut out the image.  Place a Fantastic Super Sticky Dot to the silver round link tray (from the kit), peel off red backing, place glass into the tray, and press down to secure in place.

5.  Unhook the bracelet (from the kit), so you have two separate faux leather strap pieces. One at a time, push each strap through the side holes on the silver tray piece to create a loop.
(as shown above)


6.  Take the other end of the strap (the chain or lobster clasp ends) and insert through the loop, and pull tight. Repeat for other side. When finished it will look like the picture below.


Here is a close up. Gorgeous, isn't it? And the faux leather comes in assorted colors or all black kits. 


7.  As shown below: On the left side of the bracelet, where the chain meets the strap, use the pliers to open the first small silver loop from the chain (which is already part of the strap). Add the silver heart charm and close with pliers. On the right side of the bracelet, there is another small silver loop that is also part of the strap, just below the lobster clasp. Open the loop with pliers, add the silver angel wing charm, and close with pliers.


Voila! Another charming handmade jewelry piece that is super special for our daughter's birthday! I hope I’ve inspired you to try these wonderful Craft Fantastic products and try a kit, because the possibilities are truly endless!  

Please leave us a comment and let us know what you think, we’d love to hear from you. Thanks for stopping by!

~Kim Klinkovsky @mykraftkloset

Tuesday, June 6, 2017

Once Upon A Time Altoid Tin

Hi it's Liz from Junque Drawer Designs with a project I did for a Facebook group I belong to called Art Across The Miles, an international mail art swap group.  I had never altered an altoid tin before and I had fun doing this swap incorporating Craft Fantastic products!


I had an awesome fairytale collage sheet so I decided to theme my tin around a few fairytale characters.  My swap partner would receive the altered tin plus a special pendant incorporating the fairytale theme.


I then picked out images from the sheet to decorate the inside using assorted charms and decorative bling I had from my craft stash.


I chose the Silver Elegant Tray for the Cinderella image which I thought worked well with the fairytale theme.  I used a silver Pinch Bail to affix the tray onto a Silver 30" Rolo Chain.


I then packaged up my altered altoid tin to my swap partner and hoped that she would love it !


The Pendant was placed in the tin as an extra surprise!  I also included in the package to my partner some Craft Fantastic goodies so she can make something of her own.  I can't wait to see what she may make!

Craft Fantastic products used for the pendant are:

Silver Elegant Tray
Extra Large Glass Round
30" Silver Rolo Chain
Silver Pinch Bail
Super /Sticky Dots
Craft Fantastic Glaze and Glue

Saturday, June 3, 2017

Watercolor Cards with Glass Trays

Hello everyone!!  Kymona here from Kreative Kymona to share a couple of watercolor cards with glass trays attached that could be used as charms or necklaces in the future.

Watercolor is my favorite medium and I wanted to demonstrate that by creating a card to go with Craft Fantastic Mini Round Pendent Trays.   I used the images from May's Watercolor Kit to create my charms.  Those images from that kit are totally awesome and my favorite. I can see me using them over and over again to create wonderful pieces. 

Take a look at what I create:


Breathtaking right!!! All of the aspects of the card makes me smile.  The charm balances out the sentiment and the watercolor gives the card life!!

I couldn't just make one, check out the rest of my cards:


I'm so tickled by these cards!!  They were fun to make and I hope the recipients love them as well!!

Here's how I created the charms:

1. I selected the images from the Watercolor Inspiration image sheet. 
2. I added glue to the Mini Round Glass and place it on top of the image.
3. Then I placed a super sticky dot in each of the Mini Round Pendant Trays.
4. Once the glued dried, I wiped away any excess and cut around the glass to get rid of the extra paper.
5. Then I placed the glass in the tray!

For the two cards that have an extra charm, here is how I added those:

1. I two multi purpose jewelry pliers and attached the charms to the glass trays with a small jump ring

For the watercolor panel, I simple wet the front with some water and added the different watercolor to the panel.  The colors spread and dried to what you see above.  I trimmed each panel and adhered them to the black card base. 

I used sliver elastic string to attach the charm to the card.  The charm isn't attached to the card front, it will slide on the elastic when you move it. 

The recipient can take the charm off of the card and use it for a necklace or a charm for a planner.

So what do you think?  Aren't these watercolor cards with glass trays beautiful? Please let me know below.  I would love to hear from you!!

Just in case you didn't know you can find Craft Fantastic on all of the social media platforms:

Facebook  ~  Instagram  ~  Pinterest  ~  Twitter  ~  Blog


Follow so that you don't miss out on any of the creative ideas, deals and new goodies that appear in the store.

Thank you so much for stopping by!!

Wednesday, May 31, 2017

June Kit Instructions

The NEW June Kit-of-the-Month is out and I must admit, it's my favorite so far! 

It's BACK-TO-BASICS this month featuring some of our most popular classic pieces. We've combined these elegant trays with a few of our newest and most interesting findings to create FIVE gorgeous projects that are certain to dazzle you or anyone you decide to share them with! We've also included our Woodblock Butterflies and Collage Words Art Image Sheets! Words and short phrases can add so much meaning to a piece allowing it to be completely customized for the recipient.  

Let's put these gorgeous pieces together...

Assembly Instructions

Thanks for ordering the Craft Fantastic JUNE KIT! This kit is available for a limited time. 
Click HERE to order yours today!  

Here's a few links to help you complete the projects followed by a few 
assembly instructions for each piece:


  1. Select images and add them to the glass cabochons using Fantastic Glaze & Glue. This piece contains a Duo-Side Tray so there will be two medium round pieces of glass for this tray. 
  2. Thread the key ring onto the key clip.
  3. Thread the bail of the Large Square Pendant Tray onto the key ring.
  4. Attach the Medium Round Duo-Side Charm Tray to the ring using a small jump ring.
  5. Attach the Dragonfly Disc Charm to the ring using a small jump ring.
  6. Add a Fantastic Sticky Dot to each tray. Remove the red backing to expose the adhesive. 
  7. Firmly press the appropriate cabochon into each tray. 


  1. Select an image and add it to the glass cabochon using Fantastic Glaze & Glue.   
  2. Remove the clasp and small jump ring from the 24" Rolo Chain.
  3. Attach the flower piece of the toggle to one end of the chain using a small jump ring. Attach the bar piece of the toggle to the other end of the chain also using a small jump ring.
  4. Attach a large jump ring to the bail of the Long Rectangle Tray.
  5. Connect the large jump ring on the tray to the flower piece of the toggle using a pinch bail.
  6. Add two Fantastic Sticky Dots to the Long Rectangle Tray. Remove the red backing to expose the adhesive. 
  7. Firmly press the appropriate cabochon into the tray. 


  1. Select images and add them to the glass cabochons using Fantastic Glaze & Glue.  
  2. Using scissors, cut the center of the 24" Rolo chain.
  3. Attach a small jump ring to each end of the Rolo chain.
  4. Attach the Medium Round Pendant Tray to the Rolo Chain using a large jump ring. 
  5. Attach the Small Square Pendant Tray to the bail of the Medium Round Pendant Tray using two large jump rings and one small jump ring. (refer to photo)
  6. Attach the Mini Square Pendant Tray to the bail of the Small Square Pendant Tray using two large jump rings and one small jump ring. (refer to photo)
  7. Add a Fantastic Sticky Dot to each tray. Remove the red backing to expose the adhesive. 
  8. Firmly press the appropriate cabochon into each tray. 

  1. Select images and add them to the glass cabochons using Fantastic Glaze & Glue. 
  2. Add a Fantastic Sticky Dot to each tray. Remove the red backing to expose the adhesive. 
  3. Firmly press the appropriate cabochon into each tray. 

  1. String Dragonfly Charm onto each Long Earwire.
  2. Wear and enjoy all the compliments!
We hope you have fun putting together the JUNE Kit-of-the-Month! Be sure to follow Craft Fantasic on FACEBOOK and INSTAGRAM! Also, sign up for the CRAFT FANTASTIC NEWSLETTER for the latest and greatest sales, giveaways and product peeks! 

See you soon with more crafty stuff!

Tuesday, May 30, 2017

Relax With Craft Fantastic

Hi All! Today on the Craft Fantastic Blog I am sharing a card with you using the Open Daisy Kit, Alphabet #1, Fantastic Glaze & Glue, and Fantastic Super Sticky Dots.

I am using a pink card base with a piece of pattern paper. Next I stamped the girl on watercolor paper and colored using Zig watercolor markers. Next I cut out the stamped image.

I then did remove the extra piece on the open daisy pieces that you would use to add on a jump ring. Next I added the open daisy charms, jewelers glass and letters from Alphabet #1, glaze and glue and fantastic super sticky dots to create the sentiment for the card. 

For the last step, attach the pieces to the card and there you have an adorable summer card, RELAX!

 
So, what do you think? Please leave me a comment and let me know how you like this project!
 
Hugs,
 
Judy

Saturday, May 27, 2017

Graduation Gift Card Holders + Craft Fantastic

Hi everybody! Kim here from My Kraft Kloset sharing a super easy gift card holder with personalized embellishments from Craft Fantastic number image sheets. Perfect for those upcoming Graduations.


Lets get started:


1. Gather up your supplies. Believe it or not, you will need an empty toilet roll holder to recycle for this project. Paper towel holders would work too, just cut in half. Or you can purchase new ones online. Really! lol. Press holder down to flatten, crease the sides with your hands or a bone folder.


2. Choose a patterned paper and cut a 4x6" strip.  Spread Craft Fantastic Glaze & Glue all over the holder, one side at a time, and wrap paper around holder. Repeat on other side. 
Trim any excess paper.


3. Add a brad or an eyelet to one end of the holder so the gift card doesn't fall through the bottom. You can also place a dollar bill or check, a tag, or even a message inside too!

4. Punch or cut out the numbers from the image sheet. Add a jewelers dot to the backs, peel off the red backing, and adhere to the holder.


And Viola! A fantastic gift card holder for all your special occasions, any time of the year, just change the patterned paper, and personalize the sentiment with Craft Fantastic letter and number image sheets. The possibilities are endless! 

Please leave us a comment and let us know what you think, we’d love to hear from you. Congratulations Graduates! Thanks for stopping by!

~Kim Klinkovsky @mykraftkloset

Craft Fantastic Supplies:
Other supplies: Reminiscence graduation paper; 1" square punch; toilet rolls

Tuesday, May 23, 2017

"Paris is always a good idea" Audrey Hepburn

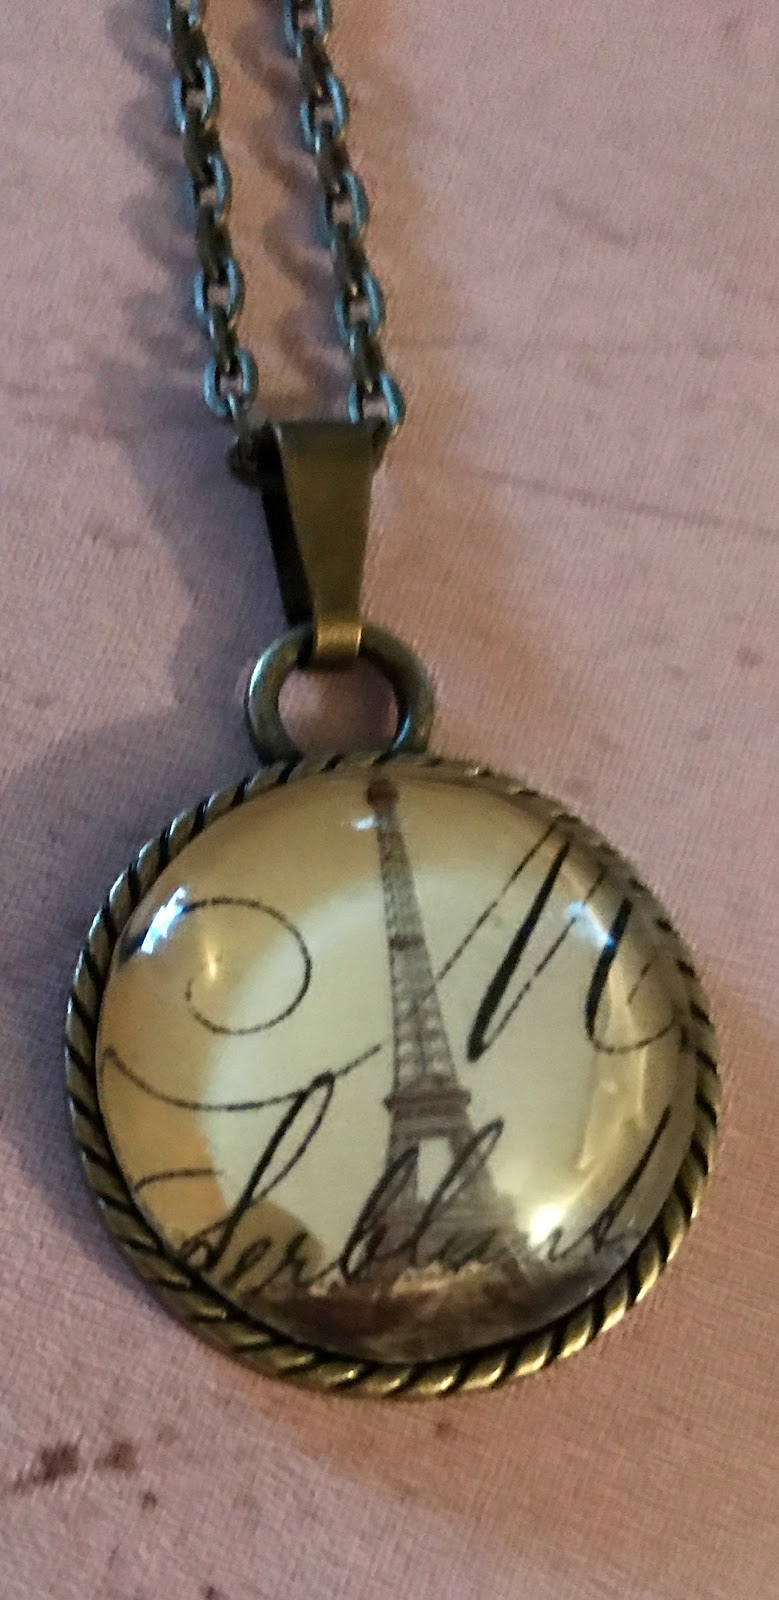
Hi it's Liz from Junque Drawer Designs and today I celebrate the city of love, Paris!  The Paris Image Sheet is one of my all time favorites from Craft Fantastic, and Paris is one of the most popular pendant design I sell at craft shows, especially for teacher gifts. 


I first chose my designs and adhered the jewelers glass with the craft fantastic glaze and glue.  Once dry I then placed them into the trays I had chosen for the specific images.


I decided on using the Antique Brass and the Silver trays along with a key ring and an Oval Rope Ring tray. There are so many possibilities with this image sheet, using entire image or just part of an image as I did with the smaller key ring tray.


Craft Fantastic products used in this project include:

Paris Image Sheet
Small Oval Rope Ring Antique Brass
Key Ring with clip Antique Brass
Medium Square Pendant Tray Silver
Small Square Pendant Tray Brass
Medium Glass Round
Fantastic Super Sticky Dots
Fantastic Glaze and Glue
30" rolo chain silver and antique brass
Medium Glass Squares
Small Glass Square
Small Glass Oval
Swirl Tray Antique Brass
Antique Brass Pinch Bail

Oui, oui, Paris!