Wednesday, September 14, 2016

Working with Fantastic Jeweler's Dots


I've received LOTS of questions regarding our Fantastic Jeweler's Dots lately. They're super easy to use, safe for all ages, and really hold up to the wear and tear of daily use. They're made of a high-tack adhesive, which means whatever you use them on will stay put for a VERY VERY VERY long time! BUT there are some steps to ensure that you get the most out of them. That prompted me to write this tutorial/FAQ post featuring our favorite little Craft Fantastic workhorses. They might be small, but they are mighty!  

First, let's look at how they work and the steps necessary to apply them to a  pendant tray. At the bottom of these instructions you'll also find answers to some commonly asked questions regarding the Fantastic Jeweler's Dots, so be sure to scroll all the way down to the bottom to get the most info out of this article.


I've chosen some different sized trays ranging from mini to extra large to demonstrate how best to position them in the trays. 


Trays sized medium and smaller will require only one Jeweler's Dot to get the job done. Tiny trays may only require a 1/2 dot. If that's the case, just cut the dot while the dot is still attached to the wax insert. If you pull the dot off the wax insert and try to cut it in half you will end up with a sticky blob attached to your scissors. Trust me on this one. 


Trays sized large and up will require 2 dots due to the larger surface area. Also, the glass pieces sized for these trays are heavier because they are larger. A second dot will ensure that they stay securely in place.


ALWAYS apply the Jeweler's Dot to the tray and burnish it down using your fingernail. This step ensures that the adhesive forms a bond with the tray. If you try to apply the dot to the paper side of the glass and then press the glass into the tray there will be less surface area that comes into contact with the tray and may even leave an air pocket between the glass and tray.  


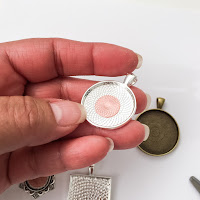
Here I have applied all of my Jeweler's Dot to my trays taking note of size and being sure to burnish down each dot with my fingernail.


Next I remove just the thin red liner of the dot to expose the adhesive. It is easy to forget to remove this liner and then wonder why the glass fell out. Trust me on this one, too! LOL! 


Here I've removed the second red liner.


I've tried to angle the tray in this picture so that you can see the clear Jeweler's Dots are firmly attached to the tray, only the thin red liners have been removed. I have on occasion become so over zealous when creating a piece that I inadvertently pull the entire dot out of the tray, sticky and all. OOPS! When this happens, I discard the dot. Once it's been handled and exposed to the oils on your skin or to dust, the adhesive quality is compromised. Best to start with a new one. 


Next, I place my glass piece in my tray. This is particularly easy with a square or rectangle tray, but glass rounds can be a bit more challenging. If using a glass round make sure it is positioned in the manner you want. There's not much wiggle room for positioning the glass once it's in the tray. 


Press the glass piece firmly into the tray. It should feel secure right away. There's no need to let it cure or dry. It's ready to wear!  


Just another angle.


Here's my finished pieces. I create LOTS of samples for the online store, social media and to send to local shows. They get knocked around and handled pretty roughly, but I've never had a piece of glass fall out of a tray. Use these steps and I bet you'll have a similar success rate :)  

FREQUENTLY ASKED QUESTIONS...

What happens if the dots get wet?
A. The Fantastic Jeweler's Dots are pretty sturdy and will definitely hold up to perspiration and other mild forms of moisture, HOWEVER, paper in general, is not sturdy and will start to deteriorate when wet. If the paper gets wet it will dissolve and the bond between the dot and the glass will weaken possibly causing the glass piece to fall out.  

Can I stick the glass cab in the tray if the Fantastic Glaze & Glue is still wet or damp? 
A. No. The Glaze & Glue should be completely dry before affixing it to the tray with a Jeweler's Dot because of the same reasons as listed above. If the paper is wet it will start to dissolve and weaken the bond between the dot and the glass. 

Can I re-use the dots?
A. No. The dots are made from a very high-tack adhesive meaning they are very strong. However, if they are handled too much, exposed to dust or oils, they will lose their tackiness. Once a dot has been placed in a tray, it cannot be scraped out and used again. 

What if I absolutely hate the way my jewelry piece turned out? Do I have to throw everything away and start over?
A. NO! Never throw a Craft Fantastic project away. If you have already affixed the glass cab into the tray, gently pry the tray out with a craft knife. Continue to scrape the tray until you have completely removed the Jeweler's Dot. Soak the piece of glass for a few minutes in very hot/boiling water. When it's cooled enough to touch, use your thumbnail to scrape the softened glue and image away from the glass. Continue to scrape until the glass bead is completely clean and ready to use again. Then take that piece of glass and tray and create something wonderful! 

Thanks for tuning in today! Please feel free to email me at DearCrafty@CraftFantastic.com with questions. I'm happy to help! Also, subscribe to this blog in the sidebar and never miss a post. And feel free to follow us on FACEBOOK and subscribe to our monthly NEWSLETTER for giveaways, secret sales and new product peeks!

Wednesday, June 15, 2016

Faux Leather Necklace 5 Ways!


I love the versatility of the Craft Fantastic components! I can dismantle one piece intended to be worn a certain way and completely transform it into something spectacular by reconfiguring and adding other products from the line. My designs can be as simple or complex as I want to make them. This creative freedom gives me LOTS of design options.  

Today I'm working with the Faux Leather Necklace. Yesterday, in a flash of inspiration, I was hit with ideas for 5 different ways to wear this fabulous piece! Some are easy and some are a little more involved, but each results in something fun and unexpected!


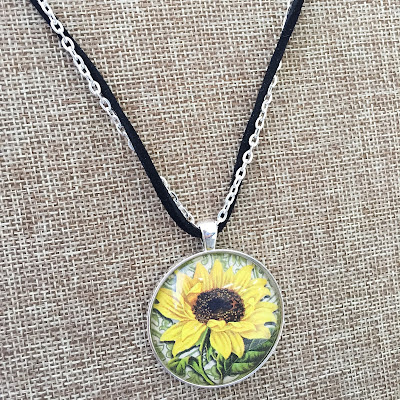
I'll start with the simplest project. I've noticed online that many stylish folks are sporting necklaces that utilize more than one type and texture of neckwear, frequently pairing a leather cord with a metal chain and sometimes even adding a sheer ribbon. Here I've cut a 24" Rolo Chain to the size of the Faux Leather Necklace and rearranged my jump rings to finish it as one piece. Very easy to do, but that added metal detail really elevates this simple pendant into a fashionable accessory.  


This next piece requires no additional components. Instead, I've opted to attach it to my tray using the same technique we use with the Faux Leather Bracelets. I pinch the Faux Leather necklace in half and push it through the top loop of the tray. Then I string the loose ends of my necklace through the loop of the leather cord to create a knot. A simply change in how the tray is attached creates a modern, youthful piece. Find my Faux Leather Bracelet tutorial with step by step photos and instructions HERE


Here is a variation of the previous necklace. This time I've attached two Faux Leather Necklaces creating a double cord on each side of the necklace. This gives the necklace a more substantial feel and balances the three link trays pictured.  


Here, I've removed all of the hardware from a Faux Leather Necklace and added two Charm Bracelets to create a long, dramatic necklace. This piece is perfect to wear on it's own, or layer with shorter pieces for a casual, carefree style. 


I'll end with the piece de resistance of my Faux Leather Necklace projects. Here I braided 3 Faux Leather Necklaces and a Rolo Chain together, again mixing my textures and materials. I attached two Charm Bracelets to create another long, dramatic piece and added some of our newest trays for whimsical interest. I LOVE this look! 


I know I say this every time, but these were truly fun to make! The finished pieces look completely different from the original Faux Leather Necklaces and the projects are thoughtful and unique. I'm sure there are many more ways to transform these simple necklaces. Please share your design ideas with me at DearCrafty@CraftFantastic.com. I would LOVE to see what you're working on!

Don't miss a post! Subscribe to this blog by clicking the link in the sidebar and I'll keep you up to date on all of my latest projects and tutorials! Sign up for our NEWSLETTER for specials, freebies and secret sales! Follow Craft Fantastic on FACEBOOK to see LOTS of new product peeks, behind the scenes pics and design ideas!

See you soon with something NEW and CRAFTY!

Thursday, May 19, 2016

Collage Pendants!


The Craft Fantastic line of Art Image Sheets is glorious in style, color and tone! Anne, the owner extraordinaire, has carefully curated the designs and selected images that complement each other. However, if you need even MORE options, this collage technique will fit the bill!

Last year I shared a blog post featuring the Collage Words Art Image Sheet. The projects were oodles of fun and I meant to create more pieces using this technique, however, the excitement that is Craft Fantastic distracted me and I never got back to it. Recently, Erin, one of our newest Show Team Members started creating samples using layers of our Art Images. The results were so fabulous, that it made me want to share another post with you regarding collage and how to incorporate it into your jewelry pieces. By the way, the wonderful sample at the top of this post is one of Erin's.

Let's get started...

What You'll Need

Craft Fantastic Art Image Sheets - An assortment of your favorites.

Craft Fantastic Glass Cabochons - Whatever sizes and shapes make you happy. 


Super Fine Glitter - Optional

Scissors

Cotton Swabs (not pictured)

Scrap Paper - To work on.


A few meager supplies and I'm ready to go!


I've selected a nice background image, a couple of butterflies and a lovely lady in profile.
 I cut them out using scissors.


I also decide to add a couple of words from the Collage Word Art Image Sheet. I lay them out to get an idea of how I want my piece to look. I use some of the Glaze & Glue to start gluing my smaller images to my background to make sure everything stays in place when I lay my piece of glass on top.


I use a generous amount of Glaze & Glue on the back of my glass cab to ensure that no air bubbles get trapped between my layers and show up later. I sprinkle a bit of super fine glitter on the glue as an after thought.


I lay my glass cab on top and firmly push out the air bubbles as I normally would. I let this set for a few seconds, then wipe away the excess glue with a cotton swab. I let it dry completely before I trim away the paper edges.


I quickly made a slew of these! I used a little bit of glitter on a few and then left the others plain. Erin's beautiful piece is in the middle. 


I hope you enjoyed this week's tutorial! Super easy, but SUPER creative! 

Thanks for joining me. Stay up to date on all of the Craft Fantastic tutorials, product peeks, and giveaways by following this blog via EMAIL (sign up in the side bar), liking Craft Fantastic on FACEBOOK, and subscribing to our monthly NEWSLETTER

See you next week with something new!

Thursday, May 12, 2016

Chunky Bracelet Chain


We sometimes receive requests to carry a chunkier chain. While we love the dramatic look of a bigger chain, we hesitate to add one to our product line. Primarily because our pendant bails on our basic trays would not easily slide on and off. A large jump ring would accommodate the pendants that contain a flat loop, but our beautiful pendant trays with the lovely pendant bails would not work with them. It would be a crime.

However, now that we're carrying these new charm bracelets, it's easy to create a fresh, chunky chain just by stringing them together! Gather round Crafty Friends, this is going to be a quick tutorial! If you blink, you'll miss it! 

Let's get started...

What You'll Need

Craft Fantastic Charm Bracelets (3 or 4) - It depends on the desired length. I wanted something long and stylish for my samples so I opted for 4.

Pliers

Scissors (not pictured) 


As I said, this is going to be a lightening fast tutorial!


Our new Charm Bracelets have an adorable ball dangle at the end, which makes for a lovely detail on the bracelet, but not so much for our chain. I clipped the dangles off easily using a pair of scissors. 


I've removed the dangles from my bracelets and now I'm ready to string them together.


I attach a lobster clasp from one end of a bracelet to the exposed jump ring of another bracelet. I do this with all four bracelets.


VOILA! I like the substance of this chain and I even like the detail of the lobster clasps. They provide an edgy, modern appeal. Plus I have the flexibility of using the bracelets again later as bracelets if I so desire. I could easily remove the lobster clasps and attach them with small jump rings if I wanted to give the chain a cleaner look and I knew I was only going to use it as a necklace. 


The chain looks pretty great as is and a large jump ring will allow the addition of a tray with a flat loop to slide right on. HOWEVER, for something even more stylish, I added a large jump ring to the small jump ring of one of the bracelets, along with a couple of our fabulous pendant trays and attached the lobster clasp directly to the large jump ring. This creates an elegant long piece (which I adore)!  


Now that is a good looking piece of jewelry! Substantial and rich! The addition of the Extra Large Round Tray and Small Round Tray is perfectly balanced by the chain and doesn't overwhelm it. 


Here's a version in silver using our new Grand Cross. I added a small glass round that I created using the Faux Turquoise Water Marbling Technique I featured in a previous post. This piece really speaks to me as it is reminiscent of New Mexico art, sky, and terrain. The Southwestern style of using silver and turquoise together is sort of our state's notable jewelry collaboration. You can tell I love the Land of Enchantment :) 


A closer look!


Four bracelets strung together create a necklace approximately 32" long, three bracelets create a necklace approximately 26" long. Do you want to wear it long one day and short the next? No problem! Just remove one bracelet! Want to wear one of the bracelets as an actual bracelet? Again, not a problem! I guess you could consider this a truly convertible piece!

I'll be honest. I really love the bohemian look of the longer pieces layered together with shorter pieces. Sort of like the wearer just threw them on with carefree abandon, but the layers come together to create something artsy and original. Now that I'm thinking about it, these longer chunky necklaces would be perfect with our Faux Leather Cords!

I hope you're as excited about this alternate use for the Charm Bracelets as I am! Be sure to follow us on the Craft Fantasic FACEBOOK PAGE, sign up to receive our monthly NEWSLETTER, and subscribe to the BLOG (in the sidebar) so you never miss a post. We frequently host giveaways, share project ideas, feature customer creations, provide product sneak peeks and MORE on all of our social media sites!

See you next time with something new and CRAFTY!


Thursday, April 28, 2016

Custom Painted Spring Cabochon!


It's no secret that I love to play with nail polish in my craft room. The endless color options and the hard glossy finish it leaves behind draws me in like a moth to a flame. Of course, these qualities are meant to give your fingernails a bit of glitz and glamour, but what it does to a Craft Fantastic Glass Cabochon will send your crafty mojo into orbit! I paint it on the back of the glass for a faux dichroic effect, I paint it on the front for a completely different effect, and I swirl it around in water for a faux marble effect. Ironically my nails always look terrible, but my glass cabs look great!  

Let's get started...

What You'll Need

Craft Fantastic Glass Cabochons - use whatever shape or size your crafty heart desires.

Nail Polish - pick your palette. I used dollar store polishes in this project to keep it economical, but you probably have a medicine cabinet full of nail polish bottles just gathering dust. 

Nail Art Polish - I also picked this up from the dollar store in white, black and silver.

Clear Top Coat

Pencils with an Eraser Top

Flat Topped Tac


Stylus


I forgot to take a picture of my supplies, so I'll just jump right into the process. I needed a sturdy way to handle my glass cab so I stuck a flat topped tac into the eraser end of a pencil.


Next I added a jeweler's dot to the top, firmly pressed it into the tac and peeled back the red liner to expose the adhesive.


Then I pressed the back of the glass cab onto the jeweler's dot. This gives me a way to securely paint my cab with the polish without the risk of dropping it or getting fingerprints all over it. 


I started with my base color, this is a light aqua polish and it was pretty sheer, so I needed about three coats to provide opaque coverage. I placed the pencil in a heavy mug and let the cab dry thoroughly between coats.


Time to get creative! I picked up some polish at the dollar store specifically for painting designs on fingernails. This bottle refers to it as Nail Art Paint. It typically comes in a tall narrow bottle and has a long skinny brush. I used this jet black color to create a few simple branches on my cab then I placed my pencil holder and cab into a mug to dry. 


Next, I took Nail Art Paint in white and dabbed it onto the top of another bottle of polish. I needed a flat surface that I could easily dip a stylus into. I stole this idea from watching the ladies at the pedicure places. They know their stuff! A stylus is used in lots of paper crafts for embossing and scoring techniques. I bet you already have one of these in your craft stash.


I dipped the stylus into the white Nail Art Paint and then gently pressed it into to the cab around my branches to create petals for my flowers.


This is already looking pretty great!


I followed the white Nail Art Paint with a few random dots of silver Nail Art Paint. Then I finished my flower centers with dabs of basic red nail polish. I let all of these layers dry and then topped it with a coat of clear Top Coat nail polish. This adds a protective layer and gives it a nice smooth glossy finish.


I added a tray and some findings to create a one of a kind hand painted necklace. Oh my gosh! This was so much fun! I hope you'll try your hand at this technique. If you do, feel free to share pictures on the Craft Fantastic Facebook Page. Also, if you liked this post and want to see what I do next, be sure to sign up in the sidebar to receive blog updates right to your IN BOX

Don't forget to add your email address to subscribe to our monthly NEWSLETTER. It's filled with exclusive specials, freebies, product peeks and oodles of inspiration!

See you next week with something new!