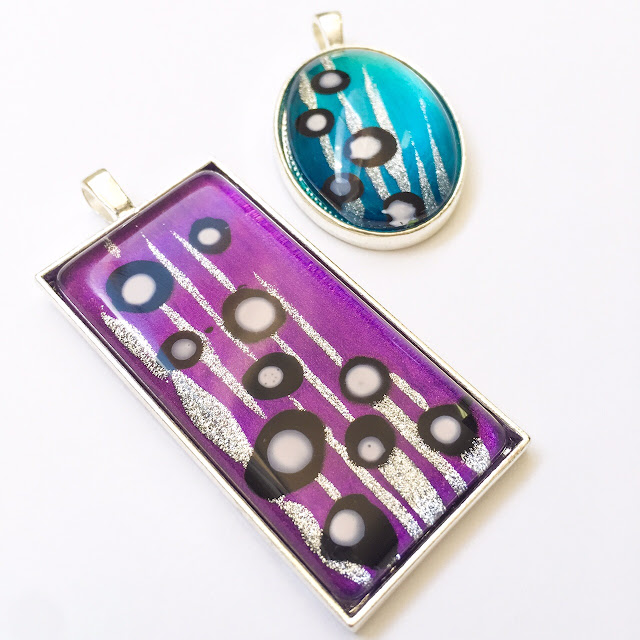
This week, we're going to take it up a notch and add some designs. The key here is to work backwards. You'll start with the tiny details that your eye sees first, then add layers of design, and finish with the background.
For example, on the above piece I began with the white dots. After those were thoroughly dry I layered black dots over the top of them to create a black border around each white dot. Once these were dry, I added silver streaks behind the black dots. Again, waiting until everything was dry, my final step was to paint the background. After all of the layers dried, I was left with a cool geometric design. I rather love this and it's relatively easy to do.
Let's get started...
What You'll Need
Nail Art Paint - The consistency is a little more opaque than regular polish and it usually comes with a really skinny brush. I picked these up at the dollar store.
Craft Fantastic Glass Cabochons - Use your favorite shapes and sizes.
Nail Polish Remover & Cotton Swabs - This dynamic duo will easily clean up any wayward polish on the back of the glass.
Scrap Paper - A must have for keeping your work surface clean.
Painting Designs and Patterns on the Glass
Working on a piece of scrap paper, start with a Craft Fantastic Glass cabochon and your choice of Nail Art Paint. I'm using a white, black and silver palette for my design.
Visualize your design. Decide on which details will be in the foreground because you will need to work backwards. Think in layers. I'll start with these small white dots.
OOPS! I got a little sloppy, but that will clean up easy peasy with a cotton swab dipped in nail polish remover.
See...just a quick swipe and it's gone!
My dots are in place and now it's time to wait. Let these little blobs dry for a while.
Time to add the black paint over the white dots. My goal is to create a border around each white dot so my black polish will need to generously cover the white.
A quick flip lets me check to see if the black paint sufficiently covers the white dots. Careful though, I don't want to mess up all my hard work. I'll need to let this coat dry for a long time because my paint layers are fairly thick.
Now for some real fun. I use the silver paint to add silver stripes of varying lengths. Again, I'll let this dry a really long time.
Finally, I add my background color. This time I opted for purple, but it goes on a bit sheer so I had to add about 5 coats, letting it dry between each application. Looks a bit sloppy at this point, but just wait until I flip it over...
TADA! All finished and popped into a Long Rectangle Tray, ready to be turned into a one-of-a-kind pendant!
Now, wasn't that fun! I'm going to try and add a tutorial each Wednesday using Craft Fantastic glass, trays and findings in unexpected ways, so tune in next week for something new!


very cool ideas
ReplyDeleteFun...
ReplyDeleteWhere do I get the nail art paint?
ReplyDeleteSuch an inspiring post! A glass painting adds so much elegance and vibrancy to any room. I love how the colors shine through the glass and create a beautiful reflective effect. I recently explored Vibecrafts’ collection, and their glass paintings are absolutely stunning — perfect for adding an artistic and modern touch to your home décor. Definitely worth checking out!
ReplyDelete