Saturday, February 11, 2017

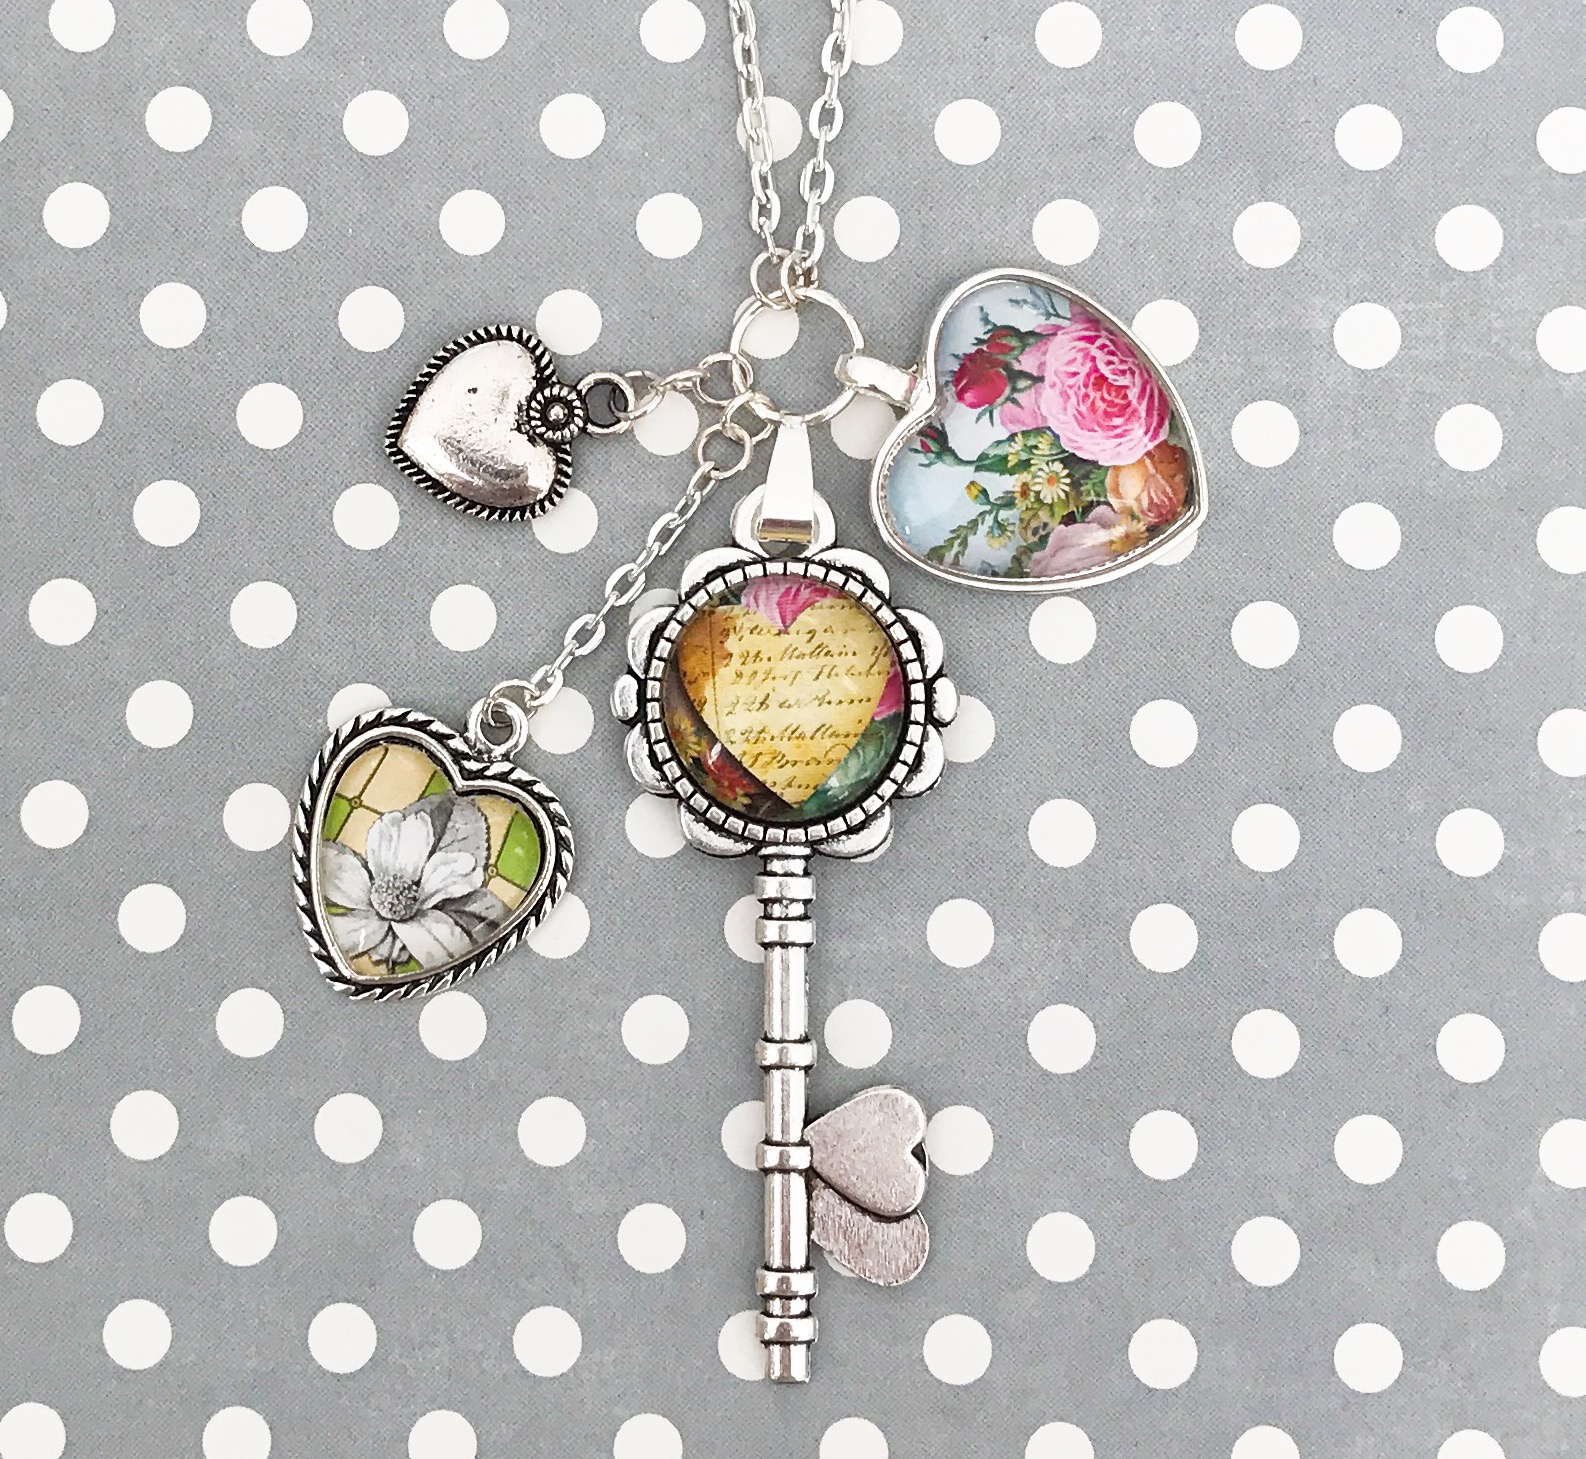
My Heart's in Paris Necklace

Hello everyone!! Kymona here for the first time as a design team member and I'm over the top excited to be here!! When I was asked to join the Craft Fantastic team I couldn't stop smiling.  I love creating new pieces of jewelry!

Today I'm going to share with how to create this heart necklace that I created for my sister!

Take a look:


My sister is going to love this necklace.  I can't wait to give it to her.  She has a love affair with Paris. When she had her first daughter, she made a promise to bring her to Paris when she gets older.  The time is drawing near so I figured this necklace is so perfect for her. 

Here is how I created this necklace:

1. I picked out the image that I wanted to appear in the necklace from Craft Fantastic Paris Image 
sheet

2.  Then I picked out the Antique Brass Medium Heart Pendant and the Medium Glass Heart  but later changed my mind and switch to the Silver Medium Heart Pendant.  The image looked so much better in the silver vs the antique.  


3.  Next, I added Fantastic Glaze & Glue 2 to the glass heart.  I added about 7 to 8 drops.


4. Then I placed the heart on top of the image making sure the glass covered parts of the image I wanted to see. I press down hard so that the glue moves and cover the entire image underneath.

5. I waited for about 2-3 minutes to make sure the glue set.  I used my finger to push the glass a bit.  If it does not move, then it's set.  

6. Once the glue set, I used a Q-tip to remove the excess glue around the edges.


7. Before placing the glass heart in the tray, I added one Fantastic Jeweler's Dot in the center of the try. You can see it in the picture above. Once the dot is in place, remove the red backing.

8.  Place the heart directly in the try and press down.  The tape is strong and will hold the glass.

9.  After that I strung the 24" Silver Ball Chain  through the heart pendent.  

10. To finish the necklace off, I added a Silver Cute Heart Charm. To do that I add a Silver Pinch Bail to the heart charm so that I could add it to the ball chain. 

Nice and pretty simple.  Once you create one the possibilities are endless!!


Supplies used:


Paris Image Sheet


Silver Medium Heart Pendant


Medium Glass Heart


Fantastic Jeweler's Dots


24" Silver Ball Chain


Silver Pinch Bails


Silver Cute Heart Charm


So what do you think?  Do you think my sister will love this piece of handmade jewelry? Would you give this jewelry making a try? Please let me know below.  I would love to hear from you!!

Just in case you didn't know you can find Craft Fantastic on all of the social media platforms:

Facebook  ~  Instagram  ~  Pinterest  ~  Twitter  ~  Blog


Follow so that you don't miss out on any of the creative ideas, deals and new goodies that appear in the store.

Thank you so much for stopping by!!

~Kymona


Tuesday, February 7, 2017

Valentines Day Projects by Judy


Hi and welcome to my first blog post as a member of the Craft Fantastic Design Team!

Today I am going to share with you two projects perfect for Valentines Day! For both projects you will need:

Craft Fantastic Glaze & Glue, 2 pairs of pliers, a ruler, Fantastic Jeweler's Glue Dots and a Craft Fantastic Image Sheet

For our first project we will make a Valentines Day necklace and for that you will need:

1  30" rolo chain (more about this later), 2 long rose connectors, 4 small jump rings, 1 medium fancy heart tray, 1 meduim glass heart, 1 wire cutting tool, Craft Fantastic Glaze & Glue, 2 pairs of pliers, a ruler and a Craft Fantastic Image Sheet


To begin I will choose an image for my heart pendant. I will cut out the image, apply my Glaze & Glue to the flat side of the glass, using a dollup in the center of the heart glass as well as several additional dollups around the edges. I will then place my glass over the image and hold it in place for a moment until it grips. Too much glue can be cleaned up with a q-tip, but too little glue won't seal properly with the image. On the Craft Fantastic website there is an in depth tutorial which you can find HERE.  Next use a scissor to trim the edges closely around the glass and set aside.

For our next step take the rolo chain and set it along side your ruler with the clasp closed. We are going to snip out 2 links at the 11" mark. I chose to remove an 8" section from the middle of the chain, so we will be able to use the snipped out portion at a later date for another project. (Note, you can use a 24" chain as well and snip in the middle, or you can also just snip the 30" chain in half. You can decide exactly how long you want your finished piece. I liked the idea of having a piece long enough that I could use later for a bracelet possibly.) Now use a small jump ring on each end of the chain where you just snipped the link and attach the chain to a long rose connector. Repeat this process for the other piece of chain and other rose connector.


Now take your next jump ring and attach the other end of the rose connector to the medium heart pendant, and do the same with the other connector and remaining jump ring.

Take two Fantastic Jeweler's Dots and place on the heart tray. Peel the orange pieces off and adhere your glass heart. And you are all finished!


For our second project we will make a Valentines Day charm bracelet and for that you will need:

2 small fancy heart trays, 2 small glass hearts, 1 cute heart charm, 1 charm bracelet, rose charm and rose with heart charm (both of these come in a set of charms called day/dead charm collection), 5 large jump rings, Craft Fantastic Glaze & Glue, 2 pairs of pliers, a ruler and a Craft Fantastic Image Sheet


To begin I will choose 2 images for my heart charms. I will cut out the images, apply my Glaze & Glue to the flat side of the glass, using a dollup in the center of the heart glass as well as several additional dollups arounf the edges. I will then place my glass over the image and hold it in place for a moment until it grips. Too much glue can be cleaned up with a qtip, but too little glue won't seal properly with the image. On the Craft Fantastic website there is an in depth tutorial which you can find HERE. Next use a scissor to trim the edges closely around the glass and set aside.

For our next step I will measure to the center of the charm bracelet and using a large jump ring, attach the cute heart charm. I will then count five links to the left of center and attach one of the heart trays by using a large jump ring, and repeat this counting five links to the right of the center and attach the second heart tray. I will then count five more links from each of the heart trays and attach the rose charm and the rose and heart charm.


Take a Fantastic Jeweler's Dot and place on each of the heart trays. Peel the orange pieces off and adhere your glass hearts. And you are all finished!


I do hope that you have enjoyed these two projects! If you have any questions please just ask!

And do check out the FEBRUARY KIT SPECIAL, which contains a lot of what I have used in todays' projects! It is a really fabulous kit so definitely check it out!

Here is a link to the CRAFT FANTASTIC WEBSITE where you can find everything you need! And below there are specific links to all the items I have referenced above.

Have a wonderful Valentines Day and I will see you again soon!

Hugs,

Judy


Multipurpose Jewelry Pliers

Fantastic Jewelers Dots

Fantastic Glaze & Glue

30" Rolo Chain

Charm Bracelet

Valentine Image Sheet

Cute Heart Charm

Day/Dead Charm Collection

Long Rose Connectors

Small Jump Rings

Large Jump Rings

Small Glass Hearts

Medium Glass Hearts

Medium Fancy Heart Tray

Small Fancy Heart Tray

Monday, February 6, 2017

February Kit Instructions


Thanks for ordering the Craft Fantastic FEBRUARY KIT! This kit is available for a limited time. 
Click HERE to order yours today!  

Here's a couple of links to help you complete the projects followed by a few 
assembly instructions for each piece:


  1. Select images and add them to the glass cabochons using Fantastic Glaze & Glue.
  2. Using pliers, remove the lobster clasp and small jump rings from the 30" Rolo Chain.
  3. Using scissors cut a length of chain measuring 10 links from one end of the Rolo Chain.
  4. Using pliers, attach a small jump ring to each end of the Rolo Chain. String each end onto a large jump ring and slide the Medium Heart Pendant Tray on before closing. 
  5. Attach the Cute Heart Charm to the large jump ring using 3 small jump rings.
  6. Attach the Small Fancy Heart Charm Tray to the length of chain cut from the Rolo Chain using a small jump ring. Attach the other end to the large jump ring using 2 small jump rings.
  7. Slide the pinch bail onto the Love Key Tray and then onto the large jump ring.
  8. Add a Fantastic Jeweler's Dot to each tray and remove the red backing to expose the adhesive.
  9. Firmly press each glass piece into the corresponding tray. 


  1. Select images and add to the glass cabochons using Fantastic Glaze & Glue.
  2. Attach the Ellipse Link to the 30" Fine Ball Chain using a small jump ring.
  3. Attach the Wing Charm to the Ellipse Link using a small jump ring.
  4. Attach the Rectangle Pendant tray to the Ellipse Link using a large jump ring and then a small jump ring.
  5. Connect the two Twist Link Trays together using a small jump ring, then attach the Cute Heart Charm to the bottom link using a small jump ring. Attach this strand to the Ellipse Link using a small jump ring.
  6. Add Fantastic Jeweler's Dots to each tray. Use 2 dots in the Rectangle Pendant Tray. Remove the red backing to expose the adhesive.
  7. Firmly press each glass piece into the corresponding tray.


  1. Select images and add to the glass cabochons using Fantastic Glaze & Glue.
  2. Attach the Small Round Charm Trays evenly to the Charm Bracelet using small jump rings.
  3. Add a Fantastic Jeweler's Dot to each tray. Remove the red backing to expose the adhesive.
  4. Firmly press each glass piece into the corresponding tray.
Happy crafting! 

Tuesday, January 3, 2017

Easy Handmade Card Ideas!


Happy New Year, Crafty Friends! We hope 2017 has your creative juices flowing! We have a simple project for you to kick off the New Year. 

We're mixing decorative papers and colorful cardstock with our Craft Fantastic trays, glass and findings to create some beautiful and unique handmade cards. Create a basketful of these easy cards for all occasions and you will never have to make a last minute trip to the card shop again! 

Craft Fantastic Supplies: mini round charm trays - mini glass rounds - inspiration image sheet

Craft Fantastic Supplies:  mini glass rounds - tiny alphabet #2 image sheet 


If you create some handmade cards using Craft Fantastic supplies be sure to share a pic with us! We love to see what our Crafty Friends are up to and are ever so inspired by your artistry! Follow us on FACEBOOK for all the latest updates and subscribe to our Craft Fantastic NEWSLETTER for monthly projects, sales and freebies!

Wednesday, September 14, 2016

Working with Fantastic Jeweler's Dots


I've received LOTS of questions regarding our Fantastic Jeweler's Dots lately. They're super easy to use, safe for all ages, and really hold up to the wear and tear of daily use. They're made of a high-tack adhesive, which means whatever you use them on will stay put for a VERY VERY VERY long time! BUT there are some steps to ensure that you get the most out of them. That prompted me to write this tutorial/FAQ post featuring our favorite little Craft Fantastic workhorses. They might be small, but they are mighty!  

First, let's look at how they work and the steps necessary to apply them to a  pendant tray. At the bottom of these instructions you'll also find answers to some commonly asked questions regarding the Fantastic Jeweler's Dots, so be sure to scroll all the way down to the bottom to get the most info out of this article.


I've chosen some different sized trays ranging from mini to extra large to demonstrate how best to position them in the trays. 


Trays sized medium and smaller will require only one Jeweler's Dot to get the job done. Tiny trays may only require a 1/2 dot. If that's the case, just cut the dot while the dot is still attached to the wax insert. If you pull the dot off the wax insert and try to cut it in half you will end up with a sticky blob attached to your scissors. Trust me on this one. 


Trays sized large and up will require 2 dots due to the larger surface area. Also, the glass pieces sized for these trays are heavier because they are larger. A second dot will ensure that they stay securely in place.


ALWAYS apply the Jeweler's Dot to the tray and burnish it down using your fingernail. This step ensures that the adhesive forms a bond with the tray. If you try to apply the dot to the paper side of the glass and then press the glass into the tray there will be less surface area that comes into contact with the tray and may even leave an air pocket between the glass and tray.  


Here I have applied all of my Jeweler's Dot to my trays taking note of size and being sure to burnish down each dot with my fingernail.


Next I remove just the thin red liner of the dot to expose the adhesive. It is easy to forget to remove this liner and then wonder why the glass fell out. Trust me on this one, too! LOL! 


Here I've removed the second red liner.


I've tried to angle the tray in this picture so that you can see the clear Jeweler's Dots are firmly attached to the tray, only the thin red liners have been removed. I have on occasion become so over zealous when creating a piece that I inadvertently pull the entire dot out of the tray, sticky and all. OOPS! When this happens, I discard the dot. Once it's been handled and exposed to the oils on your skin or to dust, the adhesive quality is compromised. Best to start with a new one. 


Next, I place my glass piece in my tray. This is particularly easy with a square or rectangle tray, but glass rounds can be a bit more challenging. If using a glass round make sure it is positioned in the manner you want. There's not much wiggle room for positioning the glass once it's in the tray. 


Press the glass piece firmly into the tray. It should feel secure right away. There's no need to let it cure or dry. It's ready to wear!  


Just another angle.


Here's my finished pieces. I create LOTS of samples for the online store, social media and to send to local shows. They get knocked around and handled pretty roughly, but I've never had a piece of glass fall out of a tray. Use these steps and I bet you'll have a similar success rate :)  

FREQUENTLY ASKED QUESTIONS...

What happens if the dots get wet?
A. The Fantastic Jeweler's Dots are pretty sturdy and will definitely hold up to perspiration and other mild forms of moisture, HOWEVER, paper in general, is not sturdy and will start to deteriorate when wet. If the paper gets wet it will dissolve and the bond between the dot and the glass will weaken possibly causing the glass piece to fall out.  

Can I stick the glass cab in the tray if the Fantastic Glaze & Glue is still wet or damp? 
A. No. The Glaze & Glue should be completely dry before affixing it to the tray with a Jeweler's Dot because of the same reasons as listed above. If the paper is wet it will start to dissolve and weaken the bond between the dot and the glass. 

Can I re-use the dots?
A. No. The dots are made from a very high-tack adhesive meaning they are very strong. However, if they are handled too much, exposed to dust or oils, they will lose their tackiness. Once a dot has been placed in a tray, it cannot be scraped out and used again. 

What if I absolutely hate the way my jewelry piece turned out? Do I have to throw everything away and start over?
A. NO! Never throw a Craft Fantastic project away. If you have already affixed the glass cab into the tray, gently pry the tray out with a craft knife. Continue to scrape the tray until you have completely removed the Jeweler's Dot. Soak the piece of glass for a few minutes in very hot/boiling water. When it's cooled enough to touch, use your thumbnail to scrape the softened glue and image away from the glass. Continue to scrape until the glass bead is completely clean and ready to use again. Then take that piece of glass and tray and create something wonderful! 

Thanks for tuning in today! Please feel free to email me at DearCrafty@CraftFantastic.com with questions. I'm happy to help! Also, subscribe to this blog in the sidebar and never miss a post. And feel free to follow us on FACEBOOK and subscribe to our monthly NEWSLETTER for giveaways, secret sales and new product peeks!

Wednesday, June 15, 2016

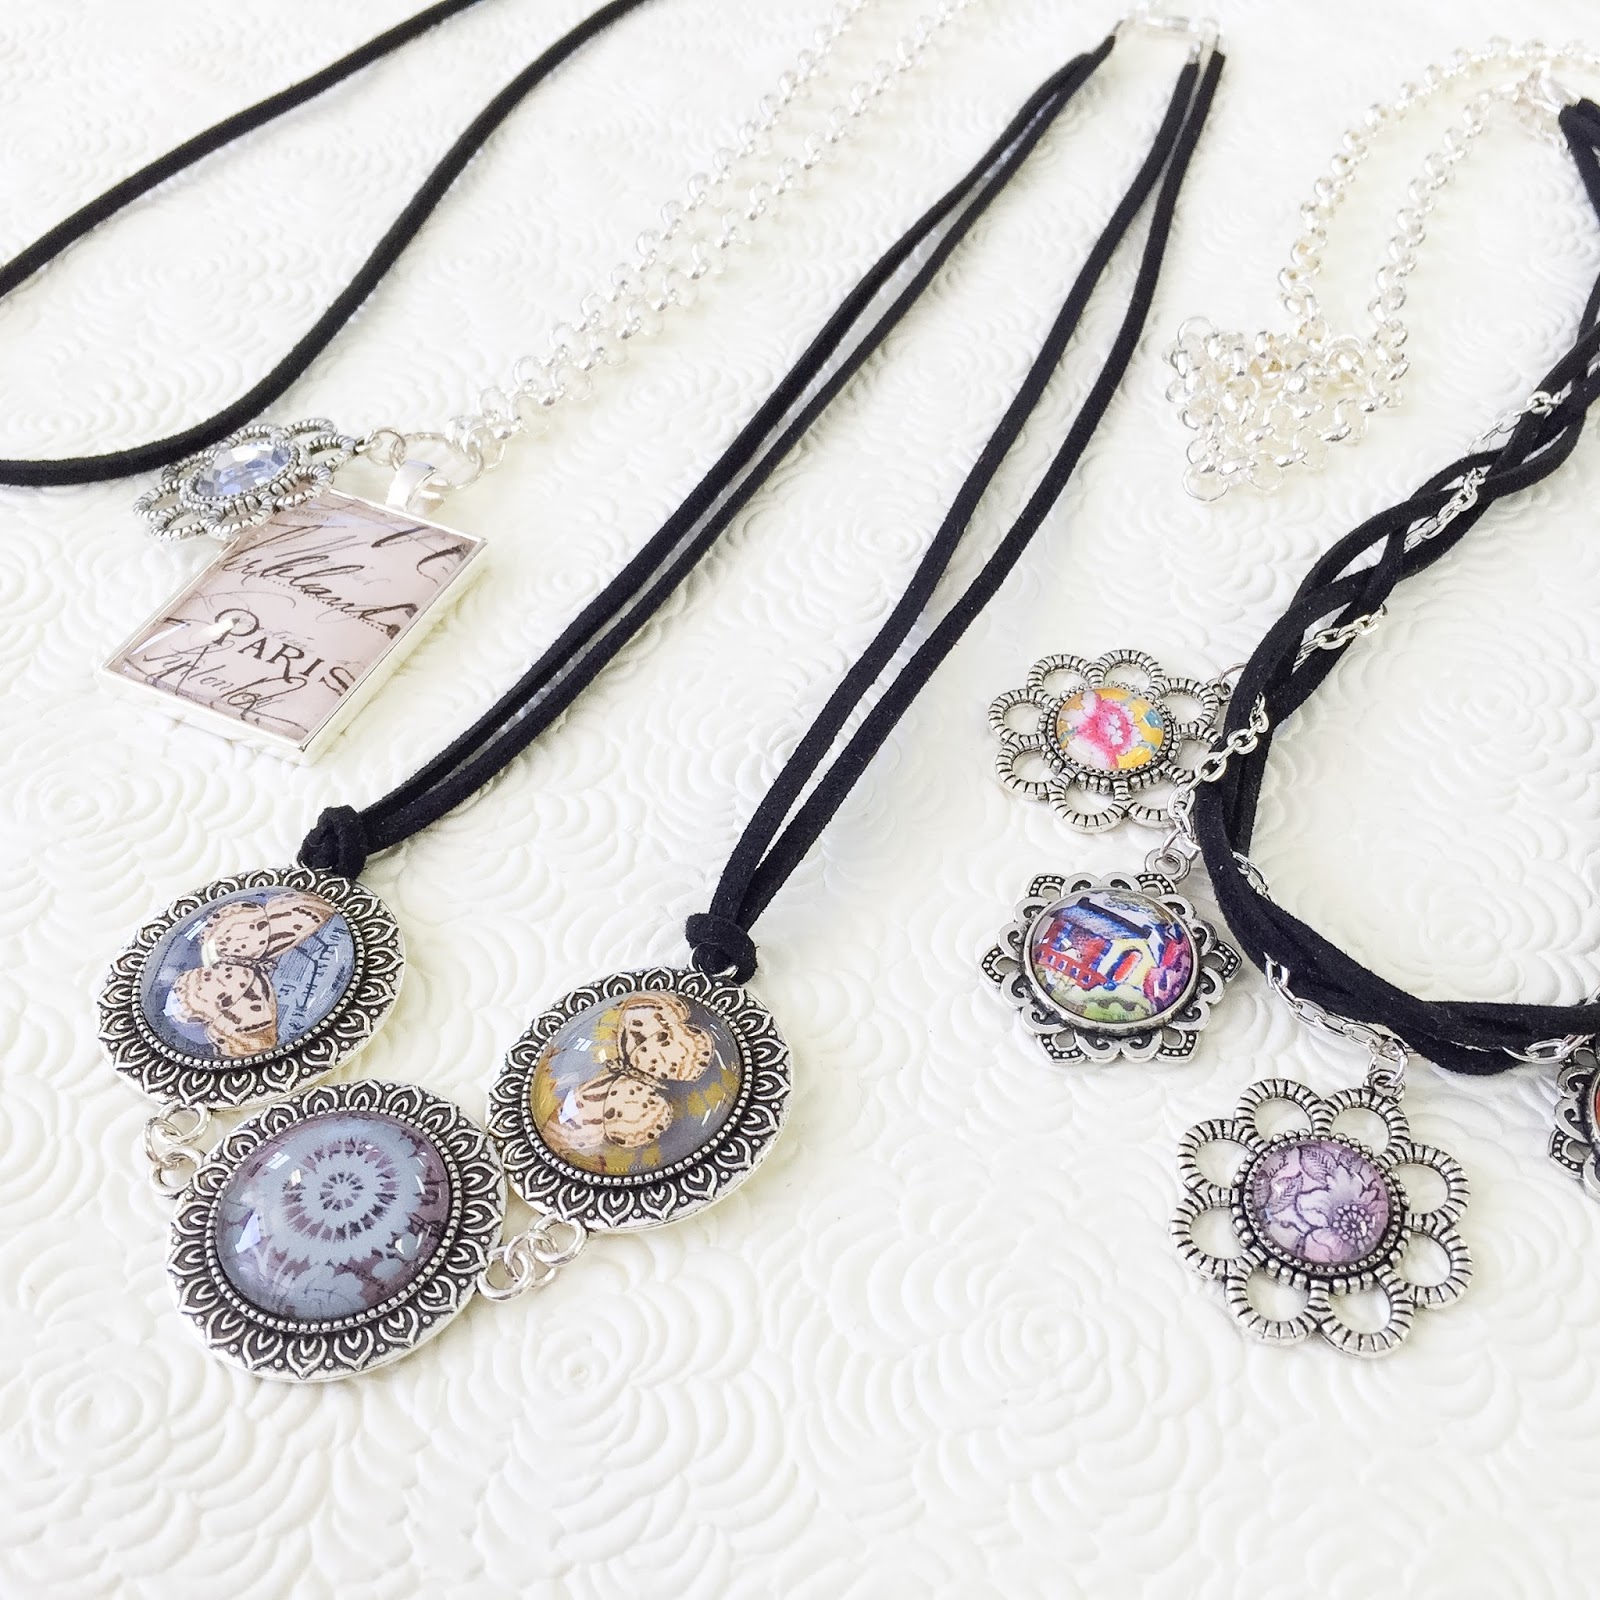
Faux Leather Necklace 5 Ways!


I love the versatility of the Craft Fantastic components! I can dismantle one piece intended to be worn a certain way and completely transform it into something spectacular by reconfiguring and adding other products from the line. My designs can be as simple or complex as I want to make them. This creative freedom gives me LOTS of design options.  

Today I'm working with the Faux Leather Necklace. Yesterday, in a flash of inspiration, I was hit with ideas for 5 different ways to wear this fabulous piece! Some are easy and some are a little more involved, but each results in something fun and unexpected!


I'll start with the simplest project. I've noticed online that many stylish folks are sporting necklaces that utilize more than one type and texture of neckwear, frequently pairing a leather cord with a metal chain and sometimes even adding a sheer ribbon. Here I've cut a 24" Rolo Chain to the size of the Faux Leather Necklace and rearranged my jump rings to finish it as one piece. Very easy to do, but that added metal detail really elevates this simple pendant into a fashionable accessory.  


This next piece requires no additional components. Instead, I've opted to attach it to my tray using the same technique we use with the Faux Leather Bracelets. I pinch the Faux Leather necklace in half and push it through the top loop of the tray. Then I string the loose ends of my necklace through the loop of the leather cord to create a knot. A simply change in how the tray is attached creates a modern, youthful piece. Find my Faux Leather Bracelet tutorial with step by step photos and instructions HERE


Here is a variation of the previous necklace. This time I've attached two Faux Leather Necklaces creating a double cord on each side of the necklace. This gives the necklace a more substantial feel and balances the three link trays pictured.  


Here, I've removed all of the hardware from a Faux Leather Necklace and added two Charm Bracelets to create a long, dramatic necklace. This piece is perfect to wear on it's own, or layer with shorter pieces for a casual, carefree style. 


I'll end with the piece de resistance of my Faux Leather Necklace projects. Here I braided 3 Faux Leather Necklaces and a Rolo Chain together, again mixing my textures and materials. I attached two Charm Bracelets to create another long, dramatic piece and added some of our newest trays for whimsical interest. I LOVE this look! 


I know I say this every time, but these were truly fun to make! The finished pieces look completely different from the original Faux Leather Necklaces and the projects are thoughtful and unique. I'm sure there are many more ways to transform these simple necklaces. Please share your design ideas with me at DearCrafty@CraftFantastic.com. I would LOVE to see what you're working on!

Don't miss a post! Subscribe to this blog by clicking the link in the sidebar and I'll keep you up to date on all of my latest projects and tutorials! Sign up for our NEWSLETTER for specials, freebies and secret sales! Follow Craft Fantastic on FACEBOOK to see LOTS of new product peeks, behind the scenes pics and design ideas!

See you soon with something NEW and CRAFTY!