

It's no secret that I love to play with nail polish in my craft room. The endless color options and the hard glossy finish it leaves behind draws me in like a moth to a flame. Of course, these qualities are meant to give your fingernails a bit of glitz and glamour, but what it does to a Craft Fantastic Glass Cabochon will send your crafty mojo into orbit! I paint it on the back of the glass for a faux dichroic effect, I paint it on the front for a completely different effect, and I swirl it around in water for a faux marble effect. Ironically my nails always look terrible, but my glass cabs look great!
Let's get started...
What You'll Need
Craft Fantastic Glass Cabochons - use whatever shape or size your crafty heart desires.
Nail Polish - pick your palette. I used dollar store polishes in this project to keep it economical, but you probably have a medicine cabinet full of nail polish bottles just gathering dust.
Nail Art Polish - I also picked this up from the dollar store in white, black and silver.
Clear Top Coat
Pencils with an Eraser Top
Flat Topped Tac
Stylus

I forgot to take a picture of my supplies, so I'll just jump right into the process. I needed a sturdy way to handle my glass cab so I stuck a flat topped tac into the eraser end of a pencil.

Next I added a jeweler's dot to the top, firmly pressed it into the tac and peeled back the red liner to expose the adhesive.

Then I pressed the back of the glass cab onto the jeweler's dot. This gives me a way to securely paint my cab with the polish without the risk of dropping it or getting fingerprints all over it.

I started with my base color, this is a light aqua polish and it was pretty sheer, so I needed about three coats to provide opaque coverage. I placed the pencil in a heavy mug and let the cab dry thoroughly between coats.

Time to get creative! I picked up some polish at the dollar store specifically for painting designs on fingernails. This bottle refers to it as Nail Art Paint. It typically comes in a tall narrow bottle and has a long skinny brush. I used this jet black color to create a few simple branches on my cab then I placed my pencil holder and cab into a mug to dry.

Next, I took Nail Art Paint in white and dabbed it onto the top of another bottle of polish. I needed a flat surface that I could easily dip a stylus into. I stole this idea from watching the ladies at the pedicure places. They know their stuff! A stylus is used in lots of paper crafts for embossing and scoring techniques. I bet you already have one of these in your craft stash.

I dipped the stylus into the white Nail Art Paint and then gently pressed it into to the cab around my branches to create petals for my flowers.

This is already looking pretty great!
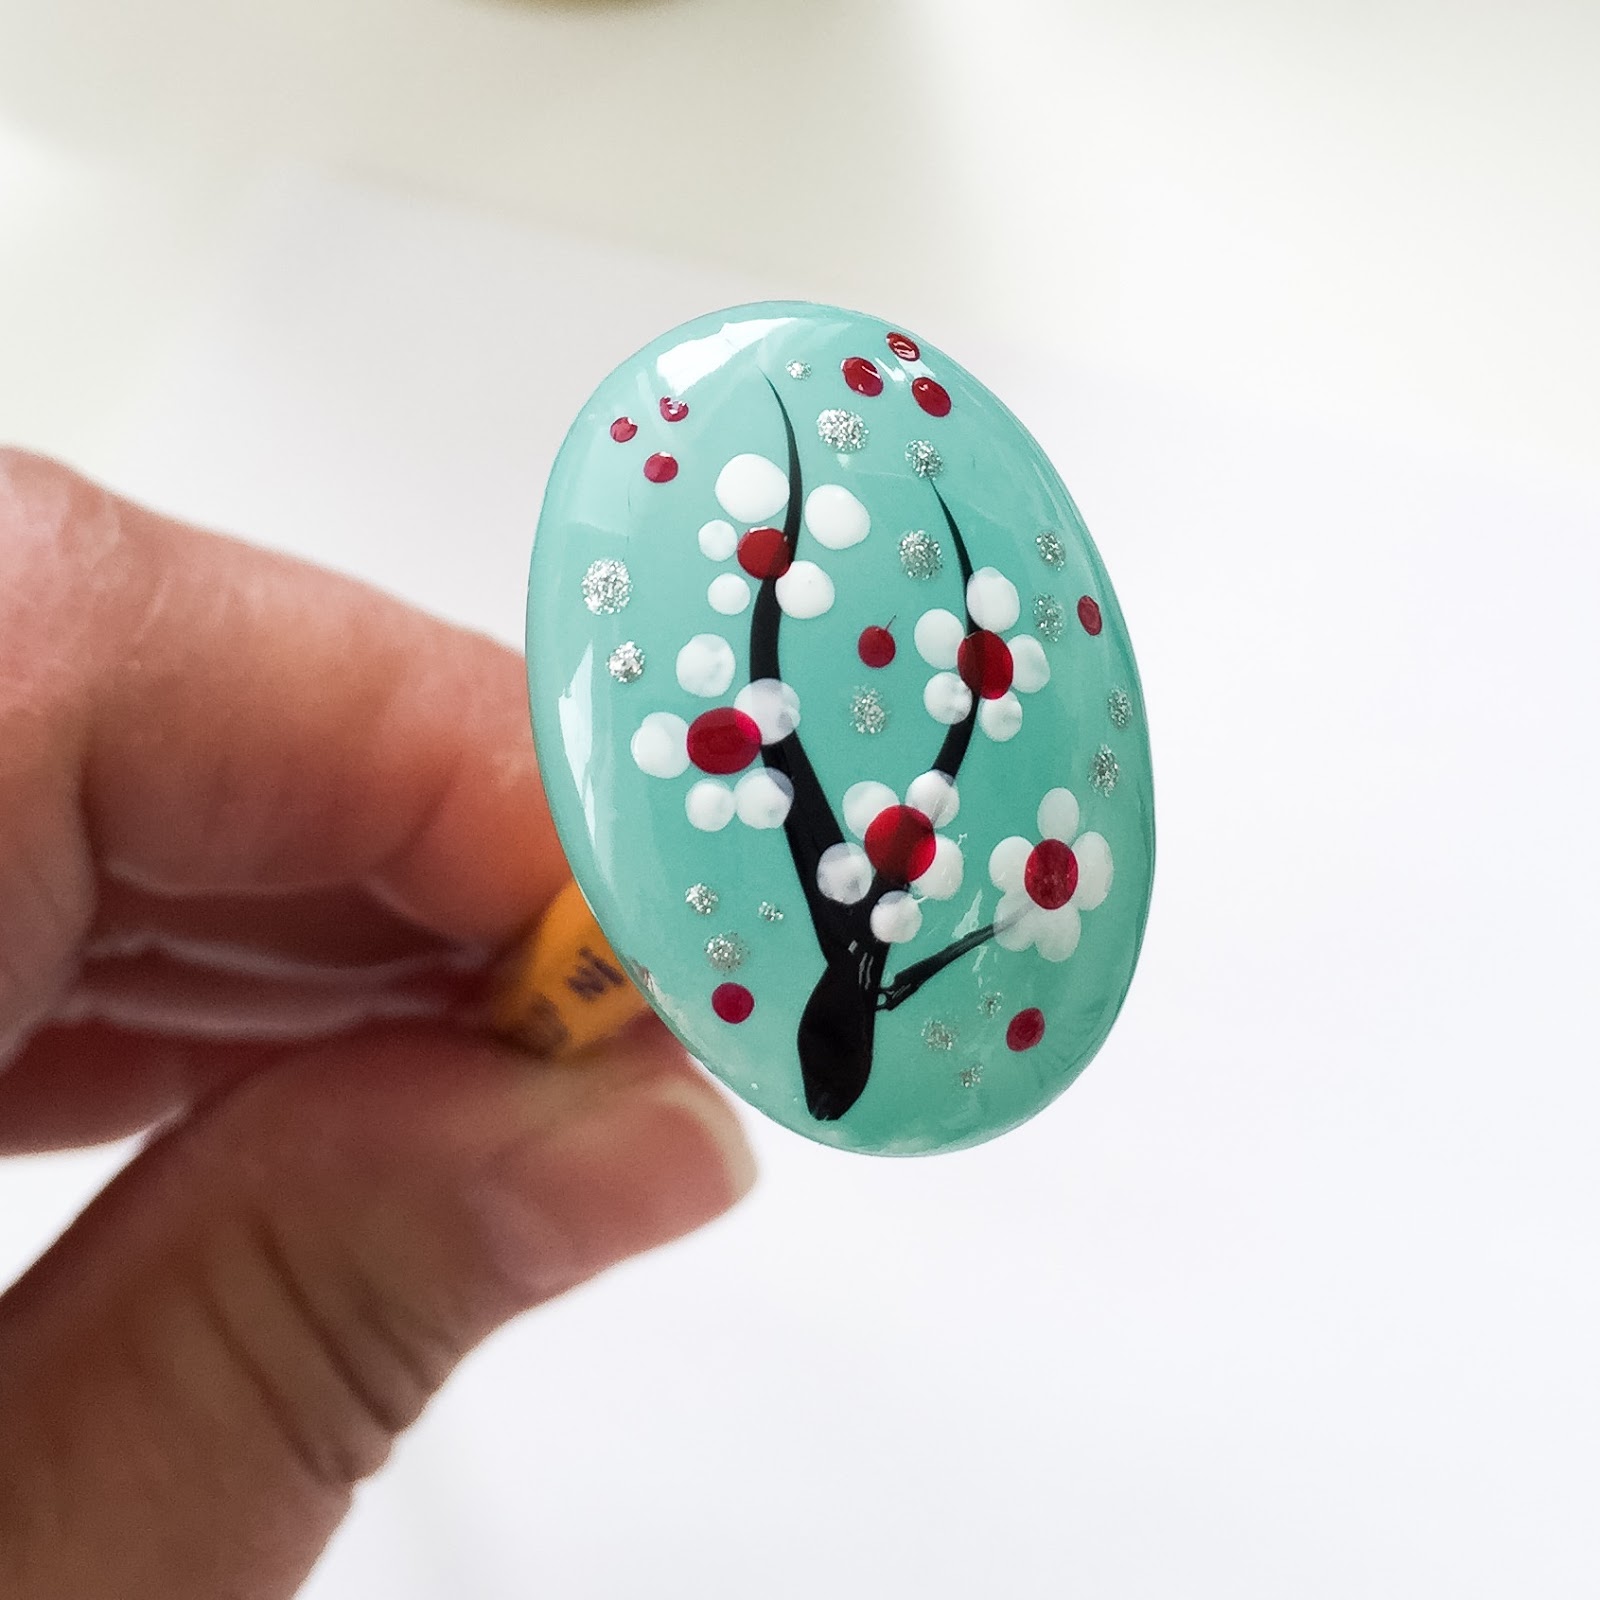
I followed the white Nail Art Paint with a few random dots of silver Nail Art Paint. Then I finished my flower centers with dabs of basic red nail polish. I let all of these layers dry and then topped it with a coat of clear Top Coat nail polish. This adds a protective layer and gives it a nice smooth glossy finish.

I added a tray and some findings to create a one of a kind hand painted necklace. Oh my gosh! This was so much fun! I hope you'll try your hand at this technique. If you do, feel free to share pictures on the Craft Fantastic Facebook Page. Also, if you liked this post and want to see what I do next, be sure to sign up in the sidebar to receive blog updates right to your IN BOX.
Don't forget to add your email address to subscribe to our monthly NEWSLETTER. It's filled with exclusive specials, freebies, product peeks and oodles of inspiration!
See you next week with something new!
beautiful and very simple.good word
ReplyDeletethese remarkably fashionable nail polish bottles you can rest assured that you are truly ready to add instant beauty to your style, even at a moment’s notice. custom nail polish bottles
ReplyDeleteHi there! I simply would like to give a huge thumbs up for the nice info you might have right here on this post. I will probably be coming back to your blog for more soon. wholesale wall art australia
ReplyDelete