Monday, August 31, 2015

A Gorgeous New Project from Rina Meyers!

Design Team member, Rina Meyers, has done it again! She has designed an absolutely scrumptious mini album showcasing the Craft Fantastic Trays, Glass and Findings! Watch her video as she reviews each glorious detail with you. She'll show you how to easily transform the Craft Fantastic product line into embellishments perfect for using in paper crafts.

I love seeing the products used in innovative and creative ways! Rina's style is lavish and rich incorporating lots of elegant papers, beautiful trims and carefully selected embellishments. Be sure to subscribe to Rina's YouTube Channel so you don't miss a video!


Thank you for stopping by today! Don't forget to check back on Wednesday to see my latest tutorial! Follow Craft Fantastic on Facebook here and signup to follow this blog by email in the sidebar.

Wednesday, August 26, 2015

Craft Fantastic and Glitter, Part 2!

Welcome to Part 2 of my glitter primer. Last week I used glitter to highlight and add a bit of shimmer to an image and then topped that image with a Craft Fantastic cabochon. The results were fun and eye catching! And the process couldn't be any easier. 

This week the glitter is the star of the show. I found some glitters were more appealing than other glitters and I also found that sticking the cab into the tray became more of a challenge, as well. I experimented with using the Fantastic Glaze & Glue, Fantastic Jeweler's Dots, and E6000. All products we sell on line. 

A few words about affixing the glittered cabs into the trays...

Fantastic Glaze & Glue - As I suspected, the Fantastic Glaze & Glue did not hold the glitter covered cab in the tray. It is designed primarily to use on paper and needs a porous surface in order to cure and work it's magic. Pressing it into a tray didn't allow enough air to circulate under the glass for it to dry. 

Fantastic Jeweler's Dots - I also suspected that these would not be the best option and I was right. The Fantastic Jeweler's Dots are formulated from a high-tack adhesive perfect for adhering the glass cabs to the trays, however, the glitter had a tendency to peel off the back of the glass and stick to the dot. So all in all the dots did their job well, but the glitter was a stinker.  

E6000 - With the exception of the Ultra Fine Glitter, the E6000 proved to be the most effective for sticking the glittered cabs into the trays. Read my results below and I'll walk you through my observations.  

I used an assortment of glitters from my own craft stash for these projects...ultra fine opaque glitters, Tim Holtz Distress Glitters, and vintage glass glitter shards.  As you can guess, I had a favorite, but you'll have to read on to find out what it was.  

Let's get started...

What I Used

Craft Fantastic Glass Cabochons - Any shape or size will do. 


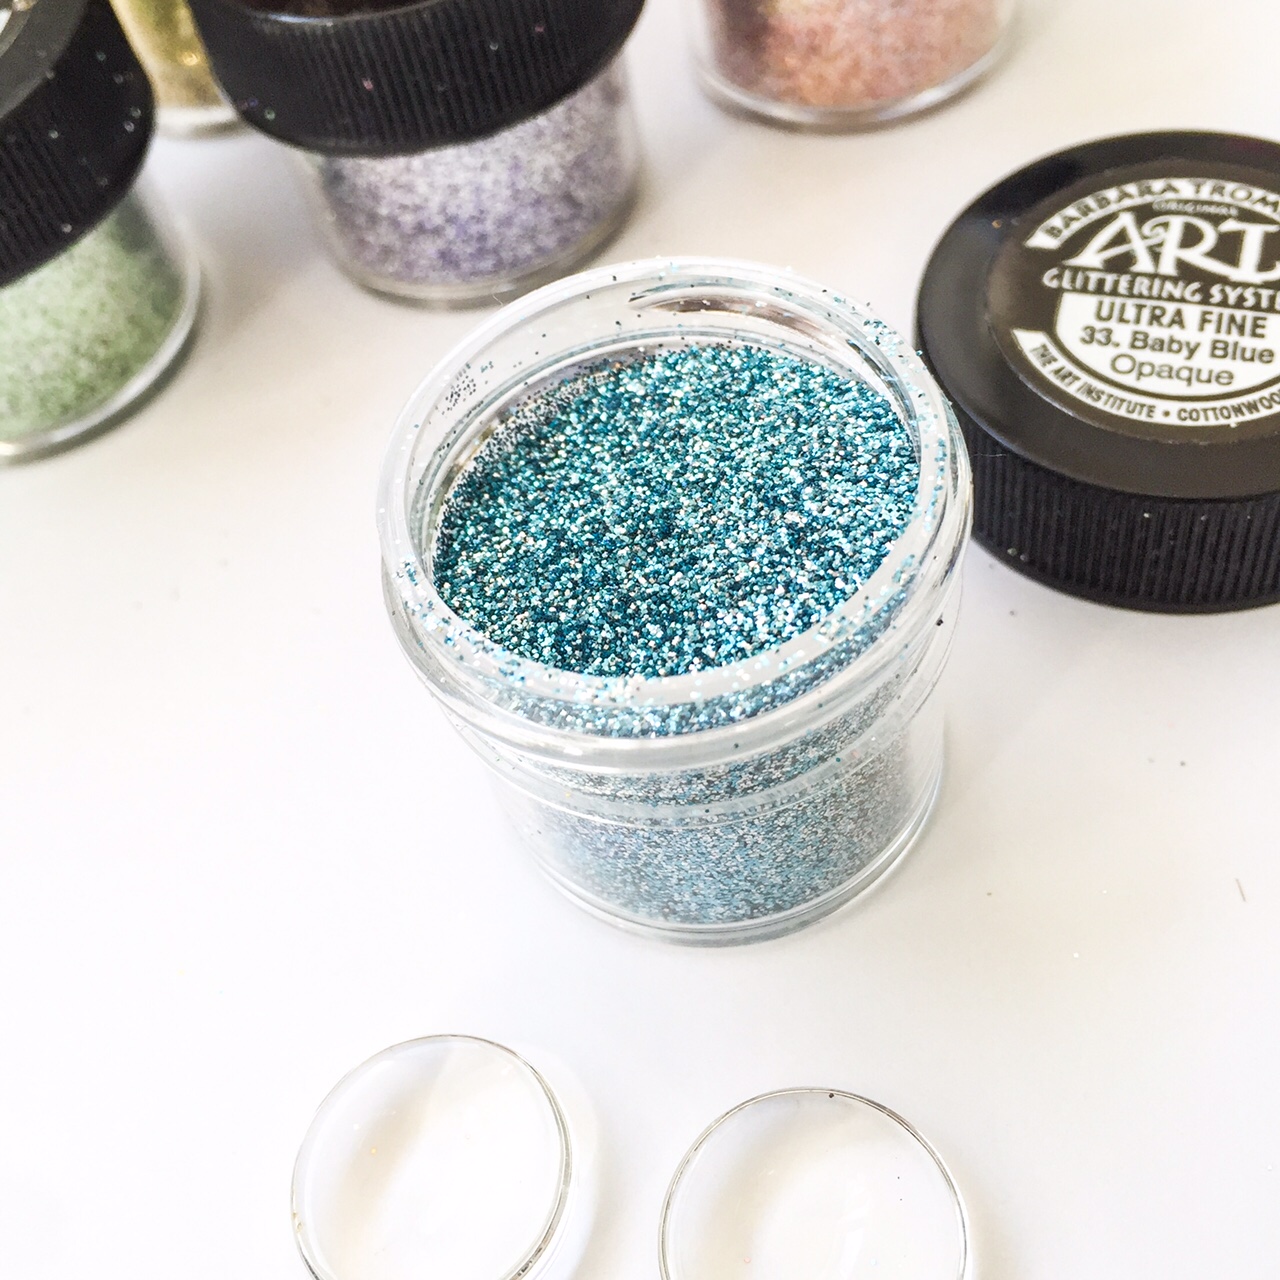
Ultra Fine Opaque Glitter - If fairy dust did exist, it would be this. Yes, it is that fine.

Tim Holtz Distress Glitter - Tim Holtz offers an entire line of "distress" products to give your projects a vintage feel. The Distress Glitter is not quite as shimmery as some glitters, but it comes in a variety of colors and has a retro appeal.

Vintage Glass Glitter Shards - Glass shards are big and chunky and oh so beautiful, but do be careful. These are lovely and shiny because they are actually created from glass, so keep this glitter out of reach, far from the wee ones and the family pets.


Clean Scrap Paper - And LOTS of it! Use a new piece for every glitter you're using. When you're finished you can gently crease the paper and pour the remaining glitter back into the jar. No waste!


Ultra Fine Opaque Glitter

I LOVE ultra fine glitters! Nothing catches the light quit like these little jars of magic, and yet, this was my least favorite glitter for this project. The variety of color is amazing and the shimmer is stunning. With that being said, even the opaque glitter proved to be too light and delicate to provide good coverage on the back of my cabs and because of that I ran into some trouble with the E6000, as you'll see below. 


The basic process was the same for all of the glitters I used. I started with a glass cab and generously covered the back with Fantastic Glaze & Glue. I used the nose of the bottle to push the glue neatly out the edge of the cab. I took a generous pinch of glitter and applied it heavily over the glue. Once I achieved good coverage, I gently used my finger to lightly "pat" the glitter into the glue and then sat it aside to dry a good long while. 


No matter how much glitter I applied, I could not get the coverage I wanted with the ultra fine glitter. I felt the finished cabs looked a bit transparent. I used the E6000 to affix the cabs to the trays and the E6000 ended up coming up through the glitter and making my cabs appear cloudy. Boo :(  I was not happy with these results at all.


Tim Holtz Distress Glitter

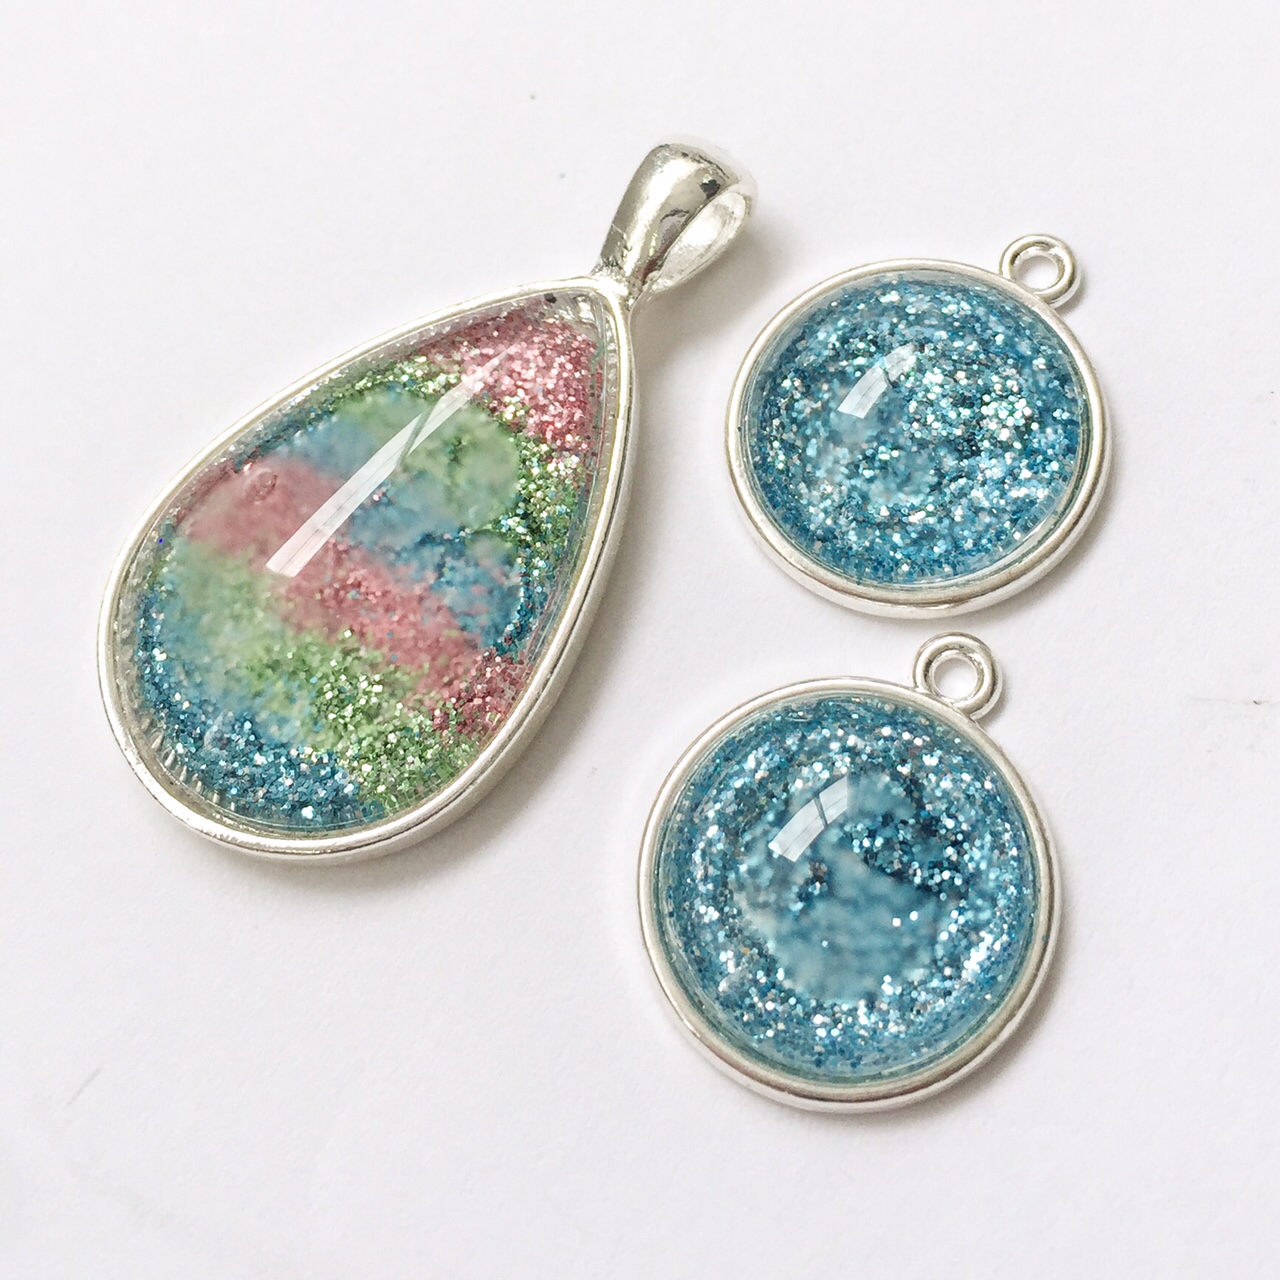
Next up, I used the Tim Holtz Distress Glitter and was much happier with the results. It's a heartier glitter, not quite as fine, and I was able to achieve much better coverage on the cabs. I used the same method as before to apply the glitter. 


I used the E6000 to affix the cabs into the trays and did not have the cloudy results I had with the ultra fine glitter. YAY! I love the look of this particular glitter. Teeny tiny uniform circles. What a great finish!


Vintage Glass Glitter Shards 

I used the vintage glass glitter shards for the next two projects. Look at those jars of glorious, glimmery, shimmery, light! They are practically hypnotic. 


I prepared my cab using the same method as described above, however, the glass shards are considerably chunkier than the other glitters, so this posed a problem getting the cab into the tray. I affixed it with the E6000, but as you'll see a couple of pics down, the glass cab sits higher in the tray. This could be a problem for some, but it didn't bother me. 


This was my favorite glitter to play with. The shards catch the light and really provide a spectacular finish, giving the illusion that the shards are suspended in the glass. 


Here's a side view so you can see how much higher it sits in the tray. This angle sort of exaggerates that height. It's not quite as noticeable in real life.


As I said, the vintage glass glitter was my favorite to play with and this next project was my favorite to make. This time I went straight for a tray and covered the inside with Fantastic Glaze & Glue. I did  not fill it up, I just covered the bottom.  


I didn't want to fill the tray too full, so I applied just enough Glaze & Glue to coat the bottom.


Then I filled the tray with the vintage glass glitter shards, pressing them gently into the glue.


I topped the shards with another thin coat of Fantastic Glaze & Glue and sat it aside to dry overnight. 


I did the same with this tray.


Now, isn't this fun! I LOVE how these turned out and they were the simplest to make! The glue dries clear so there is still a lot of glitz in the finished piece, plus the rough texture adds so much rustic detail. I added a little less glue to the top of the square piece and I like how that one maintained more of the roughness. I will definitely be making more of these in the future. 


That concludes my Two Part Glitter Primer. I had a grand ol' time playing with all this shiny stuff, but I have a feeling I will be picking glitter out of my teeth for the next month. I hope you will give glitter a try and share your results with me on the Craft Fantastic Facebook page. Also, sign up to follow this blog via email by adding your email address to the box in the sidebar. Never miss a post!

If you have suggestions for future tutorials or you have a question about the Craft Fantastic products,  feel free to send me an email to DearCrafty@CraftFantastic.com. I LOVE hearing from you :)

Wednesday, August 19, 2015

Craft Fantastic Glass Cabs and Glitter, Part 1!

A glimpse of something shiny out of the corner of my eye is all it takes to divert my attention from whatever I'm doing. I can be deep in thought, contemplating the meaning of life, but a wee bit of shimmer will immediately send me into a sparkly daydream. I love it, I can't get enough and apparently you can't either. I have received more requests to demonstrate using the Craft Fantastic products with glitter than any other tutorial. I'm more than happy to oblige.

At first, I thought this would be super quick and easy, but there are so many glitter options, I decided to break this post into 2 parts to give the glitter category the hoopla it deserves. 

As far as ease of use, there is no quicker way to add an eye-catching detail than to sprinkle, paint, or dab some shimmer onto your image. 

Lets get started...

What You'll Need

Craft Fantastic Glass Cabochons - I reached for whatever was handy, but really like the larger pieces to showcase the glitz of the glitter elements. 

Assorted Art Images - They're all beautiful, you can't go wrong.

Ultra Fine Powdered Glitter - I used Art Glittering System's ultra fine glitter in Fossil. The is a transparent glitter meaning that it won't cover too much of my image compared to an opaque glitter. I have had this jar of glitter in my stash for probably 10 years. Any fine glitter will do. 

Glitter Glue - I used Stickles Glitter Glue in Diamond. I am addicted to this stuff. 

Wink of Stella - I love this brush pen! It comes in an applicator that looks a lot like a tube of mascara. I use Clear for all of my projects, but Wink of Stella also comes in a variety of colors.  

Craft Fantastic Glaze & Glue - This is a staple in my art studio. 

Craft Fantastic Jewelers Dots - Another staple I cannot live without.

Cotton Swabs - To swipe away the excess glue from the cabs. 

Scissors - To trim away excess paper.

Scrap Paper - Important for keeping your work surface clean. 


Ultra Fine Powdered Glitter

Each of these glitter products produces a different finish and shine. Some are shinier and more obvious and others are more subtle. How do you choose? It really just depends on your desired results. 

One of my favorites way to incorporate shimmer is the ultra fine powdered glitter. This method does not allow for much control over where the glitter ends up, but that's half the fun. 

Working on a scrap piece of paper, add a generous amount of Craft Fantastic Glaze & Glue to the back of the glass cabochon. Use the nose of the glue to move the glue around and cover most of the glass. Take the smallest pinch of glitter between your thumb and forefinger and gently sprinkle it over the glue. Trust me when I say, less is more. Too much glitter will obstruct the image. That is why I do not recommend shaking it right out of the container onto the glass. Another tip...when using loose glitter, do not work under or near a fan. If you're not careful, everyone in the house will look like they work at a strip club including the family cat. 


Once you have your desired amount of glitter, press your glass cabochon onto your image. Press firmly enough to push the air bubbles out from under the glass and gently hold it in place until you feel it "grab" the paper. Use a cotton swab to swipe away the excess glue and once it's had a moment to dry, use your scissors to trim away the excess paper.


Here's my finished samples using the loose glitter. I really love the results and how the entire image has a gorgeous shimmer to it. The glitter almost looks suspended in the glass. 


Glitter Glue

An advantage to using glitter glue is that you have complete control over where and how much glitter gets applied because you're adding it directly to the image. In my samples, I used the glitter glue to add shine to the Eiffel Towers and also to the flapper girl's necklace and hair accessory. Be sure to let the glitter glue dry completely before applying the glass otherwise it might smear. I let this dry for a good 20-30 mins and then proceeded to make my glass cabochon as I normally would.  


I love the juxtaposition of the glitter against the sepia tones captured in all three images. It has a lovely, romantic quality, don't you think? It reminds me of vintage holiday postcards.


Wink of Stella Brush Pen

This product was the most subtle of the three. The sheen is hard to capture with my iPhone camera, but in person, they really do exhibit the softest hint of shimmer. 

Since the product actually sports a brush tip, this was the easiest of the three to control where my shine ended up. Again, I applied the shimmer directly to the image. I painted the little girl's wings, the sunflower's petals, the blue flowers, and the background behind the kitten. This dries fairly quickly, but a good 10 mins will ensure it stays put once you add the glass.  


They may not stand out as much as the previous samples, but when the light hits the glass cabs just right they dazzle with the softest, most alluring glow.


Here is a my pile of shimmering cabs, all dressed up and ready to be made into jewelry! I will finish these up and share some pics on the Craft Fantastic Facebook Page. 


This tutorial focused on using glitter to highlight an image or details of an image. Tune in next week, when the glitter will be the star of the show.

Are you enjoying these weekly tutorials? Don't miss a single post! Be sure to sign up to follow the Craft Fantastic Blog by adding your email in the box on the sidebar labeled Follow By Email. Also, follow us on the Craft Fantastic Facebook Page for even more ideas, giveaways, and new product sneak peaks. We have a LOT of fun over there!  

Wednesday, August 12, 2015

Using the Craft Fantastic Collage Words Art Image Sheet!

I love to use printed words and text in my art projects. The simple addition of 3 or 4 words can make such an impact whether the desired results are humor, inspiration, motivation, etc. They can be 3 or 4 powerful stand alone words to drive the point home or a series of words to create a complete thought. Whatever the case, they certainly add so much more meaning and creativity to an image. 

The Craft Fantastic line of Art Image Sheets consists of many beautiful designs featuring images found in nature, vintage images, destination images, etc., but we also offer a Collage Words Sheet composed of a variety of words in a typewriter font, perfectly sized to easily work under the Craft Fantastic Glass Cabochons. This sheet is a hidden gem nestled quietly among the more artsy sheets. Today I'm giving this sheet it's due and showing you how something so simple can add so much.

Let's get started...

What You'll Need

Collage Words Art Image Sheet - The star of the show!


Miscellaneous Craft Fantastic Glass - I used larger glass sizes for these so I had plenty of room to showcase the wonderful images and add a few words, too.


Scissors

Cotton Swabs 

Scrap Piece of Paper 


I selected the images I wanted and poured over the Collage Words Sheet to cull just the right 2 or 3 words for each design. I trimmed out each word pretty close so that they would fit neatly under my glass. 


I decided to have some fun with image below so I started with a bold sunflower from the Sunflowers Art Image Sheet and then tore one of the squares on the diagonal from the Text Art Image Sheet. Next I added my Collage Word. I laid these pieces out so I could get a feel for how I wanted them positioned and to make sure they would display correctly under my Large Glass Square. Working on a scrap piece of paper, I laid my main image down. I lightly covered my torn pieces with glaze and glue making sure to apply it right up next to the edges. I gently pressed these down and positioned them across the opposite corners. Next, I laid down just a tiny strip of glaze and glue across the area that I knew I wanted to put my collage word. 

When using these tiny words, I found that they were hard to handle because of their petite size and the fact that I have fat fingers, but if I dipped a toothpick in the Glaze and Glue and touched it to the front of the word, then I could easily pick it up and lay wherever I wanted with better precision. 


Once I had glued all my words down, I made my glass using the same steps that I normally would. If you need a refresher, here's a link that might help. I found I needed a wee bit more glue than usual in order to make sure that I was able to press those air bubbles out. Even though the paper is thin, the added layer of the word can result in air bubbles if there is not enough glue applied to the glass piece. 


All done! A pile of pretty glass waiting for a pendant tray to show it off!


Here's an upclose look at each piece. 


To finish these off, I added a Fantastic Jeweler's Dot to my Pendant Trays and pressed the glass pieces into each one. I love how the collage words add a bit of humor and beauty to each of these finished pendants and I can't wait to make them into fabulous neckwear!


Thanks for joining me this week! I hope you had as much fun as I did and I hope you will play with the Collage Words Art Image Sheet at home! If you do, feel free to share pics of your finished pieces on the Craft Fantastic Facebook page. We LOVE to see what our Crafty Friends are up to! 

Be sure to visit next week for something new!

Wednesday, August 5, 2015

Bohemian Dangle Necklace!

Welcome back! Today I'm sharing a very simple bohemian dangle necklace. I refer to it as bohemian because it does not conform to any rules, it's carefree, artsy and eclectic. If I had to sum it up, it's a tossed salad of odds and ends pieced together with jump rings. This project is not so much a tutorial regarding technique as it is a flash of inspiration on using the Craft Fantastic line of products to create something a little out of the ordinary.

I kid you not when I say that I just grabbed whatever was within arms reach of my desk here at Craft Fantastic HQ. Of course, my desk is pretty much overflowing with CF goodies so this was not a challenge in any way shape or form. In fact, just the opposite. I had so much ridiculously awesome stuff to pick from I actually had to use some restraint about what I used for this project. If you decide to make something similar, I urge you to not think too much about it. Just have fun and use what's handy. I'll walk you through my project.

Let's get started...

What I used (all items are in the Antique Brass finish)

24" Rolo Chains - I used 2 of these...one for my necklace base and one to cut into pieces.

Key Clip -  I used just the clip portion from one of our Key Chains.

Tiny Oval Duo Side Link Trays - I thought these would be fun since both sides of the tray feature a piece of glass.

Tiny Oval Glass - I needed 10 of these glass pieces to complete my Duo Side Trays.

Tiny Round Ornate Tray - Just a pretty little something to add to the mix.

Tiny Round Glass - I needed just one piece for my Ornate Tray.


Multi Purpose Pliers - Two pairs are a must when working with jump rings.


Cotton Swabs 

Scissors


I reached for whatever was handy and this was what I came up with. Not too shabby. I even had a tray already made up with the glass and a charm attached. I think this must have been part of an earring set at one time and it became separated from not only its partner, but its ear wire, as well. Oh well, waste not, want not. In it goes!  


I started by making my glass pieces. I opted for some colorful images I found on our Washi Art Image Sheet. The petite patterns work so well with the tiny glass! 


Using the Fantastic Jeweler's Dots, I pressed each piece of glass into the trays. I always apply the dot to the tray, slightly burnishing it down with my fingernail. Then I peel off the backing to expose the adhesive and firmly press my piece of glass into the tray, which creates a strong bond between the tray and glass. We're pretty rough with the samples around Craft Fantastic HQ, but I have never had a piece of glass fall out of a tray. Those Fantastic Jeweler's Dots are something fierce!


I cut the center of one of the rolo chains and attached a jump ring to each end. Next I added my key clip to the two rings to give it a modern look. This will be the foundation of the dangling elements. 


Using the extra rolo chain, I cut pieces of varying lengths to dangle my trays and charms from. I attached everything using my handy dandy multi purpose pliers and lots of jump rings. 


Once everything is put together I am left with a playful, one-of-a-kind, dangling, necklace showpiece, sure to turn heads and invite conversation. 


Here's an upclose look. Fun, huh! I imagine this piece adorning a simple white tee, accompanied by a flowing, tiered, gypsy-style skirt, awash in vibrant colors and patterns.  


Thanks for stopping by today! Visit every Wednesday for a new project or technique! Find all of the supplies used in today's project in our Craft Fantastic Online Shop and don't forget to follow our Facebook page for all of the latest Craft Fantastic updates!